To follow along with this tutorial, please install and open Google Chrome, and then add the following extension (at your own risk etc. but I’m sure they’re fine):
- Firebug for Chrome
(or you can just use Developer tools by right-clicking on parts of your webpage and selecting “Inspect” or “Inspect Element” from the menu that appears – Firebug works well on Chrome on my desktop – but not on my Macbook)
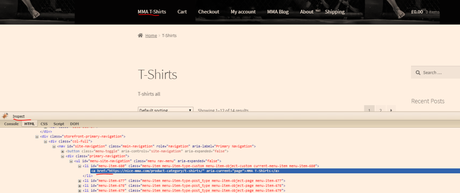
To get used to using Firebug – open your website – or just go to a website of your choice.
Click the Firebug extension on the top right of your Google Chrome browser
Adding CSS to WordPress – Additional CSS
Most WordPress themes, have a “Customize” option, that contains a menu item called “Additional CSS”
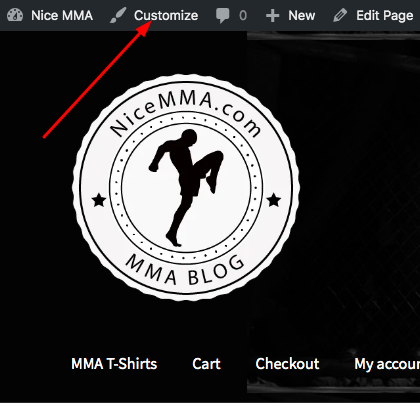
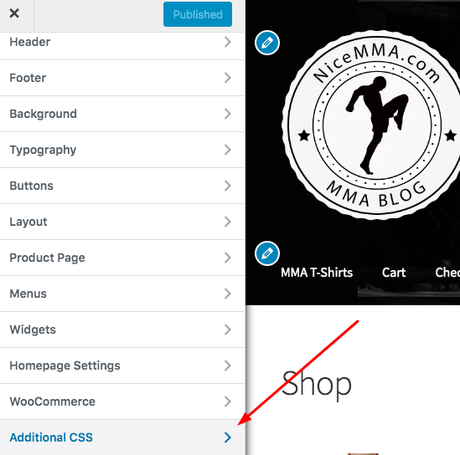
Login – on the ‘header menu’ click Customize – then Click “additional CSS”
You can then paste your CSS directly into the box provided:
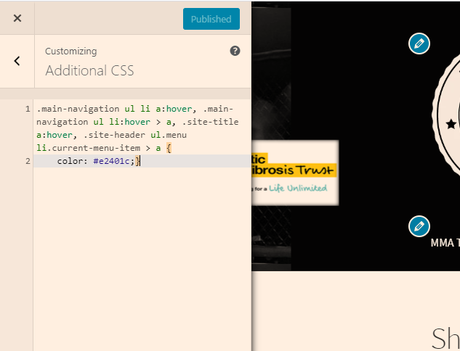
Note that if you add CSS to the box on one page – but it refers to an element that is on other pages – e.g. the main-menu – then this will be applied to all pages.
If you wanted to make a change to one page only – to a ‘global-element’ such as the main-menu – you would need to add a new class or id – by editing the HTML in the Theme Editor in the dashboard/wordpress.
Try Out Your New CSS in Inspect Element or Firebug
Once you right click and “Inspect” the CSS – you can edit it.
When you have made a change to the CSS in the Inspect-Window, copy it by highlighting it and holding CTRL + V
Open the “Additional CSS” menu item, then paste in the edited snippet of code
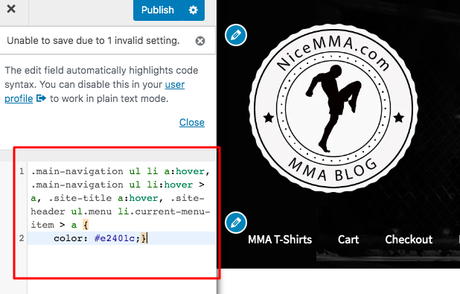
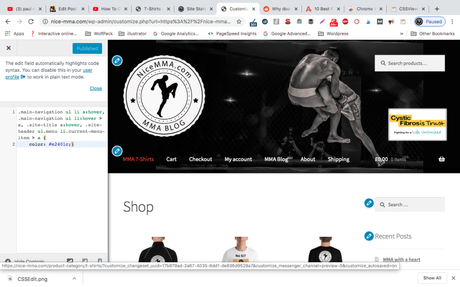
Now that the above code has been added, and published, the Menu Items turn red when the mouse-cursor hovers over them:
Basics of CSS
The basic concept and idea of CSS is that you can style multiple items, with one piece of code.
So for example, rather than adding a color to every header on your website – you could ‘tell your CSS stylesheet – to make every H1 a specific color.
Although you can use “inline CSS” by adding it directly to the HTML – best practice is to add all of your CSS to a stylesheet, which is then linked to the HTML. This is done for you already in WordPress, via the “Additional CSS” box in the Customize menu and the Appearance menu in WP-admin, under Theme Editor.
CSS Selectors
Understanding how CSS works is directly linked to understanding the concept of ‘selectors’.
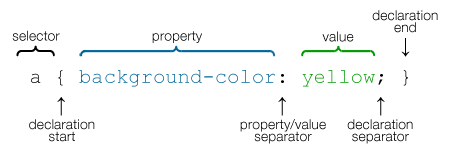
CSS selects a certain HTML tag, a class or an ID and then ‘tells the browser/HTML’ what style to apply.
HTML Tags are already predifined, examples include
– p (paragraphs)
– H1 (main headers)
– a (anchor text)
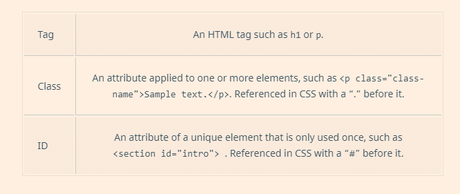
Classes and IDs are not predefined by any internet-standards such as W3. You can give a HTML tag a class or an ID – so that specific paragraphs or headers etc. can be styled and not others.
Selecting IDs
A stylesheet must ‘select’ an element, ID or class, to change the style.
To select an ID
e.g.
<div id = “main-nav“>
The ID selector is preceded by a hash character (“#”) in the stylesheet:
#main-nav {
    background-color: #ccc;
    padding: 20px
}
Selecting Classes
In the CSS, a class selector is a name preceded by a full stop
.intro {
    color: red;
    font-weight: bold;
}
Universal Selectors
The asterix * is the “universal selector”
The below CSS would select all items and make their background color yellow:
* {
    background-color: yellow;
}
A Few Examples of CSS
- Make the text within the main headers (h1s) – coral:
h1 {
    color: coral;
}- Make the text within the class called “main” centred
.main {
                text-align:center;
            }
CSS Animation
Animation in CSS, usually incorporates Keyframes.
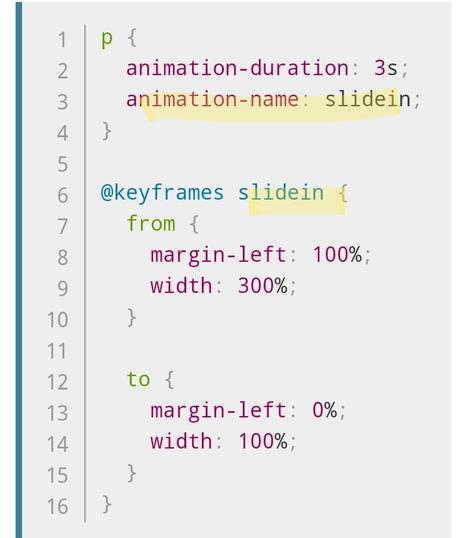
The keyframes must then select an element, for example, this keyframe selector would determine the styles and/or rules for the element called “slidein”:
Step 1 – Configure the Animation
Style the element – a paragraph (p) in the example above.
You would style the paragraph, or H1 or whatever element you want to animate, with the animation properties.
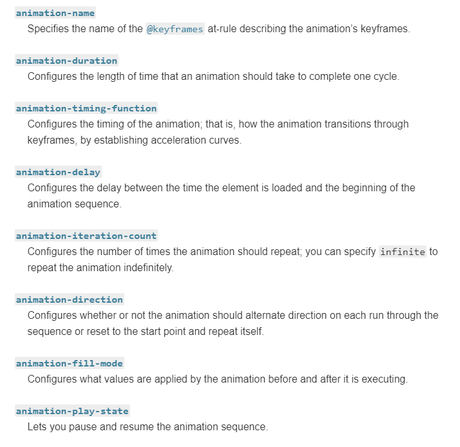
The animation properties are:
animation-name
This must sync-up with the name with the@keyframes at-rule
animation-duration
animation-timing-function
Configures the timing of the animation, relating to how the animation transitions through keyframes.
animation-delay
How long between the element loading and the animation starting?
animation-iteration-count
Defines the number of times the animation should loop
To see a good example of CSS animation, please see this one on impressivewebs.com (this free version of wordpress won’t allow me to embed code etc.)
To be fair, it’s probably a bit easier to animate with JQuery – but still very handy to know CSS animations, especially when you’re trying to work out what’s going on a give webpage in terms of SEO etc.
CSS Transitions
Properties are animated from “initial to “final states” using CSS Transitions.
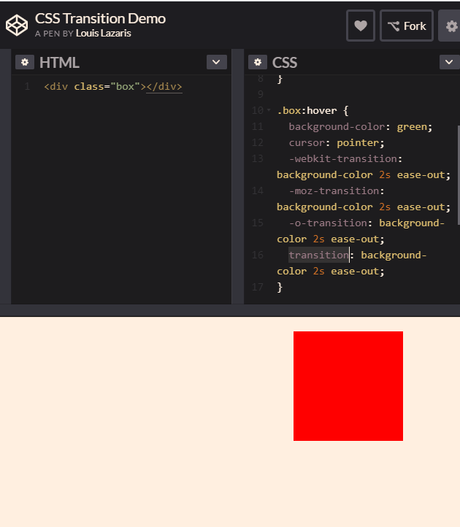
In the example above:
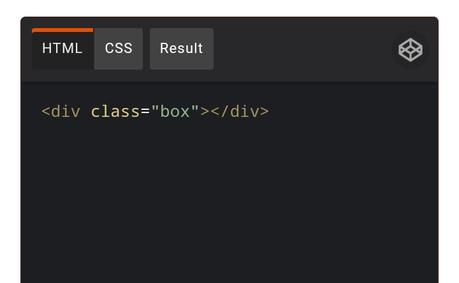
- a div class is created in HTML and named “box”
- The box is then styled in CSS to be red and specific dimensions
- Transition is added to animate the box
- Transition used on itself is shorthand, instead of declaring what to transition, for how long etc.
- In the example above, we transition the background colour, over 2 seconds and tell it to “ease out”
- The background color to change to on-hover is declared as green
- moz-transition, webkit transition etc are included for other browsers – usually older ones
Transitioning Headlines Word by Word
- Create your HTML – name your classes etc.
<body>
<div class="box">
Rotating Word Animation
<div class="word">
<span>Rotating</span>
<span>Text </span>
<span>Test </span>
<span>Please</span>
<span>Work </span>


</div>
</div>
</body>- Add your CSS
body
{
margin:0;
padding:0;
background:#ff5544;
}

.box
{
position: absolute;
top: 50%;
transform: translateY(-50%);
font-size: 3em;
margin-left: 50px
width: calc(100%-50px);
}

.word
{
display: inline-block;
color: #ff0
}

.word span
{
position: absolute;
top: 0;
overflow: hidden;
animation: animate 10s linear infinite;
opacity: 0;
}

@keyframes animate
{
0%
{
opacity: 0;
transform: translateY(-50px);
}

2%
{
opacity: 1;
transform: translateY(0px);
}

18%
{
opacity: 1;
transform: translateY(0px);
}

20%
{
opacity: 0;
transform: translateY(50px);
}

100%
{
opacity: 0;
transform: translateY(50px);
}

}

.word span:nth-child(1)
{
animation-delay: 0s;
}

.word span:nth-child(2)
{
animation-delay: 2s;
}

.word span:nth-child(3)
{
animation-delay: 4s;
}

.word span:nth-child(4)
{
animation-delay: 6s;
}

.word span:nth-child(5)
{
animation-delay: 8s;
}
By using keyframes and changing the opacity of the ‘nth-child’ and altering the animation delay, you get the rotating word effect:
What is SaSS?
SaSS stands for “Syntactically Awesome Style Sheets”
SaSS look a bit different to standard CSS, as you don’t need the semi-colons or curly braces.
Variables
With SaSS, you can use the dollar symbol – $ to store variables.
You can, for example, create your own text variable, giving the text several styles such as size, font family, font style and a font weight – and store this information in a font variable called $my-font.
You can then call this variable to style various parts of a webpage
body {
  font: 100% $my-font;
}
or you could, create a color variable, to save having to write out the hex code each time, e.g.
$red: #FF4848
For more information about SaSS, this Treehouse blog post is pretty good, as well as this post on sass-lang.com
Nesting
Sass lets you nest CSS selectors in the same way as HTML.

