Well, you see... Unlike most chiffon cakes, my ultra soft chiffon cakes are extra soft and fragile! Hey... I don't name them ultra soft for nothing! LOL! Therefore, we usually eat our ultra soft chiffon cakes on their own without any frosting because any frosting applied on the fragile cake will weigh the cake down and might cause the cake to lose its structure eventually. What to do???
I must admit that I have not been answer all questions lately. To be honest, I'm really tired. I find myself in this situation that answering questions such as "Why is my bake not ok?" or "Can I substitute this with that?"or "Where can I buy this or that?" or "Can you convert this to that?" are time-wasting and consuming as I would rather spend my time with my family. It's not that I don't want to help. I just can't! Sorry!
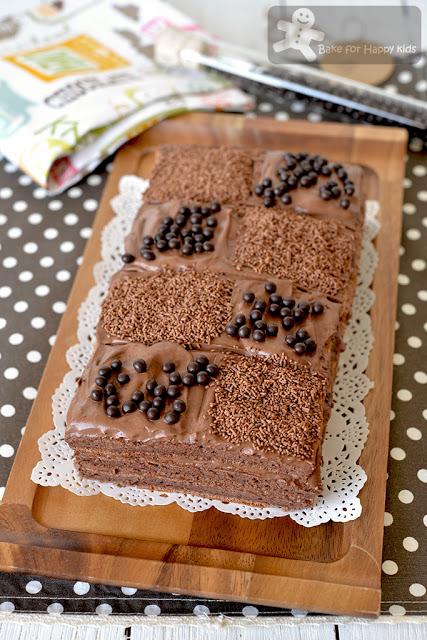
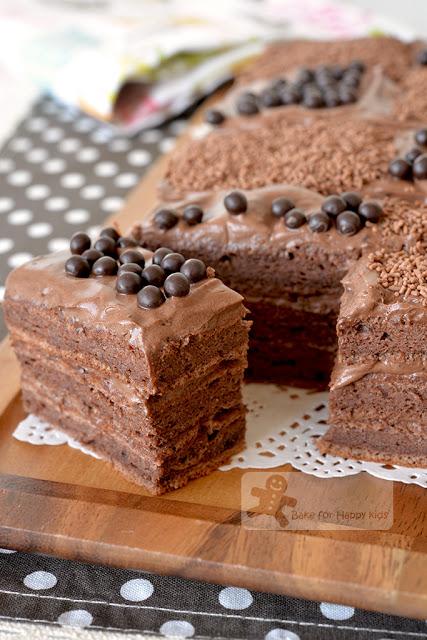
The least I can do is to continue sharing my prized recipes. If you want to bake a cottony soft triple-layer chocolate chiffon cake for any occasions, I can show you how to bake it and frost it with a light cocoa cream. A low-sugar frosting that is lighter than buttercream and easier to whip than the plain whipped cream.

My Impressive Triple-Layer Chocolate Chiffon Cake
with Light Cocoa Cream Frosting
As a health freak, I always bake my cake with the least amount of fat and sugar required.
As a foodie, I want my cake to be delicious!
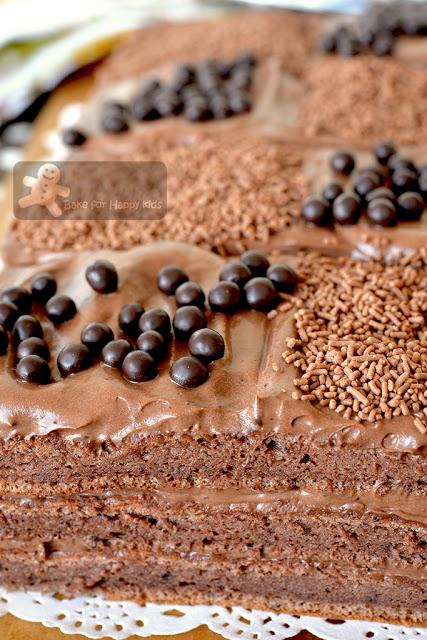
As a experienced home baker, I know that this thin chocolate chiffon cake layer recipe at here is really good and fail proof. With minimal trial-and-error, I have assembled all to create this impressive cottony soft, chocolaty chocolate cake with minimal amount of fat and sugar. So good that the cake is almost guilty free to indulge!
Here's a video showing I baked this delicious feathery-light cottony-soft chocolate cake. Enjoy!
Music: Bensound

Unlike buttercream, this velvety light cocoa cream is made with cream, not butter.
Fyi, cream contains 35% fat wheres butter contain 80% fat.
Plus, the flavoursome cream is made with minimal amount of sugar!

Less fat less sugar in this cake than usual? YES!!!
Yet, every slice of it is still so delicious.
I hope that you will like this cake and I don't sound too negative with my lack-of-time situation. If you like my recipes and want to support me, please LIKE, SHARE and FOLLOW me my Facebook at here or here or my Instagram @zoebakeforhappykids because every LIKE, SHARE and FOLLOW from you will motivate a hardworking working mom like me to bake and share more! Thank you!!!
Here's the recipe
For the frosting:Make the frosting one day or at least 2 hrs ahead
20g cocoa powder, preferably Dutch process
5g instant coffee powder - I used decaffeinated
20g caster sugar, plus more if desired*
180g whipping cream with 35% fat, divided to 60g and 120g and the 120g has to be well-chilled
* The sweetness of this bittersweet chocolate frosting is just right for us considering the fact that I would decorate the cake with chocolate rice which also contains sugar!
Sift cocoa powder into large bowl. Add espresso powder and sugar.
Bring cream to boil in small saucepan or a in a microwave with medium power. Slowly pour cream over cocoa mixture, whisking until cocoa and sugar are completely dissolved, about 1 min. Mixture should look thick and smooth. Cover and chill until mixture is firm and cold, at least 2 hrs or overnight.
When the chocolate cake layer is baked and cooled enough for assembled, whip cocoa cream. Add chilled cocoa cream into 120g chilled cream. Use an electric mixer with whisk attachment or a cream whipper to whip cocoa cream until combined and stiff peaks form. Then, see the steps below to assemble.
For the cake:Please use the exact weight and make sure that all cake base ingredients are at room temperature.
Make one 17 x 25 cm double-layer chocolate cake
For the egg white mixture:
175g egg whites - about 4 large but please use exact weight.
85g caster sugar
For the egg yolk mixture:
75g egg yolks - about 4 large but please use exact weight.
65g milk
60g vegetable oil, preferably something neutral tasting
1 tsp vanilla paste or extract
75g cake flour
15g cocoa powder, preferably Dutch process
1 tsp baking powder
1/4 tsp salt
Preheat oven to 180°C / 350°F. Line one 35 x 25 cm / 10 x 14 inches baking tray with baking paper.
For the egg white mixture:Using an electric mixer with a whisk attachment, beat egg whites in lowest speed for at least 10 mins to stabilise the egg white mixture.
While beating, proceed to mix the egg yolk mixture:
In a large mixing bowl, combine egg yolks, milk, oil and vanilla. Use a hand whisk to mix until combined. Sift cake flour, cocoa powder and baking powder into egg yolk mixture and use a hand whisk to mix until all are well-incorporated. Set aside.
Back to beating the egg white mixture:
Increase beating speed to the next higher speed. While beating, add sugar gradually. Increase beating speed to the next higher speed and continue to beat until stiff peaks form. The egg white mixture should be very smooth with tiny bubbles. Do not over-beat the mixture or use too high speed to beat the mixture.
Combine egg yolk and white mixtures:
Using a hand whisk or a spatula, gently fold in the egg whites to the egg yolks mixture in 3-4 batches. It is ok to mix the 1st batch of egg white more vigorously into the egg yolk mixture but the subsequent portions must be folded in very gently. Make sure that most of the white is not visible after folding.
Pour batter into prepared baking tray. Use a spatula to spread the batter evenly and gentle tap the filled tray on the kitchen top to remove any large bubble.
Bake for 16-17 mins or until the cake is well-risen and fully cooked.
When done, remove cake (with its baking paper) from the tray immediately and transfer it onto a wire rack to cool. After about 5 mins of cooling, flip the cake onto a clean baking paper and remove the used baking paper at its bottom. Allow the cake to cool completely.
To assemble:Use a knife to trim off all sides of the cakes and cut the cakes into three 11 cm x 25 cm layers.
Spread a layer of cream evenly on each layer of the cake and stack the cake on top of each other.
Spread the remaining cream on the top, swirling decoratively. Decorate with chocolate sprinkles or curls if desired. Note: I have decorated mine with chocolate rice plus crunchy pearls that is made 55% cocoa.
Place cake in in an airtight container, then in a the fridge for about 1-2 hr until the frosting is set and the cake will be easier to handle. Slice and serve. Enjoy!!!
Keep any leftover cake in an airtight container, then in a fridge for up to 3 days.
Happy BakingPlease support me and like me at Facebook...

