I was away and I did not do any work on my blog for a while, but now I`m back to help you guys!
In this "Coming back" tutorial I`m going to show you how to clean your vocal, and make it sound bright and clear.
Let`s get started :

REMOVE NOISE STEP 3
- Run Cool Edit Pro, insert the instrumental, arm the track to record hit the red button and record you vocals
- Open you vocal track into editing mode (2x click on the track)
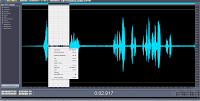
- If you have any noise on your mic you should remove it by marking the empty space then right click and left click on silence (check out the screenshot)
- The next step is to add some effects to your vocal track, you can do it by marking the whole track and go to effects panel and choose dynamic processing. Find the Classic Softknee and apply it.
- Next step is to add some reverb (delay) effect to your vocal. You can do it by clicking the effect panel again and select Delay effect. Then select Natural Reverb or Tight and Close, apply it
- Now it`s time to level your vocal. You can do it by using Hard Limiting.
- Next thing you should do is to remove any noise from your vocal . You can do it by using Noise reduction
- The final step you want to do is mixing volumes of instrumental and vocal track. This step you must do by yourself, because I don`t know how loud is your instrumental. Just mess a lil bit with the volumes to get it perfect.
Any question just put it on!
Thank you very much!!
Peace
