
Are you looking for the Claspo review? If you are, we have got you covered. This article will share everything you need to know about the Claspo tool.
If you need to convert your website visitors into customers, you should use a pop-up. Email marketing is straightforward if you have an excellent pop-up builder and a reliable email marketing service provider.
If you are a beginner, you might be probably confused with all the available options. But, we researched for you and came up with one of the best options to boost your sales and conversions.
This article will show you a tool called Claspo and how you can use it to convert your website visitors into customers or subscribers.
Claspo Review Claspo Review
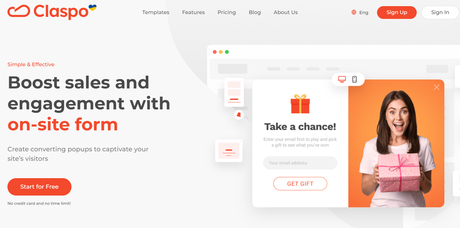
If you search for a lead generation tool or pop-up builder, you will see multiple options on the internet. However, if you are looking for a pop-up builder that delivers results, you should consider checking out the features before subscribing to a premium plan.
And with the multiple choices, choosing one for your online business will be hard.
Claspo is one of the finest tools available to create pop-ups or any type of lead generation form without much hassle. In addition, it comes with many unique features that will ease your work more than other competitors.
This review will show why Claspo can be a good fit for every online shop and personal blog.
Get a Free Claspo Subscription
Features Features
In this section, we will look at the popular features of Claspo.
Multiple Opt-In Forms Multiple Opt-In Forms
They have got multiple campaign types for you. As of today, they have released these types:
- Lightbox
- Slide-in
- Floating bar
- Inline forms
- Informer pop-up
- Content locking forms
- Launchers
and so on.
On top of that, they will be launching these types shortly:
- Gamification
- Multi-step forms
- Fullscreen
- Sidebar forms
You can pick any campaign type you like. There is no need to add custom CSS or JavaScript to make it pop out.
The development team did the job of making it work.
So, you can easily add the text, and everything you want, to integrate the widget into your website.
Drag and Drop Editor Drag and Drop Editor
Creating pop-ups with coding can be really overwhelming.
Plus, that is not a beginner-friendly method. Thankfully, the Claspo platform comes with a drag-and-drop pop-up builder. So if you need to create forms easily, this is an excellent chance.
Usually, creating email forms with coding requires HTML for structuring, PHP for processing, CSS for styling, and JavaScript for fancy animations. Hiring a web developer for the task won’t be a feasible option. It will cost you more.
You can get everything at your fingertip with the drag and drop builder. You can customize your existing fields or add new ones to the form. The best part about the drag and drop builder is you can see what you are building.
So, you can make changes to the form accordingly.
Complete Form Customization Complete Form Customization
You can control every inch of your form. The things you can
- Undo/redo changes
- Duplicate elements
- Mobile view editing
- Layout adjusting
- Custom success message
and so on.
So with these available options, you can modify the entire form.
Analytics Analytics
To track how your opt-in forms perform, you can connect them with Google Analytics. Analytics is a popular service offered by Google that can measure how visitors interact with websites or apps.
With the power of the Claspo Google Analytics integration, you can measure how many of your website visitors are seeing it and clicking on the elements. It is a compelling feature to have.
From the integrations section, you can connect your Google Analytics account. All the data will be saved to your Claspo account. So if you need to see how your opt-in delivers the results, check the dashboard.
Integrations Integrations
If you need to enhance the tool’s functionality, you can use the available webhooks. Or, you can also integrate the widgets with CRMs, email marketing services, and so on.
You can integrate Claspo with tools like:
- Zapier
- Google Sheets
- MailerLite
- SendPulse
- SendGrid
- ActiveCampaign
- Google Analytics
- Sendinblue
- Google Chrome
and so on.
Integrating the tool with email marketing service providers allows you to easily store all the leads inside the mail list. When someone enters their name and email address, it will be automatically stored on the email marketing provider.
You do not need to manually add/edit the names.
If you have been in the blogging industry for a while, you probably know Zapier. It is a service that will let you connect apps to improve your productivity. Claspo comes with the Zapier integration, so you can connect any apps.
Custom Display Settings Custom Display Settings
You can choose when you need to display the form to a website visitor. The admin team has added multiple options to the platform.
Some of the popular options available are:
- Scroll trigger
- UTM parameters
- Timed delay
- Click trigger
- HTML elements
- Device types
- Page-level targeting
and so on.
You can choose the display rules from the form builder.
Support and Docs Support and Docs
If you need help with the tool, feel free to check out their support section.
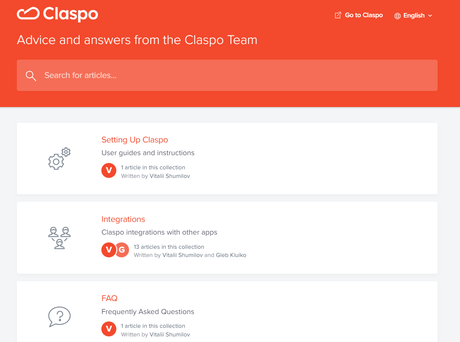
They have categorized the documentation articles into:
- Setting up
- Integrations
- FAQ
You can check the archives to find step-by-step tutorials regarding the tool. If you need more help, you can always contact the support team through email.
Then, they will help you personally.
Pricing Pricing
Claspo offers two types of subscriptions.
- Monthly
- Annually
We will check both options and see which one is suitable for most online business owners.
Monthly Subscription Monthly Subscription
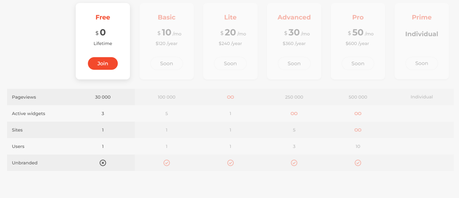
- Free – $0
- Basic – $10 a month
- Lite – $20 a month
- Advanced – $30 a month
- Pro – $50 a month
- Prime – custom pricing
Annual Subscription Annual Subscription
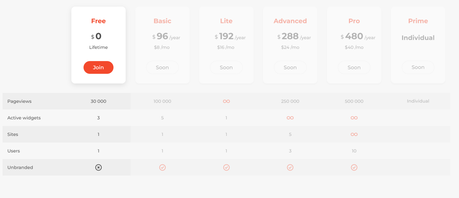
- Free – $0
- Basic – $96 a year
- Lite -$192 a year
- Advanced – $288 a year
- Pro – $480 a year
- Prime – custom pricing
If you are concerned about your budget, you can choose the monthly billing option. There, you can spend a small amount on the subscription according to your plan of choice.
On the other hand, a yearly subscription will give you more advantages. So, if you plan to stick with Claspo for a long time, choose the annual billing option. You will get a 20% flat discount on the purchase if you choose the annual billing option.
So, pick a plan according to your business needs.
NOTE: As of now, the free version is the only active plan. Within a short period, the admin team will release the premium subscription models, and you can upgrade to a paid plan from the account dashboard!
Overall Claspo Review Overall Claspo Review
Claspo
Product BrandClaspo
Product Rating
Visit ClaspoGet Started with Claspo Pop-Up Builder Get Started with Claspo Pop-Up Builder
You can get a subscription to the tool here.
Get a Free Claspo Subscription
How to Use Claspo to Build Pop-Up Forms How to Use Claspo to Build Pop-Up Forms
Here, we will show you how to use Claspo to build pop-up forms.
The very first thing you need to do is get an account. Since they offer a free plan, you can use that right now.
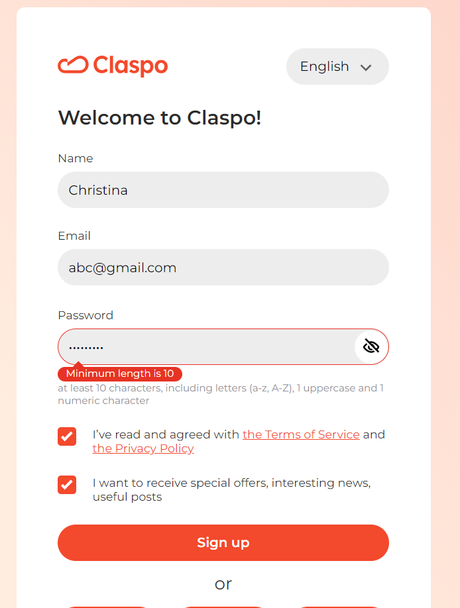
You can register on the site using your email address or with your social connections. Next, you have to validate your email address.
Claspo will send you a verification email with a unique link. All you need to do is click on the link, and soon your account will get verified.
After verifying your account, you will be redirected to the Claspo dashboard.
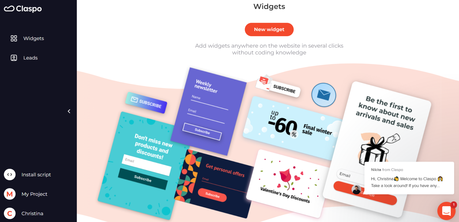
ON the left-hand side, you can see options like
- Widgets
- Leads
- Install Script
- My Project
- Account
Since this is a new account, we do not have any active widgets. So what we need to do next is create a widget.
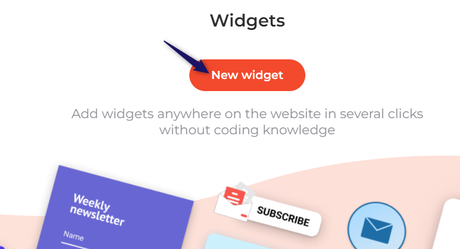
Next, choose a name for your widget.

The name won’t be visible on the front end. It is just for identifying the widget if you have many.
After naming your widget, choose a goal.
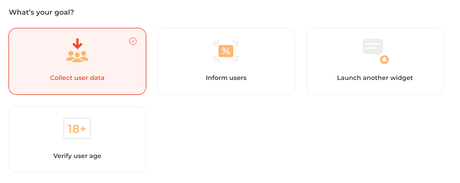
There are four options available.
- Collect user data
- Inform users
- Launch another widget
- Verify user age
You can pick a goal according to your needs. After that, you have to choose a layout type.
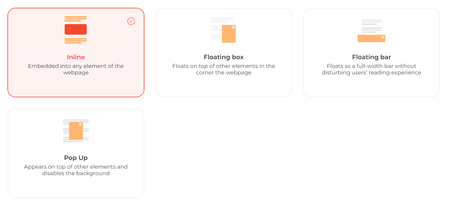
You can pick any of the available options:
- Inline
- Floating box
- Floating bar
- Pop up
Here, we will be picking up pop-ups as the layout.
On the next page, you must choose a style for your form.
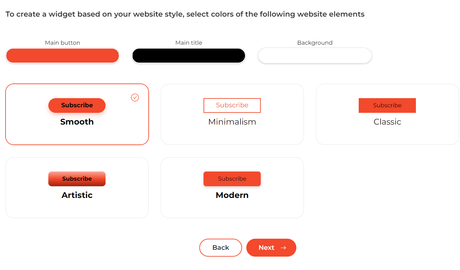
They have got some pre-made styles. But you can always customize it. After choosing the style, the tool will show you some templates.
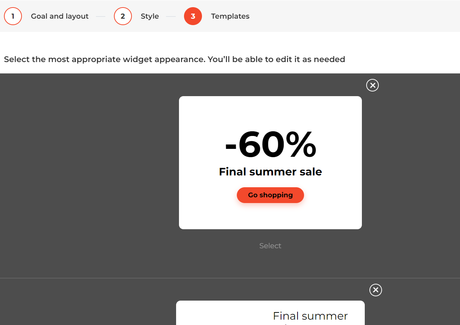
You can pick one from the screen. Now, you will be redirected to the editor.
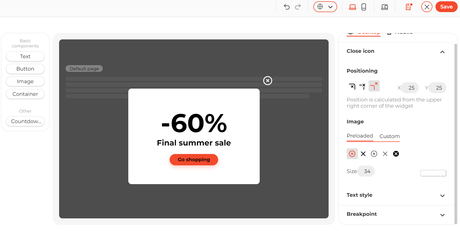
From here, you can customize the form. Edit the form as you like from there. For example, you can change the icon, position, text style, image, etc. On top of that, you can also add custom elements to the form.
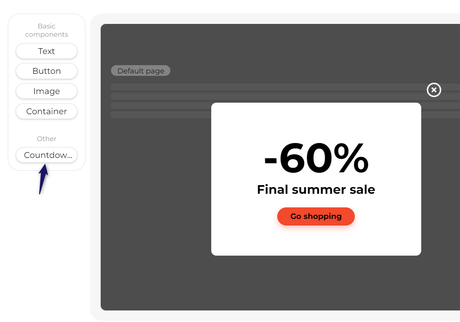
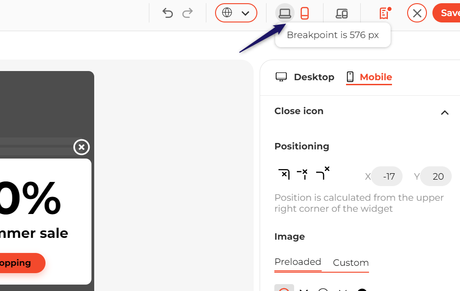
You can choose different layouts for desktops and mobile phones.
Once you are done with the customization, save the form. Then, under widgets, you will see the newly created form.

You can click on the widget name to see dedicated options.

As of now, the widget is unpublished. Therefore, you must choose Published from the dropdown and save the changes.

You can choose custom widget triggering options and integrations from the left-hand side. Also, you can see how the widget performs from the analytics tab.
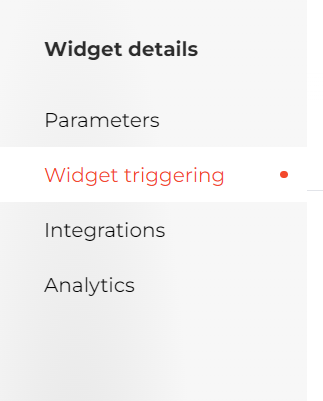
That’s it. This is how you can create widgets through the Claspo platform. Once you have created a widget, you must embed it on a website.
Under Install Script, you will see custom codes.
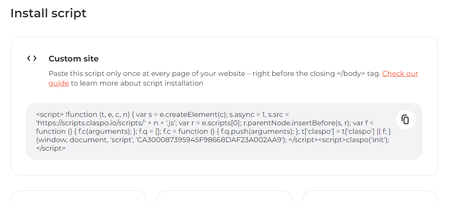
If you use an HTML website, simply paste the code inside your head tag. Or, if you are using WordPress as CMS, you can use Insert Headers and Footers plugin.
After installing the plugin, paste the custom code inside the head tag, and you are good.
From now on, the website will display the created widget according to your rules. If you need to modify the widget, you can use the Claspo dashboard.
That’s it.
This is how you can create a widget using the Claspo platform and embed it on a website.
Get a Free Claspo Subscription
Conclusion Conclusion
Choosing the right tool for your business or personal blog might be a challenging task for you. If you are new in this field, Claspo is one of the finest pop-up builders available on the internet.
It has many advanced features that will help you quickly and efficiently build an email list. In addition, since it offers a free subscription, you can use that to test the features and their integrations.
You can choose a premium plan if you are comfortable with the plugin.
We hope you have found this article helpful and enjoyed the article. Please consider sharing this post with your friends and fellow bloggers on social media if you did. Also, for more related articles, you need to check out our blog archive.
