Remember I was sharing many fabulous Castella cakes recipes towards end of 2016 until early 2017 at here, here, here and here?
ちょっと待って (pronounce as chottomatte and means wait a minute)!!! I have one more recipe to share!!!
Why didn't I post and share this recipe earlier?
I just didn't have the opportunity to do so! ... but I had to share this recipe because it is really really really good too!!! HIGHLY RECOMMENDED!!! And I will tell you more later...Then, I promise that I won't bore you with Castella cake baking anymore as this is the last!!!
Why last?
Remember when I found my BEST Castella cake recipe at here, I said that I have two more questions to answer...
Does the addition of more eggs or egg yolks make a better Castella cake? All done! Clap! Clap! Please read this if you are interested.
Last but not the least... Does the addition of other interesting ingredients like condensed milk and brown sugar will improve the taste and texture of the Castella cake? My answer is YES!!!
And this is the interesting brown sugar Castella cake recipe that I have found!!!
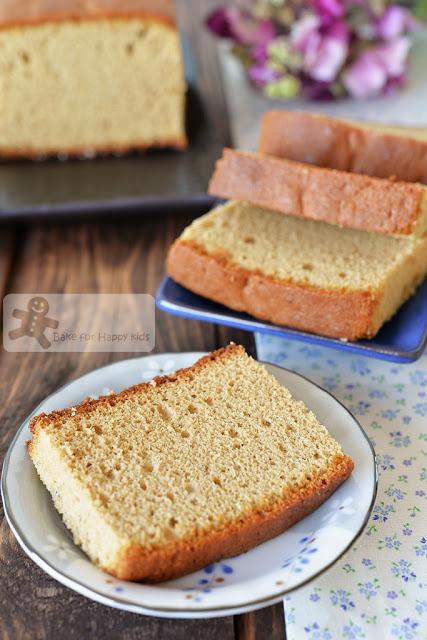
Brown Sugar Japanese Castella Cake
I must say this is the most atypical Castella cake that I have seen...
Unlike the original Castella cakes that are made of four basic ingredients which are bread flour, eggs, sugar and sticky syrup like honey, this cake is made of four additional ingredients and they are condensed milk, milk, vegetable oil and light brown sugar!
Characteristically, it does look and taste like a Castella cake with its moist soft mildly sweet taste, bouncy texture and dark golden brown top and bottom crust as part of its beautiful contrasting look. The only drawback is that this cake does not contain as much honey as the rest that I have baked and so its honey flavor is not as strong as most cakes.
In fact, due to the addition of brown sugar, this cake does not have a typical GOLDEN YELLOW sponge cake look but I wouldn't say NO to this non-standard-Castella-cake addition because the brown sugar has actually made the cake extra moist, fragrant and delicious! Imagine. With just 20g oil, every slice of this cake can stay miraculously moist in an airtight container stored at room temperature even up to its 5th day of bake. Amazing huh!!! I guess it must be the addition of brown sugar and the condensed milk that creates the magic!!! Or maybe this recipe is just simply good :)
Want to see how I bake this amazing Castella cake? I have a one-minute video to show you...
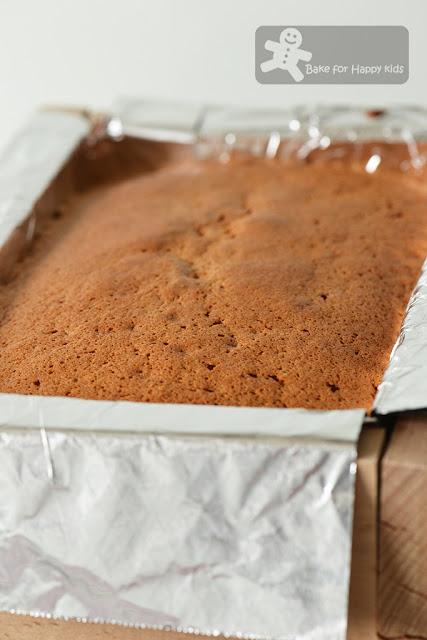
After baking and cooling.
Notice that there is very minimal shrinkage in this cake?
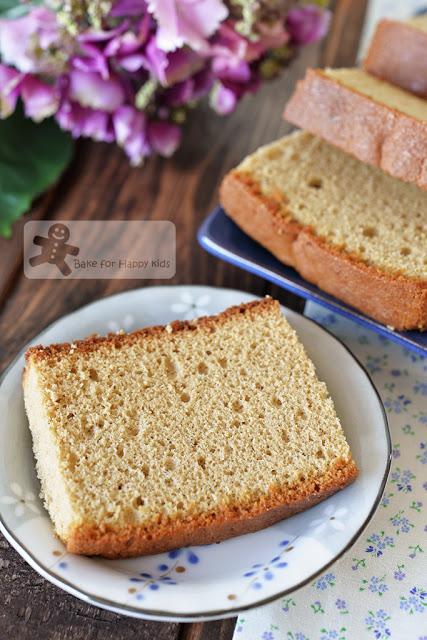
I was like "Wow"! when I had my first slice of this cake.
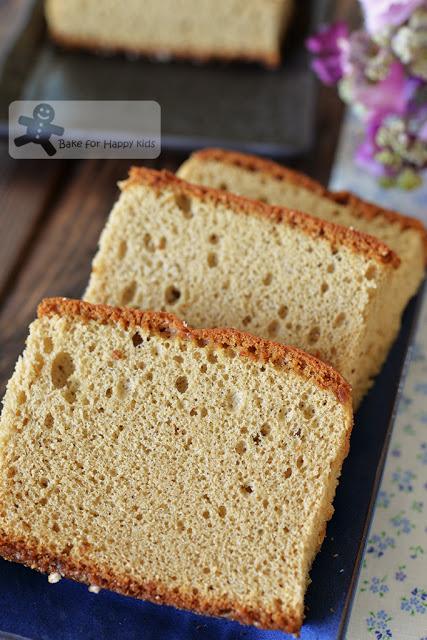
While enjoying this cake, I examined the cake closely...
I promise. I promise. This will be my last Castella cake post for now! LOL! No more Castella cake forever? Hmmm...
To summarise... Texture-wise, although this cake is not as fine as my BEST Castella cake, taste-wise, I reckon that both can fight! The BEST Castella cake has the best traditional honey-rich taste and texture whereas this brown sugar cake is rather unique, very moist too and very fragrant to enjoy. Both are great Castella cake recipes that are relatively easy to bake with least amount of shrinking and equally yummy in their own way! So will you bake this cake?
Here's the recipe that is very modified from Cookpad at here.
Make one 17.5 x 10.5 x 8 cm or 10 x 20 x 8 cm Castella cake
Please weigh all ingredients and use the exact weight.
For the egg yolk mixture:
10g condensed milk20g honey
20g milk
20g vegetable oil, preferably smooth and neutral tasting ones
45g egg yolks (about 3 egg yolks), at room temperature
80g light brown sugar
90g bread flour with about 12% protein
For the egg white mixture:
105g egg whites (about 3 egg whites), at room temperature40g caster sugar
2 tbsp pearl sugar to sprinkle the bottom of the cake, optional
Place a baking rack in the middle of the oven. Preheat oven to 180°C / 350°F with NO fan forced.
Line the internal sides of your cake or loaf pan with aluminum foil and a piece of baking paper to fit its bottom. Sprinkle the bottom of the lined pan with pearl sugar if desired and this step is optional. If you are using 10 x 20 cm standard loaf metal pan, please see here for instructions and photos to prepare your metal loaf pan for your Castella cake baking.
For the egg yolk mixture:
Place condensed milk, honey, milk and oil in a saucepan or heat proof bowl. Cook mixture in the saucepan using the stove with very low heat or microwave mixture in the heat proof bowl with short pulses of low power until all dissolve into the mixture. Do not over-cook the mixture until it boils because overcooking the mixture will cause it to curd!!! Set aside for the mixture to cool slightly, about 10 mins.
Place egg yolks and brown sugar in a large mixing bowl and use a hand whisk to beat until mixture turns slightly lighter in color. Whisk in the honey mixture. Sift flour into egg yolk mixture and whisk until everything is combined.
For the egg white mixture:
Using an electric mixer with a whisk attachment, beat egg whites in medium low speed until foamy. Increase beating speed to medium (not too high to avoid large bubbles forming). While beating, add sugar gradually and continue to beat until stiff peaks form and the meringue look glossy. Do not over beat the mixture.To combine and bake:
Using a hand whisk or a spatula, fold in the egg whites to the egg yolks mixture in 3 portions. It's ok to mix the first batch of egg white mixture kind of vigorously into the egg yolk mixture but please ensure that the subsequent batches are mixed in very gently until most of the white is not visible after folding.Pour batter into the prepared pan. Gently drop the pan onto the kitchen bench from a height of 10 cm to remove any large air bubbles and do this just once. If you are afraid of doing this, you can use a skewer to draw a zigzag to remove air bubbles in the batter. You can choose to do either one of these steps or both but do not over-do these steps.
Place pan in the middle rack and bake for 10 mins. Decrease temperature to 140°C / 285°F and bake for another 60 mins, or until the cake is thoroughly cooked and must has a nice golden brown top. NOTE: (1) An inserted skewer or cake tester is not a good gauge to see if the cake is thoroughly cooked. (2) Different oven is different. To optimize your baking, you might wish to try other oven temperature setting that I have mentioned in this previous post.
Allow the cake to cool with the foil until the warm cake is cooled enough to touch. Remove the cake out of the pan, peel off the foil and the baking paper at its bottom and wrap the cake in plastic wrap. Place cake in an airtight container or a zip lock bag and allow it to rest in room temperature so that the cake will moisten by itself for at least one day and the cake cake will stay moist (in airtight container) and delicious even until on its 5th day of bake.
Slice and serve on the next day. Store the uneaten cake in airtight container for up to 5 days in room temperature.
Happy BakingPlease support me and like me at Facebook...
