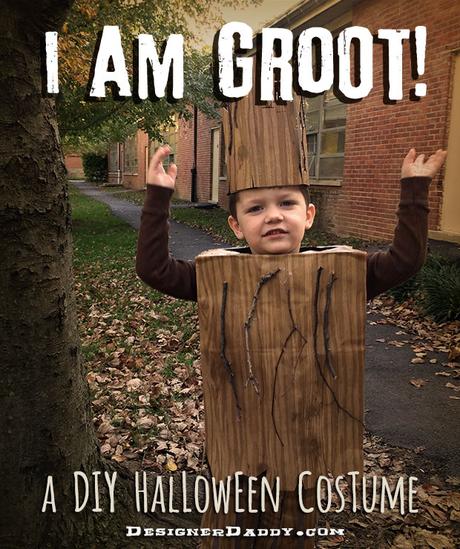
For most, 2014’s Guardians of the Galaxy was their introduction to one of comicdom’s lesser-known super teams. Marvel’s gamble paid off, with millions becoming fast fans of Star Lord, Drax, Gamora, Rocket, and of course, Groot.
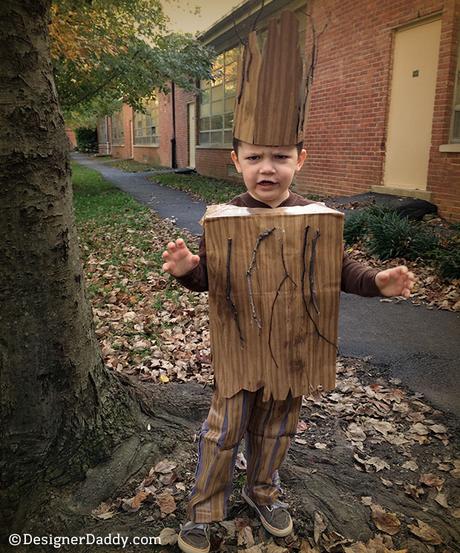
This majestic, trisyllabic creature is both powerful and compassionate, frightening and kind. And he steals every scene with a wooden smile and only three words: “I. Am. Groot.” Naturally, when my son requested begged to be Groot for Halloween, I said yes. Then I immediately panicked, having no idea how I was going to pull this off.
Yet I love a challenge, so I did what I always do — I waited until the last minute, forcing me to get creative with stuff I already had. I did make one trip to my local hardware store — my go-to spot for both supplies and inspiration. That’s where I discovered the spark I was looking for… wood grain contact paper.
LET’S MAKE A GROOT!
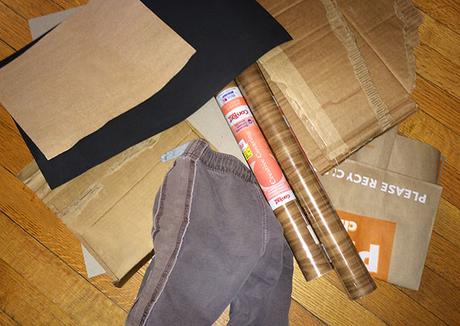
WHAT YOU’LL NEED:
. . . . . . . . . . . . . . . . . . . . . . . . . . . . . . . . . . . . . . . . . . . . . . .
• brown/dark pants you don’t mind messing up a bit
• self-adhesive contact paper, wood grain pattern
• 2-3 brown paper bags
• duct or packing tape (beige or brown)
• cardboard box or sheets of thick cardboard paper
• brown or black foam sheets (the larger the better)
• bundle of small sticks
• Groot head piece template
• hot glue gun or fast-drying craft glue
• large spoon
• scissors
• stapler
HOW TO MAKE IT:
. . . . . . . . . . . . . . . . . . . . . . . . . . . . . . . . . . . . . . . . . . . . . . .
Step 1 (the legs)
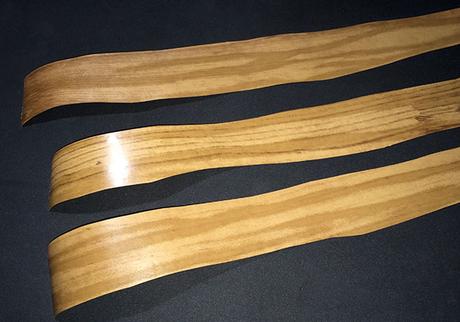
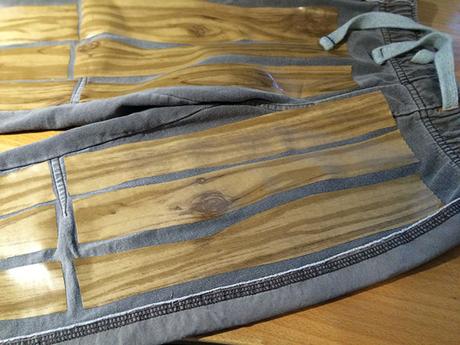
Cut strips of contact paper so there are 6 for each side of each pant leg. Make them uneven/jagged to help simulate wood grain.
Cut and adhere strips so 2 run the length of your child’s pants. Leave a small gap between strips to allow the pants to bend at the knee.
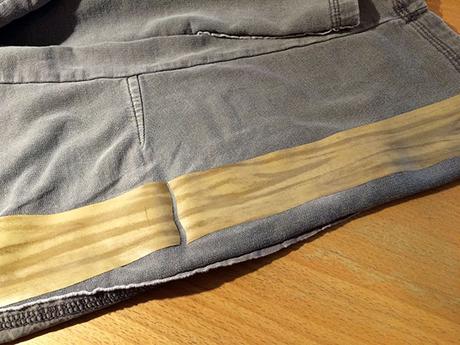
Strips should be cut wide enough so that they run 3 across each side of each pant leg, for a total of 24. Again, leave a gap between each strip to allow for better movement.
Firmly rub the strips with the bottom of a large spoon so they are pressed on as firmly as possible.
Hint: The contact paper sticks best to track pants or polyester pajama pants, less so to jeans and sweat pants. Use fabric glue to help keep the strips attached to the latter.
Step 2 (the body)
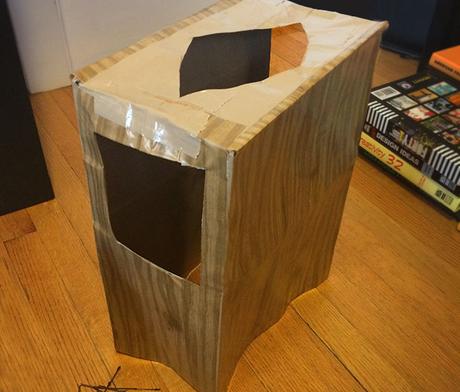
Cover the outside — all four sides and the bottom — of a paper bag with contact paper.
Hint: Adhere the contact paper to the side without the fold first (while the bag is closed and flat). Open the bag and double (or triple) bag it with the additional paper bags to make it sturdier. For even more support, place over the back of a chair while you cover the other sides with contact paper.
Step 3
Cut holes in the sides and bottom of the bag for the arms and head, respectively (shown above). You can make the holes rectangular (like I did) or round, but be sure to make them large enough to get the bag on your child easily.
You may want to reinforce the holes with extra strips of contact paper, especially around the corners as they may rip when taking the costume on and off.
Step 4
Cut a jagged pattern around the top opening of the bag (the end where you put groceries, not your head hole) to simulate tree bark.
Step 5 (the head piece)
Using a tape measure or a baseball cap adjusted to fit snugly, determine 3 different measurements:
• The circumference of your child’s head just above the ears
• The distance a cap would sit across the top of your child’s head from front to back
• The distance a cap would sit side-to-side (from ear to ear)
Step 6
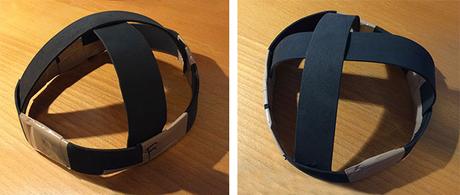
Cut strips of foam sheet into these 3 lengths (plus add 2 inches to each); each strip should be about 2 inches wide. Build the frame of your Groot head piece as shown below.
• Make the circumference band by attaching the ends with staples, then wrapping with duct tape so the staples won’t scratch your child’s head. Double-check your measurements by holding it on your child’s head before stapling.
• Attach 2 top bands as shown below – stapling/taping them to the inside of the circumference band.
Step 7
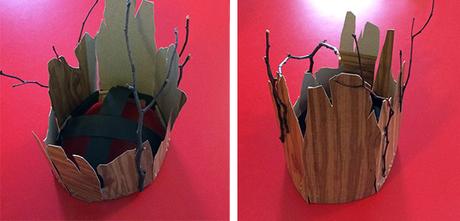
Cover a large piece of cardboard or cardboard paper with contact paper. Draw the shapes of the head piece using this downloadable template, or just freestyle it. The less “perfect” it looks, the better.
Staple and/or glue the wood head pieces around the circumference band until it’s completely covered.
Step 8 (the final touches)
Rinse any dirt off the sticks and allow to fully dry — they won’t glue as well if still damp. Apply the sticks with hot glue to the head piece as shown above, and to the body as shown below. Feel free to use more — I just ran out of time!
Step 9 (the voice)
Spend some time coaching your child how to say the character’s signature line, “I AM GROOT!”
Here was our training session. I’ll let you judge how successful it was… or not.
I’m sure there are better/easier ways to get your Groot on — so feel free to share suggestions in the comments. Nonetheless, it was a huge success (my son loved it, classmates and teachers loved it), but I hope he doesn’t ask for Groot again any time soon. Guardians of the Galaxy 2 comes out May 5, 2017, so hopefully I’ve got some time…
. . . . . . . . . . . . . . . . . . . . . . . . . . . . . . . . . . . . . . . . . . . . . . .
Check out other DIY costumes on Designer Daddy.
Never miss a post. Enter your email address under the SUBSCRIBE button, and get Designer Daddy posts delivered to your in box!


