 Photo credit: thisisglamorous.com
Hi everyone! Today I will be doing a post on how to create your own simple banner. This is a very simple and easy way to customize your blog or website. Anyone can do this, just follow the steps below!
PicMonkey is my favorite photo editor because it's free and easy to use! (no registration required either!)Once you get to the website (link above) click on "Edit a photo" and select a photo (any photo from your computer). This photo does not have to be the background-- you just need a photo to be set as your base.
Resize
Click "Resize" on the left hand side (under Basic Effects) and unclick "Keep proportions". Now key in the size you want your banner to be. My banner is 1000x 116 for reference. (I know its hard to tell since my background is white and it all blends in)
Customizing
Solid Background
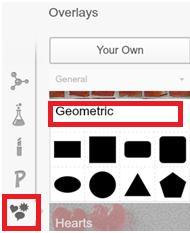
If you want a solid background (for example mine is white), click "Geometric" under the Overlays tab on the left. Click the rectangle and drag it to fit the banner. You can select any color you want the background to be.

Writing
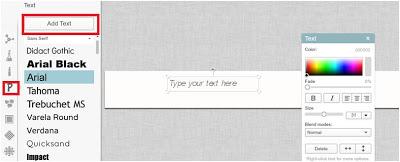
Under the Text tab (the big "P") select the font you want and then click "Add Text". Here you will be able to change the colour, size, centered, etc etc! Once done, click merge at the top.
Add photo to banner
Save your banner and open blogger
-Under Layout click edit header
-Click "add Image"
-Upload banner that you just created
Those are the main features in order to create a simple customized banner!
Additional features
PhotoMonkey does have additional features including frames, textures and photo effects that you can add to any banner. If you just want to add an effect (black & white photo for example) just to the banner and not to the whole banner black & white you will first have to edit the photo, save it and then start your banner and add the edited photo.I know this is a very simple way to create your own banner but I think it will be helpful to new bloggers as I know it took me awhile to figure out how to to create a banner that wasn't in paint, haha.
I hope to do more of these Blog Tips posts so let me know if there is anything specific you want to know and hopefully I can help!Thanks for reading!
*All photos except for the first one are screenshots from PicMonkey & then edited.<a href="http://www.bloglovin.com/blog/6505077/?claim=d64egjkx3ny">Follow my blog with Bloglovin</a>
