I always try to keep this blog as something that I do for fun, and not work. It's been quiet around here for about a month, basically because I haven't felt like sitting down to write. I want to keep this site for quality, not quantity of publications. However, when I start to worry about leaving Cake Of The Week alone for a month, I remember that when I read other baking blogs I don't necessarily notice an absence of posts (apart from those that go on for many months) until it's pointed out to me in a post like this...
Yesterday I had a completely empty diary, so I decided to check out Birmingham Museum & Art Gallery. It's set in this beautiful building from the 19th Century, right in the city center. Coincidentally, the museum is celebrating its 160th anniversary this year, so there was a display about how the museum came to be. More surprising was the discovery that it was not just an art gallery, as I had assumed, but it has a whole section about the origins of Birmingham and life in the city from the 1700s. Did you know that Birmingham was once famous for its production of buttons and coins? It was fascinating, and there was so much to see that I couldn't even finish the display, let alone the rest of the museum. For the record, it looks like the museum also contains some historical artifacts. I look forward to seeing what those are!

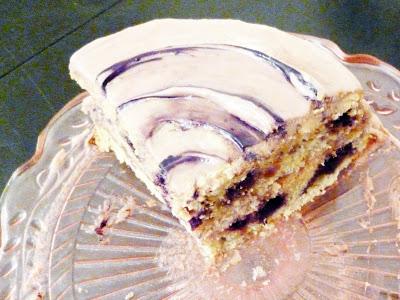
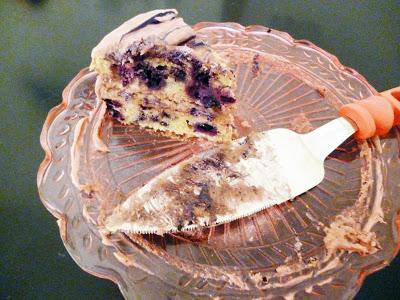
This is Blackberry Cake 2.0 because I originally made another Blackberry Cake a few years ago. The difference is that here I used whole blackberries and French buttercream, whereas before I blended the blackberries into the batter and decorated the cake with Swiss meringue buttercream. Subtle differences that led to a noticeable difference in flavor and taste. I prefer to use French buttercream because it uses half as much fat, but either type is perfect for slathering onto cakes. They are also much less sweet than traditional buttercream, which is made with icing sugar and butter. Whole blackberries vs blended blackberries is just an aesthetic thing, really, so you can really do whatever you prefer here. Blackberry Cake 2.0 was a success at work, though maybe it's best eaten with a fork because the buttercream can get a bit messy if you use your hands!
A note on the blackberries: I used frozen blackberries, but fresh would work just as well, or perhaps even better. I tend to pick as many as I can when the fruit is in season and then freeze the majority for later use (mostly Blackberry & Apple Crumble, I won't lie). Frozen blackberries can now be found pretty commonly in larger supermarkets.

Ingredients
Sponge:
- 200g Butter
- 200g Caster Sugar
- 3 Eggs
- 500g Frozen Blackberries
- 200g Plain Flour
- 1 Tsp Baking Powder
- 50mL Milk
French Buttercream:
- 250g Unsalted Butter
- 5 Egg Yolks
- 90g Caster Sugar
- 1 Tbsp Vanilla Extract
- Purple Gel Food Colouring
Recipe
Sponge:
- Preheat oven to 200C/180C fan and line two 9in cake tins with baking parchment.
- Cream the butter and sugar together until pale and fluffy.
- Beat in the eggs, one at a time, until well combined.
- Stir in the milk, followed by the frozen blackberries.
- Sift the flour and baking powder into the batter and fold in until well combined.
- Bake in the oven for 22 minutes, or until a skewer comes out clean.
- Allow the cakes to cool completely on a wire rack.
- Heat a pan filled 2/3 with water until the water starts to simmer.
- Place the sugar and egg yolks in a heat proof bowl over the pan, ensuring that the water does not touch the bottom of the bowl.
- Stir the mixture constantly with a fork/whisk until the sugar has fully dissolved in the yolks (use clean fingers to test; it won't be as hot as you think).
- Immediately transfer the yolk mixture into a mixing bowl and whisk until it has doubled in size and is very pale.
- Ensure that the butter is room temperature, then take a knob at a time and whisk it into the yolk mixture, ensuring it is fully incorporated before adding more. When all of the butter has been added, the buttercream should be smooth, pale and glossy.
- Beat in the gel food colouring until you reach your desired shade of purple. Add a little at a time, because it can be hard to judge the intensity that the colouring will produce.
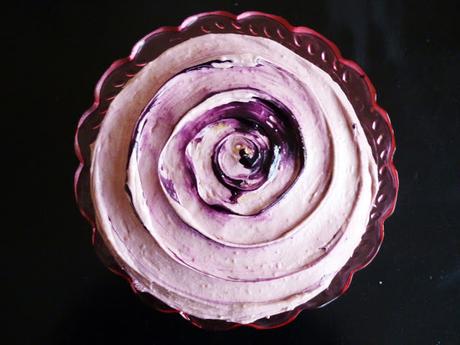
- Sandwich the cakes together with 1/3 buttercream, then spread the remainder over the top and sides of the cake. To get the swirled pattern on top, I dotted some more gel food colouring onto a spatula and gently touched it on the center of the top of the cake whilst rotating the cake with my other hand. It helps to have an icing turntable!
