Are you worried about the preservatives present in the store-bought curd? I am and that is one reason why I prefer homemade curd. Many of us think that setting curd at home is rocket science. But it's not!! We can make tasty healthy curd at home itself if we follow the authentic homemade curd recipe.
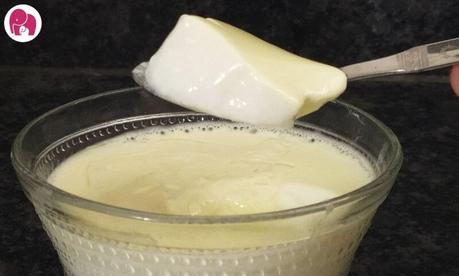
In this article, I have discussed in detail the method to set curd at home. I have also included 3 methods to make starter curd, the best way to get thick curd or dahi, and also the preferred utensils for setting curd. But first, let us see some benefits of curd.
Health Benefits of Curd or Dahi
Curd is good for people of all ages. Even for babies who are allergic to milk, curd can be given. This is because the allergy-causing lactose present in milk is converted into lactic acid as milk ferments and becomes curd. The lactic acid causes the milk to thicken, taste tart, and doesn't cause allergy. Curd is very good for digestion and also boosts memory. Let us see the other benefits.
Curd has a good amount of calcium, is good for teeth and bone health. Most of us women and babies suffer from a lack of calcium. Including a small cup of curd or buttermilk in the daily diet is good for our bones and teeth.
When suffering from mouth ulcer babies can't have any food due to the discomfort. Vitamin B2 and vitamin B12 present in the curd cures mouth ulcers.
Stress, climate, or food habits may produce body heat. Consuming curd cools downs the body.
The good bacteria present in curd improves digestion. Having a diluted curd promotes digestion. Curd is a good probiotic. Curd rice is good comfort food for babies and kids.
Including curd in your diet daily improves immunity. When you feel fatigued having a glass of buttermilk will boost your energy.
Read: Shrikhand Recipe for Babies and Kids
Homemade Curd Recipe with Old Starter Curd
This is the method commonly followed by most of the houses in India. In this homemade curd recipe, old curd is used as a starter and is added to milk to make fresh curd. Let us see how to make curd with old curd.
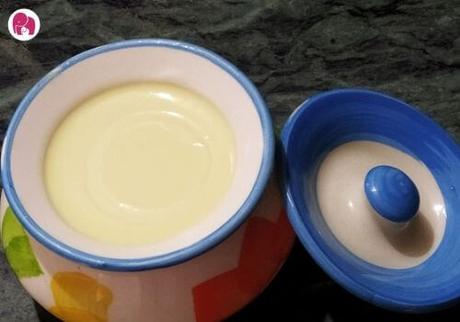
- Firstly, wash and sterilize the bowl in which you are going to boil the milk.
- Then add the milk to the vessel and boil it in low flame.
- Make sure you give a mix at regular intervals.
- After the milk boils, turn off the stove and cool the milk.
- Let the milk cool down and become lukewarm.
- In a small cup take 1 teaspoon of old curd, mix it well.
- Now add the mixed old curd to the empty cup in which you are going to set the curd.
- Finally, add the lukewarm milk in the cup and close it. The cup should not be disturbed.
- Wait for 5 to 8 hours to set the curd. ( depends on milk, weather, and other factors)
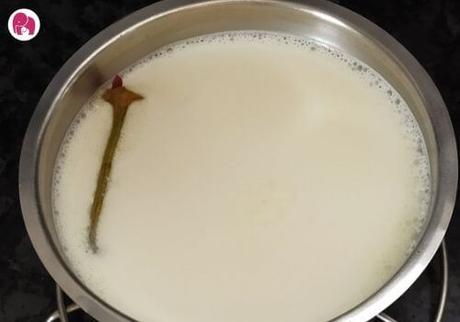
- In case you want the curd to set fast, put the stem of red chili on top of the milk. (Optional)
- After the curd sets, keep it in the refrigerator to prevent it from turning sour.
- Boiling the milk in low flame and stirring it occasionally is important to get thick curd
- Also stirring it occasionally avoids burning at the bottom.
- Avoid setting the curd in the same vessel in which you boil the milk.
- Make sure you take out all the malai on the sides of the vessel when transferring it.
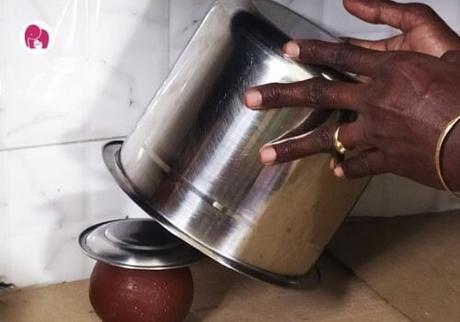
- Place the milk to set in a warm place. You can keep it inside the oven with lights ON or you can cover the vessel with a warm cloth or vessel.
- Don't disturb the vessel till the curd is set.
The quality and brand of the milk are also the factors that decide how good your homemade curd is. Always take full cream/full-fat milk. If one brand of milk doesn't work, try with another. Weather, time, and the quality of starter curd also influence the time required for the curd to set. So if you didn't get the curd set in the first try, don't get disappointed. Try changing the milk brand, keep it in a warmer place, or if you are in a colder region try increasing the quantity of starter curd per cup of milk.
How to make the starter curd for homemade curd recipe?
One or two spoons of curd which you require to mix with milk to make/set the curd at home is called the Starter Curd. It is also called Khatta or Jaman. But sometimes, when making curd from scratch, we may not have that one or two spoons of curd to start with. But don't worry you can make the starter curd at home itself. It is not advisable to consume the starter curd as such. Just use them to set curd.
It is very simple to make a starter curd at home.
Take 30 ml of warm milk, add two red chilies with the stem. Close the cup with a lid. Do not disturb the cup overnight or for 6 hours. You can also place the cup in a warm area to set it faster. Next day or after the curd sets, use it to make a fresh batch of curd.
Just a few drops of lemon juice is what you need. Take 30 ml of warm milk, add a few drops of lemon juice and close it with a lid. No need to mix it. After 6 hours or overnight the starter curd will be ready.
This is the same as we did for red chili. In 30 ml warm milk add one green chili and close the cup with the lid. After 6 hours or overnight the starter curd will be ready.
How to set curd when the climate is cold?
Though I stay in a hot city like Chennai, I have faced difficulties to set curd during the rainy season and winter. I follow these simple tricks to set homemade curd when the climate is not hot. Usually, lukewarm milk is used to set the curd, but during the cold or rainy season, I use slightly warm milk to set the curd and also keep the bowl inside a casserole. You can also cover it with another vessel. Here I am discussing a few methods I follow to set curd during winters.
1.The method with the oven
- First, boil the milk.
- Next, once it is warm, d ilute 1 spoon of starter curd in a cup and mix it with the warm milk.
- Preheat the oven for ten mins and place the milk cup inside the oven.
- The best duration is to keep the milk cup in the oven overnight or 8 hours.
2.The method with the cooker and blanket
In this method, you use a preheated cooker instead of an oven.
- First, boil the milk.
- Let the milk become warm( slightly higher temperature than lukewarm)
- Now, dilute 1 spoon of starter curd in a cup and mix it with the warm milk.
- Heat a cooker for ten minutes and turn off the stove.
- Place the milk cup inside the heated cooker. Cover the cooker with a blanket.
- You can add one red chili on the top of the milk if you want.
- The best duration is to keep it in the cooker overnight or 8 hours.
The Sureshot Thick Homemade Curd Recipe
For some recipes, like bread sandwiches, tikkas, etc, we need thick curd and some of us may even prefer good thick curd-like hung curd. Even though we have good quality milk we may not get good thick curd. Just with one simple ingredient, we can get good quality thick curd. Here is a recipe for homemade curd that I follow to get thick curd.
Let us see how to set thick curd at home.
- First, in 30 ml of hot milk add 1 spoon of cornflour and mix well without any lumps.
- Just add this cornflour mixed milk to the warm milk and mix well.
- Lastly, add 1 spoon of diluted starter curd to the warm milk.
- Do not disturb the cup and place it in a warm place. After 5 hours the thick curd is ready.
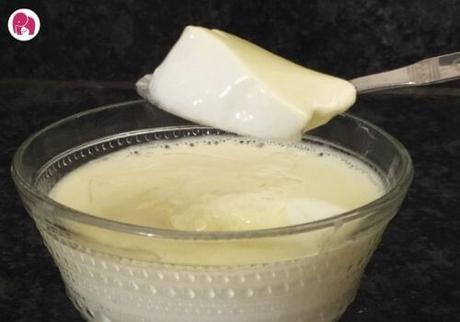
Best utensils to set curd
When making homemade curd, it is always best to use a cup/bowl which doesn't chemically react with the milk/curd.
Glass cup, ceramic cup, terracotta cup, stainless steel, and silver cups are the best choices to set the curd.
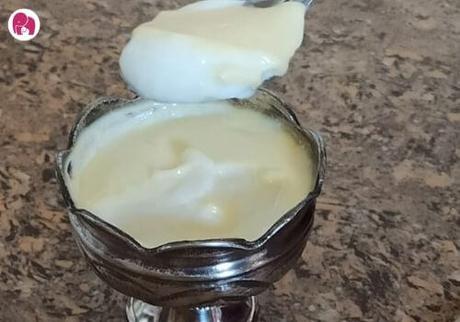
Avoid plastic, aluminum, brass, iron cups to set curd. These will react with the milk and spoil it. Once I had a very bad experience when I set curd in an aluminum cup. The smell and quality of the curd were not up to my satisfaction.
Here is a tip to preserve the curd quality when you pack for lunch. Instead of setting curd in a big bowl and transferring to the lunchbox, set curd in the same container that you carry for lunch.
The terracotta cup will give you a good quality thick curd. The cup will absorb the water in the milk and the curd will be nice, thick, and fresh. It will not sour faster. But when using the terracotta cup for setting the curd, the maintenance is very important. Wash the cup nicely and sundry it to avoid unpleasant smells. It is best to have two terracotta cups and use them alternatively. Sun-drying them for at least 5 hours after each use to get rid of the smell.
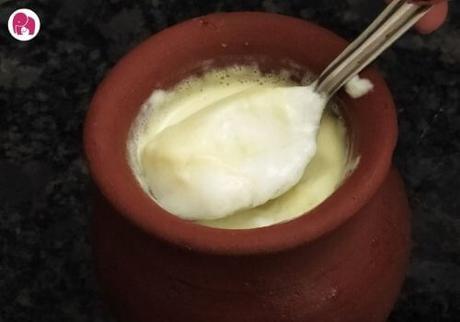
A silver cup or glass container is also the best if you are setting homemade curd for babies. Silver protects food from germs. Even for adults, we can use a silver cup/bowl to set curd.
So these are the ways to make fresh homemade curd. I have discussed almost everything that you will need to get a bowl of perfect curd. Try this homemade curd recipe and let me know how good it came out. Also, if you know any other ways on how to make homemade curd, please share in the comments.
