If your one of those people who gets very stressed out whilst applying false lashes and they end up stuck to your eyebrows instead, then this simple guide may offer you a few handy tips ...
Types of lashes - There are many to choose from and some being much more easier to apply than others but with practice and knowing what works for you, it gets easier when you know how.
Ranging from small individual lashes to natural, smoky, flared, wispie, thick, coloured, swarovski, double lashes the list is endless! Just choose a lash that goes with the look that your want, so for a night out maybe choose thick, full, glamorous looking lashes but for the day something natural and lightweight that shall sit comfortable throughout your day.
There are no 'lash rules' just go for what you like!
What you will need -
- Lashes
- Eyelash Adhesive (available in white or black, white dries clear)
- Small Scissors
- Tweezers or Eyelash Applicator
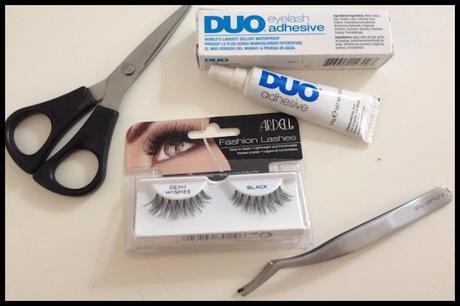
KelliLash: False Eyelash Guide
Getting Started!
1)For lash beginners, choose a strip lash that has a fine or invisible band. This is the base of the false eyelash that sits on your lashes. This type of lash shall be much more easier to manouvre as it shall be more flexible & lightweight.
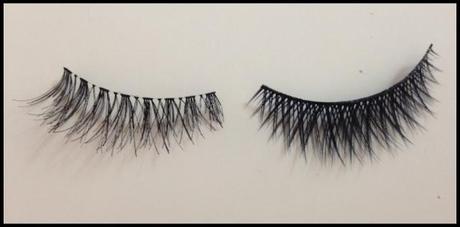
Left: False lash with a invisible band
Right: False lash with a thicker & wider band
2) Removing the lashes from the packet - most often they are stuck down inside the plastic packet. Place your thumb over the middle of the lash and firmly press down, pulling the lash away from the plastic. This way you should not damage the eyelash.
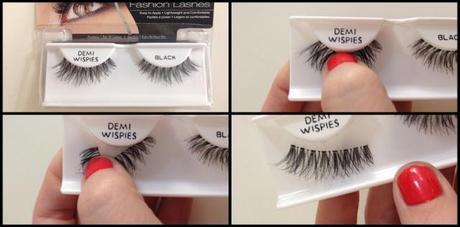
KelliLash: Removing false lashes from their holder
3) Remember to keep the packaging which your lashes came in, as after you have worn them and providing you have not applied mascara over them, you can get many more wears from them.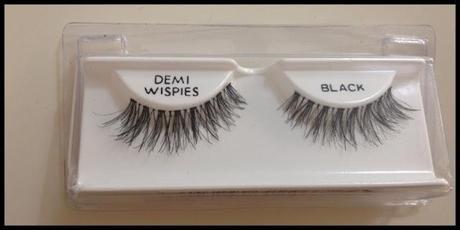
KelliLash: Keep your eyelash case!
Applying Strip Lashes!
Remember to apply your make-up first, mascara should already be applied.
1) MEASURE - place your strip lash at the base of your lashes & leaving roughly a 5mm gap from the inner corner, check the lashes are not too long. If they hang over the end of the eye then gently trim them with some scissors, trimming from the outer corner, not the inner corner! (you want the lashes to be short on the inner corner).
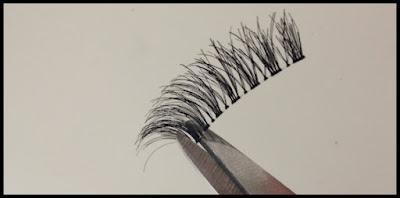
KelliLash: Measuring your eyelash
2) SHAPE - bend the lashes into a C Shape to loosen up the band, making it easier to fit the eye. Some lashes can be very straight so you need to shape them, wrap around a make-up brush or pencil for a few seconds if very thick and this shall make them easier to apply.
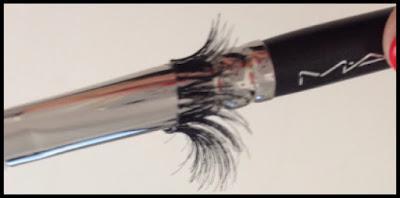
KelliLash: Shaping your eyelash
3) APPLY GLUE - I like to use DUO Glue, available from MAC, Ardell and online. I find it easier to put a small amount of glue on the back of my hand then hold the lash in same hand. Then taking your tweezers, dip them into the glue and apply it to the base of the false lash. Make sure you apply more glue to the ends as this is where you shall need the most hold.Wait about 30 seconds until the glue turns tacky.(If the glue is wet then the lash shall slide straight off, this way the tackiness shall hold onto your eyelash).
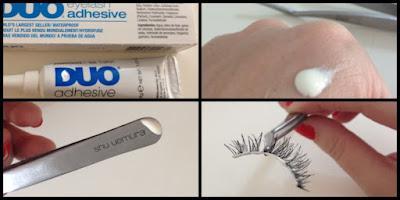
KelliLash: Applying eyelash glue
5) POSITIONING - Holding the false lash in the middle with your tweezer/applicator, look down into a mirror. Place the false lash onto the base of your lashes, not the eyelid. Rest the lash on top of your lashes.Taking the outer corner first, with your tweezer, position into place and stick down. Then take the inner corner and position into place. Close your eye and firmly press down the lashes.
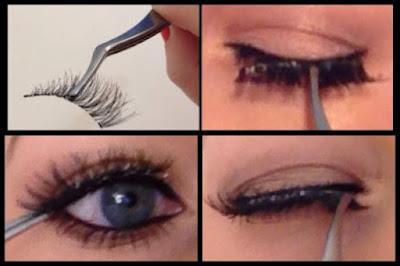
Kellilash Guide
1) Grab lash in the middle 2) Position in the center of your lashline
3) Tuck in the outer corner 4) Tuck in the inner corner
6) CLAMP - clamp together with your tweezer your real lashes with the false lashes. This way they shall blend together and look much more natural aswell as staying put! This is why having your mascara on helps them stick together.
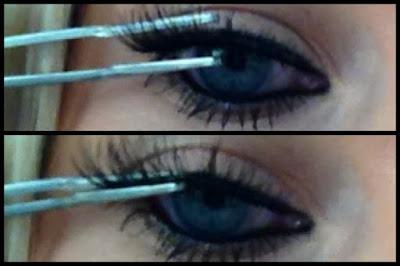
KelliLash: Clamping your lashes
7) GOOD TO GO! - once the glue has dried clear, you can apply some last minute eyeliner or make-up. I apply my eyeliner again over the seal of the lashes, as this disguises the base of the false lash.
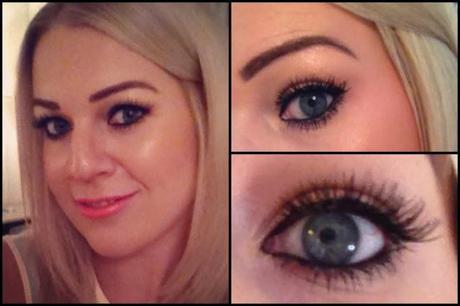
KelliLash: False lashes complete ;-)
DO NOT apply mascara onto your false lashes if you want to wear them again, if not then apply mascara over the entire lash area for added intensity!
- CORNER LASHES
These are simple to apply! Follow all the same steps as above but no need to measure them as they are only half a lash!
- INDIVIDUAL LASHES
Again these are actually very easy to apply. Only the very tip of them needs to be dipped into your glue. Looking downwards just place them in between your natural lashes until you have as many as you want! You go can graduate the sizes starting from small at the inner corner, graduating to medium for the middle and ends. These look very natural and also can just be applied to the ends for a flick.Now your a Lash-Tastic!It does take practice believe me, but the more you try it, the easier it shall get!
TIP!
Let me know if this has helped you fellow lash lovers and do email me any questions you may have ;-)


