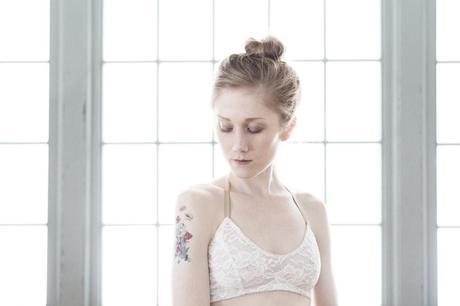
In Sara’s interview, she said that Chrissy Day, her mentor, “taught her all the rules and then how to properly break them.” For the past year and a half, I lived according to the rules and my bible has been Beverly Johnson’s Bra-Makers Manual and Norma Loehr’s Demystifying Bra Fitting and Construction. If they said to do it, I did, and if they said not to, I didn’t. I wasn’t going to be Judas and turn my back on them, until now. I know the definition of point of most strain, I know how the importance of an exact bridge width, and I know the different orientation of grain lines for different levels of cup support. I even made flash cards, people! With this knowledge, I ventured off and made someone completed on my own, using some rules and ditching other. The end result? A lace bralette that although it still needs some tweaking, suits my needs.


Depending on what top I’m wearing for the day determines the type of bra I’m going to wear. If I’m wearing a blouse or a shirt, I choose a cupped/underwire bra like this one, and if I’m wearing a knit, a tee, or a sweater, I opt for a soft bra like this one. In my opinion, soft bras give a smoother appearance underneath clingy knits and sweaters. So far in my bra making experiments, I’ve focused on cupped/underwire bras, but because this time of year is super busy due to the holidays, I decided to save my sanity and rub off a quick and easy bra pattern from a bra I bought at a thrift store.
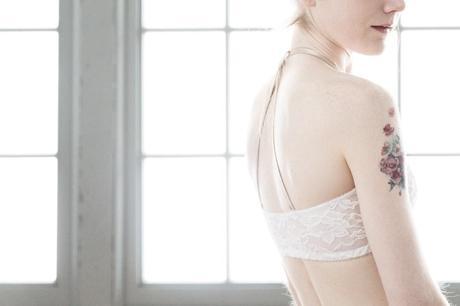
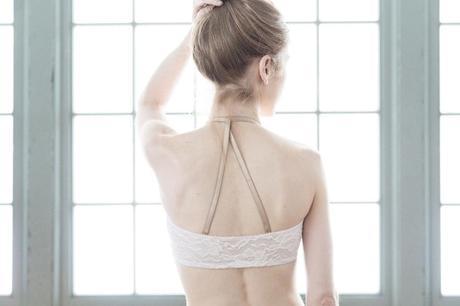
The construction of this bra is as simple as it gets. Made from lace I bought at Spandex House during my most recent visit to NYC, the only seams are princess and side seams. There are two sets of straps that when intertwined, hold up the bra. The front straps are a halter, so the front left strap wraps around my neck and becomes the front right strap, and the back straps loop around the front straps at center back. The bottom band elastic is 1/2″ and the top band and neckline elastic are 3/8″ – both both from Bra Makers Supply.
So how does this bra break the rules? Well, normally the band is left unlined, but on my RTW bras just like this one, the flimsy lace on the band is the first portion of the bra that starts to deteriorate. To give the lace on this band a longer life, I lined it with my new favorite bra lining, micro mesh. A long-time tricot buyer, I always wondered what the soft, stretchy lining fabric was used on my RTW bras. When I came across micro mesh while at Spandex House with Marce, I knew what I had in my hands. No, it wasn’t the golden ticket; I was luckier than Charlie in Charlie and The Chocolate Factory. I had something sweeter than even the sweetest cocoa – a lining fabric that although it’s as hard to sew as chiffon, it gives that same luxurious look. Micro mesh luxurious? I know.
In most bra making circumstances, lining the band is a no-no. The band is left unlined for a reason – because the bridge is stabilized both up and down and side to side, the band allows the chest to move for breathing. But the lace and micro mesh were both four way stretch, and even when combined, the bra expanded enough that I could get it over my head (remember, there is no closure on this bra).
In what other ways did I break the rules? Look at the back of the bra – do you see any sliders or rings. Nope. Technically, it’s okay to eliminate them if you know your strap length and the straps are a stable fabric and/or stabalized. Because elastic loses its stretch over time, even if the strap length is known, rings and sliders should be used to adjust the length as the elastic wears out. But I freaking hate those things, especially when I’m leaning against the back of the chair, so I got rid of them. Yes, the straps will eventually lose their stretch and become too long, but at that point, I hope I will have made many more replacement bras. Plus, it’s an easy fix to shorten strap length.

One tip that has helped me a lot when attaching the straps is to sew a box stitch with an “x” in the middle instead of a bar tack. My machine doesn’t handle sewing bar tacks just like the RTW bras – the bra doesn’t move under the presser foot and the thread bunches up like Donald Trump’s hair (or is it a wig?). What results is a tangle mess and a grumpy seamstress. This solution has always ended up clean and professional looking.
The only alteration for this bra is the placement of the princess seams. For my next one, I’ll move them closer to center front and have it intersect the strap point.
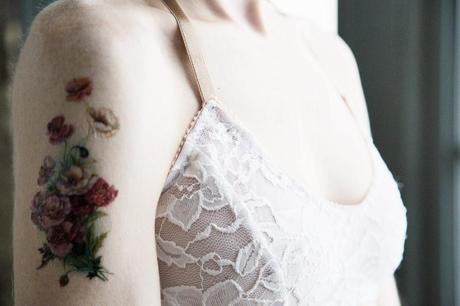
And no, I didn’t get a tattoo. It’s temporary and from one of my sponsors, Pepper Ink. It’s the same Etsy shop that created the sewing related temporary tattoos. She has a store full of vintage inspired, feminine designs that are so much fun to try out. Pepper also creates custom creations, so just send her a message with what you have in mind!

