Trimming your paper is a very important step in any D.I.Y. training. Even if you do not work with paper often, accurate trimming is the difference between something looking professional/polished vs. something done in your kitchen.
The cost for a local printer to trim your work is so affordable and saves SO much time that I will always recommend professional cutting. If you do want a printer to trim something that you've printed on your own laser printer, there are a couple of things to keep in mind:
Professional Trimming
Guillotine Cutter Printers will have large machines with a long blade and your stack of prints goes underneath. These huge machines require trim marks or crop marks on your prints so that the operator will know where to "strike"your paper. Depending on the equipment, you can trim up to 500 sheets of text or up to 250 sheets of card stock at a time. Typically, 2.5" to 3"stacks are ideal.
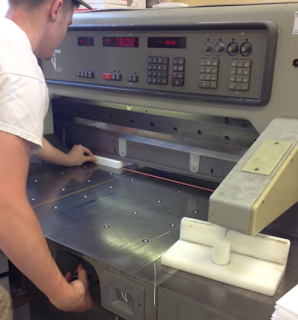
A local privately owned printer will most likely charge you a flat fee... Places like Kinko's and Office Depot will charge you a small fee "per cut".
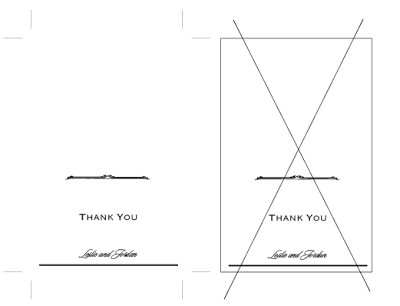
Regardless of whether you are having your printing trimmed professionally or by hand, I recommend trim marks or crop marks. There is a 1/16" "bounce" (movement of the blade) that you should account for on your prints so if you include a full outline, you run the risk of the line showing intermittently throughout the job.
Hand or D.I.Y. Trimming
If you must trim on your own, I recommend the following tools:
1. Exacto Blade

Cons: If you don't use this blade properly you can really hurt yourself (trust me, I've gotten stitches due to an exacto blade "mishap" before). You can also run the risk of hurting yourself if you do not switch out the blade. Dull blades stop grabbing your paper and can jump and grab your finger or your hand!
2. Hand Trimmer (Spring Action Metal Blade)
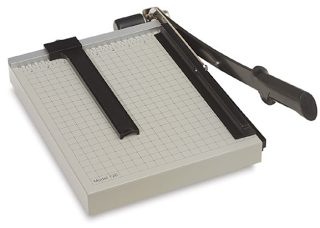
Hand trimmer with hinge arm blade... This one is by Dahle (which is my favorite brand) and it has a guide and a grid pattern to help you with placement before you pull the arm down and cut.
Pros: Easy to use, makes precise cuts, and can cut more than one sheet at a time Use with: A great eye... With practice, you should be able to anticipate just where the cuts will occur when you pull the arm down Cons: If you do not take the time to make sure the bottom of your print is horizontal with one of the lines from the grid, your trimmed edge will be crooked. No way around it.3. Hand Trimmer (Sliding Rotary Blade)
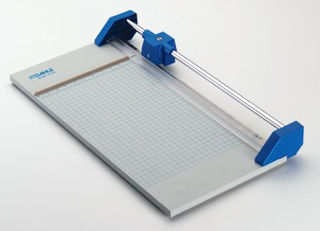
The sliding rotary style hand trimmer, also made by Dahle
Pros: Easy to use, makes precise cuts, and is perhaps more accurate than the spring action cutter Use with: A great eye... With practice, you should be able to anticipate just where the cuts will occur when you slide the blade (inside the plastic casing) Cons: Not friendly to multiple sheets of paper... Can jam easily when pushing through larger jobsOther Random Tips:
- When using the Exacto blade, keep it low, like 30 degrees as you drag it along your paper... This angle will give you a better cut and your blade will last longer
- When switching out blades in your knife, for text weight paper, change up every 12-15 cuts... For cover stock every 10-12...
- Use a triangle for vertical cuts (always line up the bottom part of the triangle with an existing straight edge)
- Use a steel ruler for horizontal cuts (always line up the vertical side of your paper with an existing straight edge)
We'll talk bindery options tomorrow! --ct

