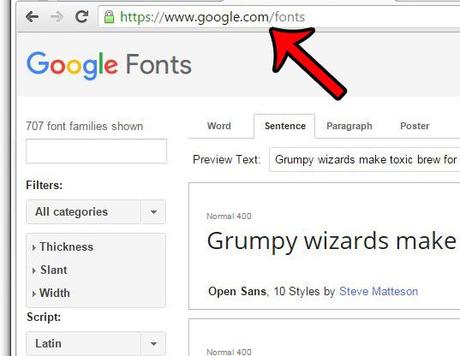
While there are many places where you can purchase new fonts, there aren't many options that make the process of installing fonts in Windows 7 easier than Google Fonts.
They have many different fonts and you can rest easy knowing that the files you download and install will be safe.
Our guide below will walk you through the process of downloading and installing a font from Google Fonts on your Windows 7 laptop or desktop.
How to Install Google Font in Windows 7
- Go to https://fonts.google.com.
- Choose a font.
- Click the Load Family button.
- Click the Save button.
- Select the downloaded file.
- Click the Extract All button.
- Click Extract.
- Right-click the font file and select Install.
Our guide to installing fonts for Windows 7 continues below with more information on how to get more fonts on your computer, including images of those steps.
Google Fonts is a set of fonts often used by web developers to extend the look and feel of their text beyond the most basic and common font styles.
But these fonts are not limited to websites; you can also download them from the Google Fonts library and install them on your Windows 7 computer.
The process for downloading and installing Google Font is very similar to downloading fonts from other websites that distribute free fonts.
So keep reading below to find out how you can use one of these fonts on your computer.
Related Topic: This Italic fonts in Word guide shows you where to get and how to install the new italic and script fonts that you can use in your Microsoft Word documents.
The Old Method - Download and Install from Google Fonts on Windows 7 (Illustrated Guide)
The steps in this guide will show you how to download and install the font you find on the Google Fonts website.
This font will be installed on your computer and available through programs that have access to the Windows Font Library on your computer.
Step 2: Use the search box or filters on the left side of the window to find the font you want to download and install.
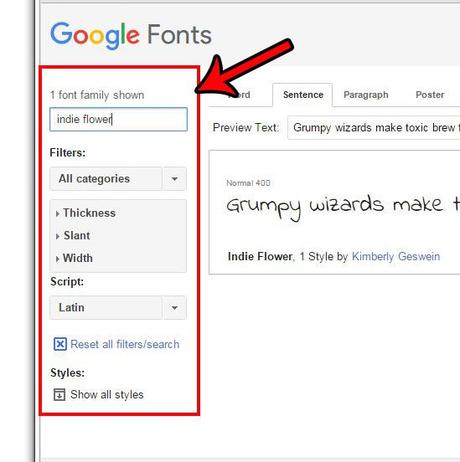
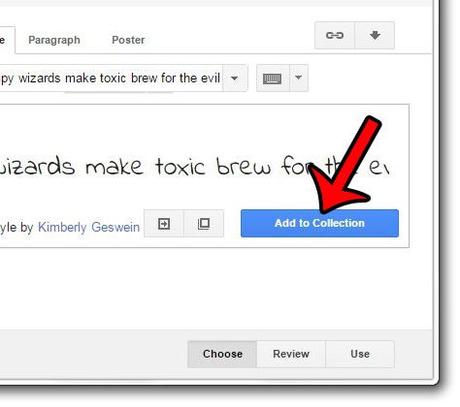
Step 3: Click the blue Add to Collection button next to the font.
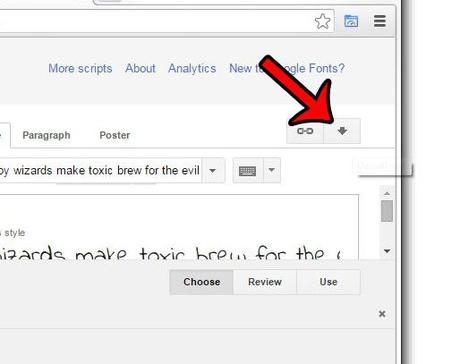
Step 4: Click the "Upload" button at the top right corner of the page after you've finished adding all the fonts you want to your collection.
Step 5: Click on the ZIP file link to download the ZIP file containing your fonts.
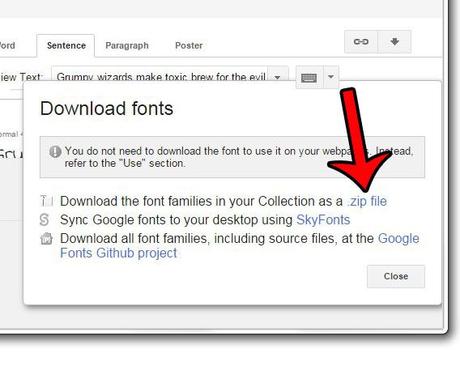
Step 6: Open the downloaded ZIP file.
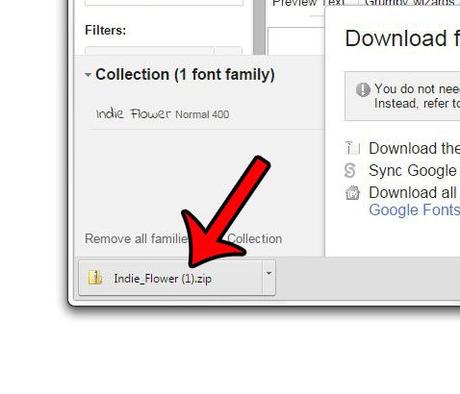
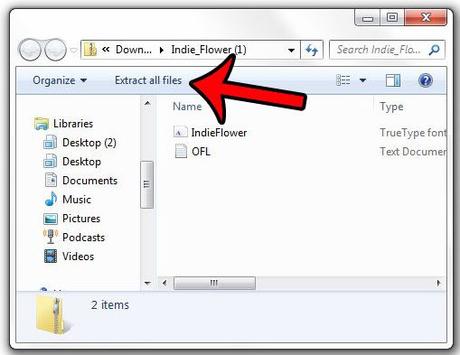
Step 7: Click the Extract All Files button at the top of the window.
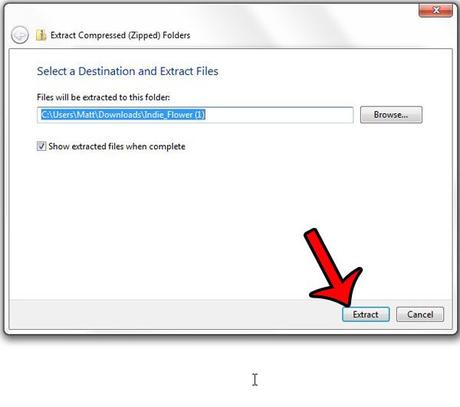
Step 8: Click the "Extract" button at the bottom of the window to extract the files.
Step 9: Right click on the font file, then click on the "Install" button.
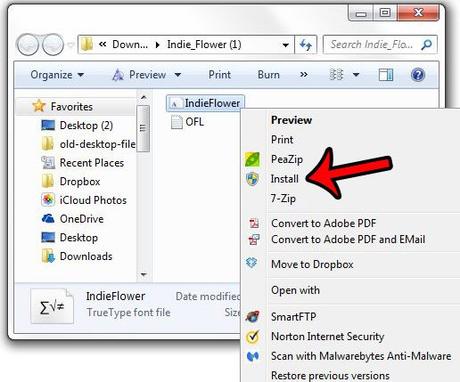
Once you have completed this Windows 7 font installation process, you should have the downloaded fonts on your computer.
Now, when you open a program that uses Windows fonts, such as Microsoft Word or Paint, the installed fonts will be available for you to use.
Do you have fonts installed in Windows 7 that you no longer use or are having problems with? Learn how to remove fonts from your computer so that they are no longer available through an installed application.
You may also like
Руководства
#Windows #Font #Installation #Guide

