Using WordPress on your business blog or personal blog? If you are, there is one issue you need to fix – the emails fail to send. When we did a quick survey, we have found that a lot of our users are suffering from this error. If you take a quick look, you could see that the email deliverability is a crucial error.
Don’t worry. We have got a fix for you. In this post, we are going to introduce you the WP Mail SMTP plugin which will help you to fix all email deliverability issues, sends the emails. So, let’s get into the post!
WP Mail SMTP
WP Mail SMTP is a freemium plugin by the Awesome Motive family. The same team behind WPForms, MonsterInsights, SeedProd, and OptinMonster. The free version WP Mail SMTP Lite can be installed directly from the WordPress plugins repository.
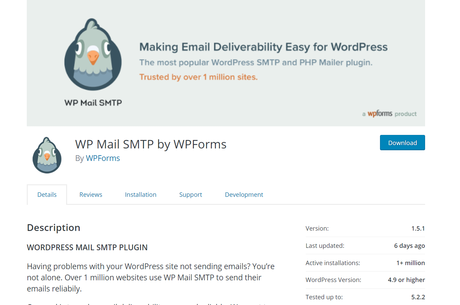
You can see that there are more than 1 million WordPress blogs using this plugin on their blog. So a proper configuration of this plugin will help you to send your emails directly to your user’s inbox. Not to the spam box.
Welcome WP Mail SMTP Pro
Recently, the team introduced a premium version of the plugin.
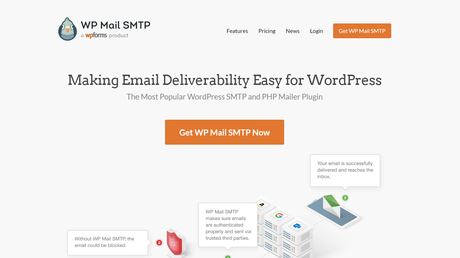
The plugin can be easily integrated with:
- Amazon SES.
- Gmail.
- GSuite.
- Mailgun.
- Outlook.
- Office 365.
- SendGrid.
- Other SMTP Providers.
So, no matter which email service are you using. You will be able to easily configure this plugin in your WordPress blog. At this time, they offer 2 premium plans.
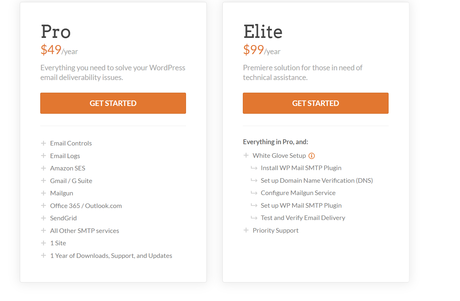
- Pro – $49 a year.
- Elite – $99 a year.
The Pro plan comes with almost all basic features. The Elite plan got more advanced configurations. If you are just starting out, we recommend the Pro plan.
How To Configure WP Mail SMTP?
Let’s move to the tutorial now. In this tutorial, we will be using the free version of WP Mail SMTP.
Login to your WordPress blog, go to the add new plugins section. There, search for the WP Mail SMTP and install it on your blog.
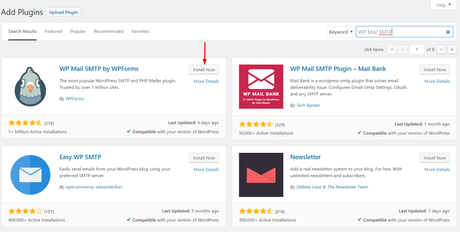
Once you got installed it, activate the plugin.
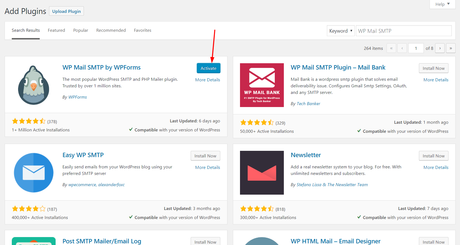
The plugin settings would be visible in your WordPress dashboard.
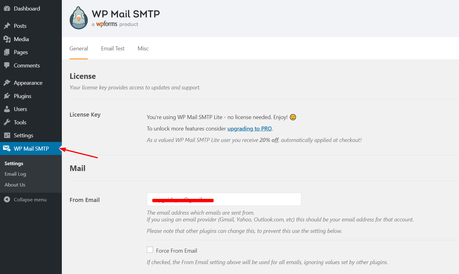
From there, you can configure the
- Email.
- Name.
- Return Path.
- and The Mailer.
The PHP will be checked by default.

You could use Gmail, Mailgun, SendGrid or any other SMTP providers to send the email. When you selected the PHP mailer, you don’t need any additional configurations. In our case, we always prefer Gmail/ GSuite. If you prefer Gmail for sending WordPress emails, select the option.
How To Use Gmail For Sending WordPress Emails?
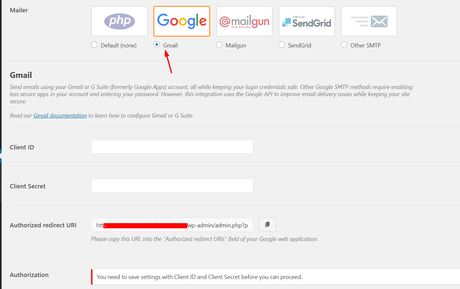
If you got generated the Client ID and Secret, that’s great. You just want to paste them in the submit box save the settings. If you haven’t, sign in to your Google account here. You’ll need to create a new project.
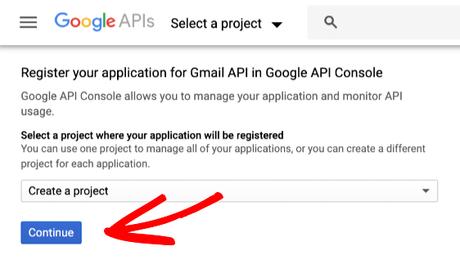
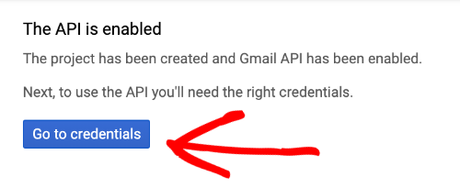
The API will get enabled automatically. Go to credentials.
Refer to the image below. Choose the settings like that.
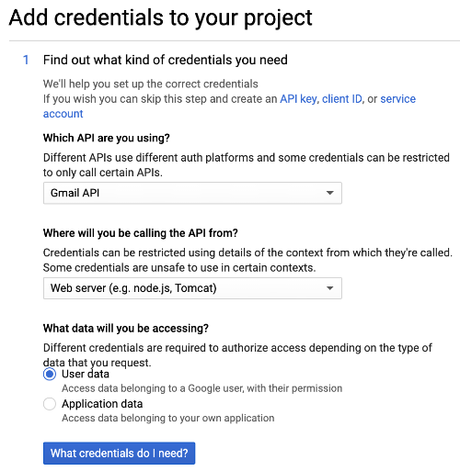
- Which API are you using? – Gmail API.
- Where will you be calling the API from? – Web Server.
- What data will you be accessing? – user data.
Once you got selected the options, click on the What credentials do I need button. In the next step, you need to click on the setup consent screen button.
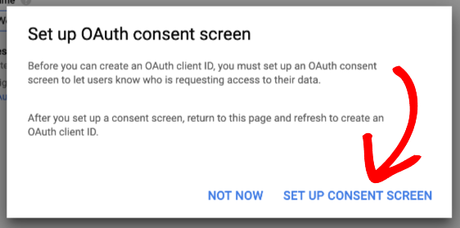
You will see a screen something like this.
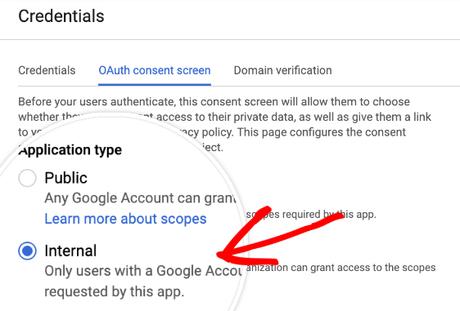
You will need to set the settings to internal if you are running on G Suite account. When you use the @gmail.com account, you will not see this feature. Complete the application name in the next step.
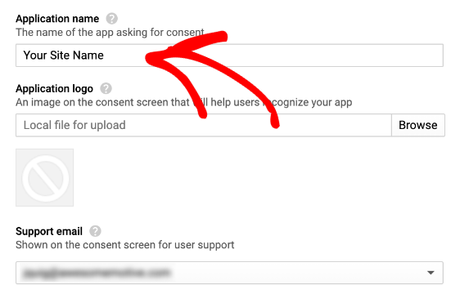
You enter your websites name as the application name. Scroll to the bottom page and you will see a box to enter your domain name. You don’t want to add the domain prefix (http:// or https://). Just enter the naked domain name. (Eg: example.com)
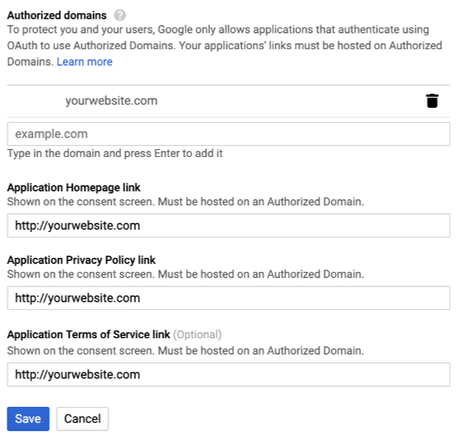
In the application homepage link and privacy policy link, you can use your exact domain name with the prefix. Application ToS link is totally optional. You could skip it.
Just click on the save button then. Once you saved the settings, the console will take you to the API screen. This is where you can create the OAuth Client ID. You’ll see the name field. Leave it blank or add a custom name. This is not visible for your website visitors. Just for reference. In the JS origins field, enter your website’s URL.
And now, we need to set up the authorized redirect URL. In your WP Mail SMTP plugin settings, you could see the URL.
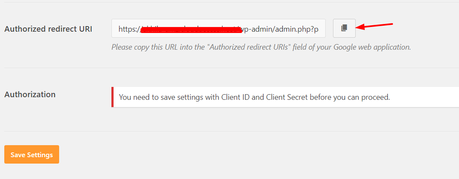
You’ll need to copy this URL. Simply do it by clicking on the copy button on the right side. Get back to your Google API page and paste the URL in the field where you need to enter the authorized redirect URLs. You can see the image from below.
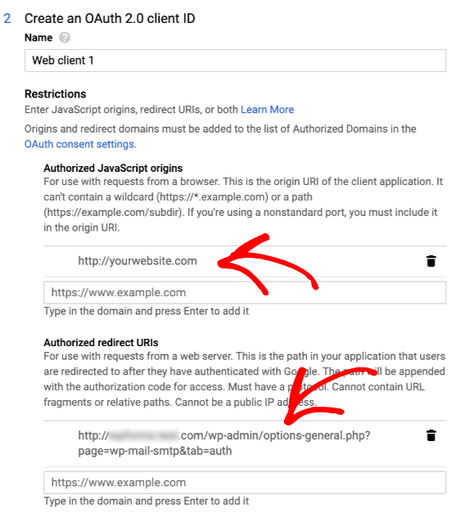
Once you pasted these URLs, hit the enter key. This will save those URLs in the system. And now, you need to click on the OAuth client ID button.
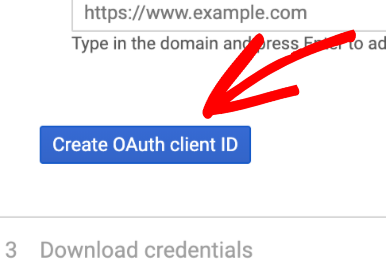
You don’t want to download the credentials.
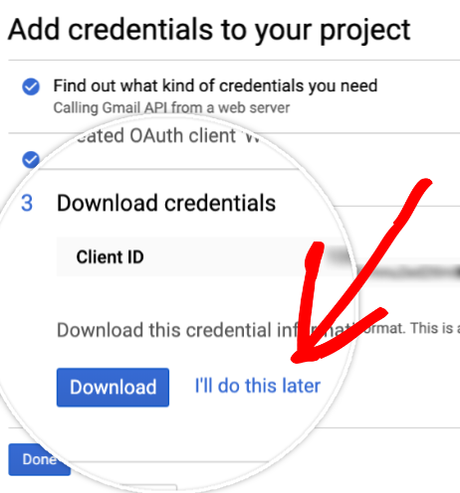
On the credentials page, you could see your all available web applications.

For the client ID and client secret, you’ll need to click on the edit button. It will take you to a page where you can see all those details.
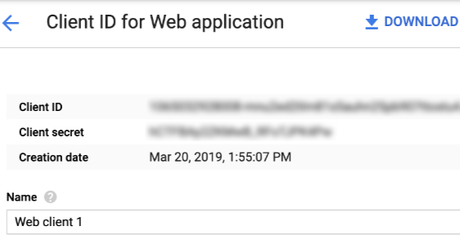
Copy these credentials. In the WP Mail SMTP plugin settings, paste these.
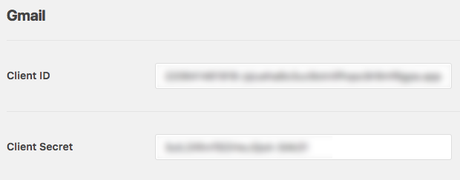
And below that settings, you could see a button for authorization. Click on that.

You will need to sign in with the Google account which you used for setting up the credentials and API. Just log in and allow access.
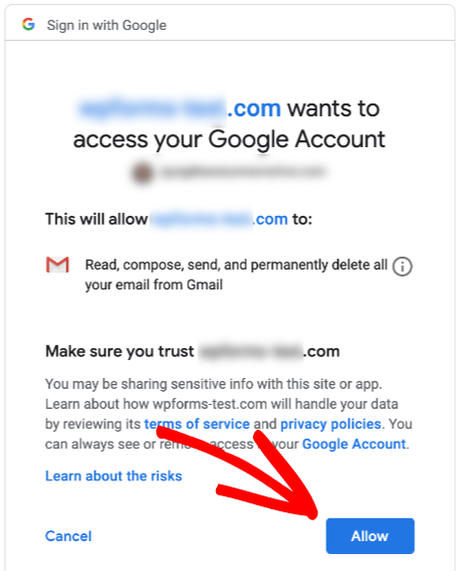
You are now successfully linked your website with the API project. Next thing we need to do is, send a test mail.
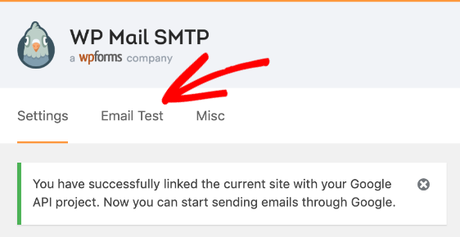
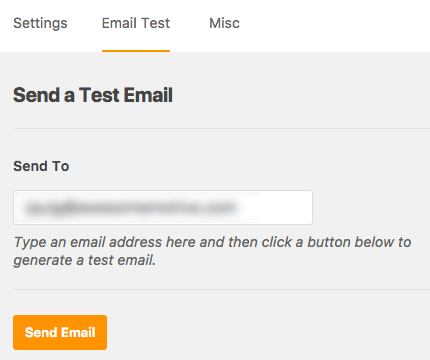
Enter an email account which you need to send a test email.
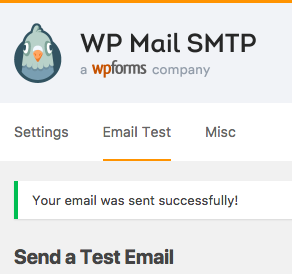
if the configuration is perfect, you will see a success message.
Also, you will receive the test email in your specified email address.
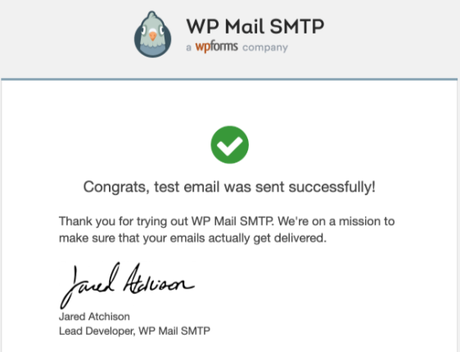
Impressive, isn’t it? You will get all the emails from now on. There will be no issues. Also, the emails will land in your inbox, not the spam box. This is how you can configure WordPress to send emails properly.
Get Started With WP Mail SMTP
You can get a premium license of WP Mail SMTP from below.
Download WP Mail SMTP
We hope you found this post helpful and enjoyed the read. If your emails fail to send, you might want to consider this. If you liked this post, please consider sharing this post with your friends and fellow bloggers on social media. We have got an exclusive pin for you.

Image credits: Freepik
For more awesome tutorials and reviews, feel free to check out our blog section.
