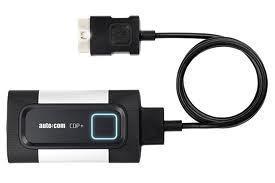
 Flight recording is one of the incredible tools highly useful for the workshop technicians. Autocom CDP+ has a flight recorder function, which the users can use for recording the real-time parameters while the vehicle is running. When recording, the user can highlight the particular error for investigating the detected errors on immediate notice. CDP+ contains a built-in memory, thus eliminating the need of keeping an extra computer.
The flight recorder function of is used by following seven easy steps. Let us discuss the seven steps.
Creating the Session
First Step: For creating a Flight Recorder session, first the real-time data or the parameters have to be selected that are to be recorded.
Second Step: Then the customized data list existing in the real-time data menu visible in the diagnostic program is opened to start the process.
Third Step: You have the option choose for creating a session befitting all system type, that is Engine A/C, ABS, etc., but it is suitable for only one system at one time since it is impossible for the vehicle to communicate at the same time with multiple systems.
Fourth Step: After selecting the parameter, you will have to test them on the vehicle for verifying the validity of the data. Then the parameter selections are transferred to the CDP+, and then Flight Recorder session is properly created. Earlier, the templates and recorded data are deleted once the new session is created.
Fifth Step: After that, the CDP+ is disconnected from the computer and the vehicle. The Flight Recorder is started at the time of test-driving the automobile. You can save multiple recordings and sessions on CDP+. You can even select the sessions you are willing to upload before you save them on the computer.
At the Time of Test Drive
Sixth Step: To start a new session, you have to press and hold the button on CDP+ till the indicator changes to yellow, and a short audible tone is emitted by the CDP+. Then, the yellow light begins rotating that indicates the data is being recorded.
Seventh Step: You can find the data portion easily where the symptoms have taken place. There you can keep the symptoms earmarked in the session. For doing this, you have to press the "Flight Recorder" button.
Trying Your Hand on A Vehicle
There are two main software, the Autocom CDP+ features for catering to the requirements of passenger car and commercial vehicle:
The CARS is the professional diagnostic tool used for the workshops. It has an extensive database as well as a great coverage for the vehicle brands.
On the other hand, TRUCKS diagnostic tool features a powerful coverage for both the heavy and light commercial vehicles, buses, and trailers. The tool even incorporates Intelligent System Scan and Intelligent System Identification and allows the users to set the configurations, calibrations, and adjustments.
The intelligent and highly efficient unit comprises functionalities like the Intelligent System Scan and Intelligent System Identification along with the traditional service function, adjustment, and repair options. The software of the tool ensures reliable and fast diagnostics and a user-friendly interface, fast installation, and right updates.
