Ubuntu users can do everything with their operating systems, including image editing. The truth remains that there are a lot of graphical editors available in Ubuntu. However, this post will introduce you to some of the best available.
In this article, you will be introduced to the six best image editors for Ubuntu.
Below are 6 graphical editors available for Ubuntu and other Ubuntu based systems. All the apps listed here are free and open source.
1. GIMP
Gimp is one of the best graphical editors in Ubuntu. It is a free cross-platform image editor that works with Ubuntu. In addition, the fact that the GIMP image editor supports various programming languages, including C, C++, Perl, and Python, greatly simplifies the user experience.
This photo editor supports several unique features, including high-quality image modification, image conversion, and graphic design creation. Whether you're a beginner or an advanced user, this photo editor gives you everything you need to edit images like a pro because it's flexible.
The GIMP photo editor also allows users to change the colors and icons of an image to their liking. In addition, it includes tools that allow the user to remove unnecessary or unwanted elements of an image, allowing them to create unique and flawless photographs.
This image editor also allows the user to view your images in full screen, so when you have any other edits you want to add, you can easily do so without any hassle. Gimp also supports image animation, volume control, and image cropping.
Installing Gimp on Ubuntu
There are two main methods you can use to install Gimp on Ubuntu - Snap and the APT package manager.
SnapRun the command below to install Gimp with the Snap package manager.
Note. These commands will only work for Ubuntu 18.04 LTS and newer.
sudo apt install snapd
sudo apt apdate
suso snap install gimp
APT
Run the command below to install Gimp using APT.
sudo apt install gimp
Unfortunately, the above command will not install the latest version of Gimp. Use the commands below if you want to install the latest version of Gimp.
sudo add-apt-repository ppa:ubuntuhandbook1/gimp
sudo apt update
sudo apt install gimp
Using Gimp on Ubuntu
After successfully installing Gimp on your system, you can launch it from the application menu as shown in the image below.


Alternatively, you can run the application from the command line by running the command below.
gimp
The main window of Gimp looks something like the image below. In our case, we have already loaded a "lion" image ready for editing.
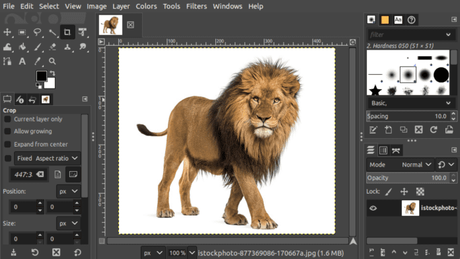
If you've moved from a photo editor like Adobe Photoshop, you'll realize that Gimp isn't much different. The image is in the middle, while tools and other features are in the left and right panels. At the top you have the main menu which allows you to access advanced features and tools.
2. Fell
Another great image editor for Ubuntu is Krita. Krita is an open source photo editor with tons of features that will make your photo editing skills top notch.
It's free and one of the best image editors you'll ever use. Krita is usually intended for artists who want to sketch and create original artwork, but if that's not your goal, you can also use it to modify existing images.
This photo editor has several features that users can customize to create whatever they want. Among these features:
- Moving and resizing UI elements.
- Brush tools.
- Layers. Krita has over ten layers, including filter, clone, vector, and draw, among other layers.
- Text and vector tools.
- Asset manager.
- Animations and transitions.
- Color management tools.
A huge plus of the Krita image editor is that it supports many image formats, including PNG, JPEG, TIFF, Dicom, PSD, and GIF.
Installing Krita on Ubuntu
You can install Krita on Ubuntu using Snap or APT, or run it as APPImage.
AppImage:Download the Krita AppImage file from their official site. Make the file executable with the below command and run it. If the download link on their official website doesn't work, download the AppImage file from AppRepo.
sudo chmod +x [Krita-AppImage-File]sudo ./[Krita-AppImage-File]Snap
Run the command below to install Krita using the Snap package manager.
sudo snap install KritaAPT
Run the commands below to install Krita using the APT package manager.
sudo add-apt-repository ppa:kritalime/ppa
sudo apt update
sudo apt install krita
Using Krita Photo Editor
When you launch Krita for the first time, you will see a window similar to the image below.
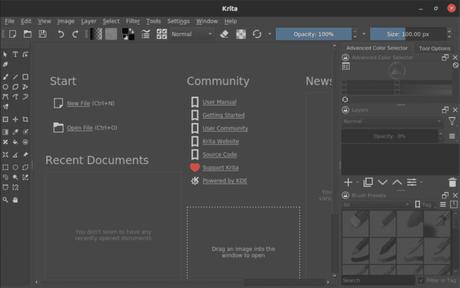
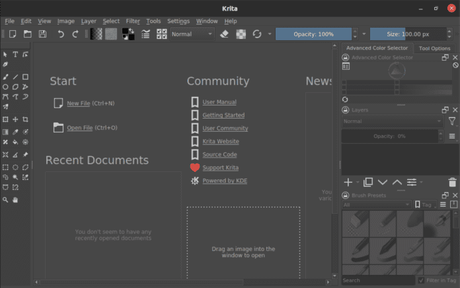
Krita is a powerful image editor with many tools and features that you can also find in commercial image editors like Adobe Photoshop.
3. RawTherapee
RawTherapee is another great image editor for Ubuntu. As the name suggests, the RawTherapee image editor is used when working with raw images, which is why it was created in the first place.
RawTherapee is a free and open source raw image processing platform compatible with Linux distributions and other operating systems. Due to its powerful features, this image editor is mainly used by experts. It's convenient, so if you're using it for the first time, try not to get frustrated. Over time, you will gain a deep understanding of how to use it.
Moreover, it supports multiple image formats including RAW, JPEG, TIFF, and PNG. With so many handy tools to experiment with, this image editor is the best choice for quickly improving the quality of your photos.
The following are some of the features of the RawTherapee Image Editor:
- Supported cameras
- Parallel editing
- Preview mode.
- Color Adjustment
- Additional display
- Editing metadata.
- Export image.
Installing RawTherapee on Ubuntu
Use the command below to install RawTherapee on Ubuntu.
sudo apt install rawtherapee
Using RawTherapee on Ubuntu
After successfully installing RawTherapee, you can launch the application from the application menu as shown in the image below.


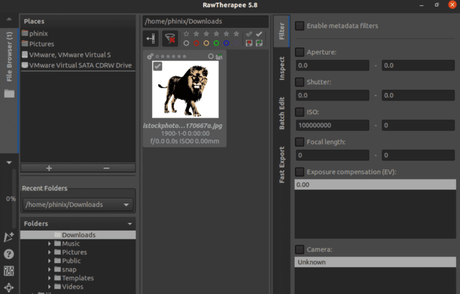
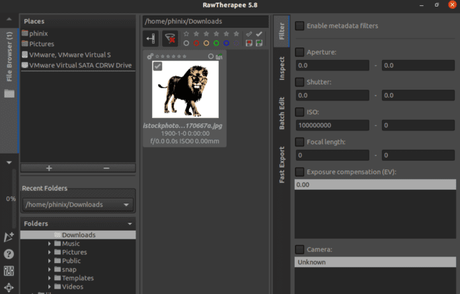
The main RawTherapee window looks something like the one shown in the figure below. If you are used to other image editors like Gimp or Adobe Photoshop, this photo editor may look different, mainly how the workspace is divided.
However, this should not scare you, as many resources are available on their website. official website.
4. Fotoxx
Fotoxx is another image editor for Ubuntu users. It is also a free and open source tool that will improve your image editing skills. It is one of the easy-to-use and fast image editors with many features to help the user to do their job and also beginner-friendly.
This image editor provides photo collection management and an easy way to browse the collection's directories and subdirectories using the thumbnail browser.
One of the incredible advantages of the Fotoxx image editor is the ability to artistically alter your photos and retouch them with specialized tools.
The complete editing procedure will be breathtaking due to the ability of this image editor to change color brightness and intensity, remove red-eye, reduce whiteness and even minimize noise.
In addition, it has easy-to-use options to crop, resize and rotate photos according to the user's preferences.
Installing Fotoxx on Ubuntu
Use the command below to install Fotoxx on Ubuntu.
sudo apt-get -y install fotoxx
Using Fotoxx in Ubuntu
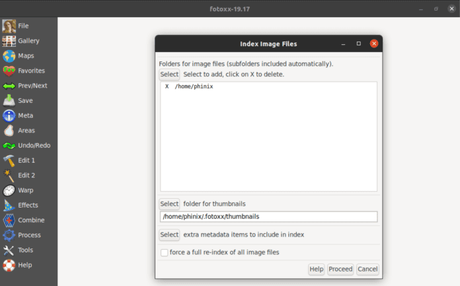
After installing Fotoxx successfully, you can launch the app from the apps menu as shown in the image below.


Alternatively, you can run the application from the command line using the command below.
fotoxx
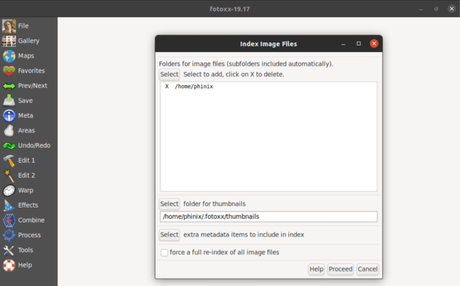
The Fotoxx main window looks something like the one shown in the figure below. It's a simple interface that's easy to navigate for experienced and novice alike.
5. Showfoto
Another best image editor for Ubuntu is Showfoto. This is a simple free image editor that offers all the standard photo editing features. Showfoto is popular because it is portable and beginner friendly. Various image formats are supported, including JPEG, PNG, and TIFF.
Its unique capabilities include image transformation, adding effects, filtering, and manipulating metadata. Keep in mind that this image editor can be used without additional software. In addition, the user can edit the metadata of the photo.
Installing Showfoto on Ubuntu
Use the command below to install Showfoto on Ubuntu.
sudo apt-get install -y showfoto
Using Showfoto in Ubuntu
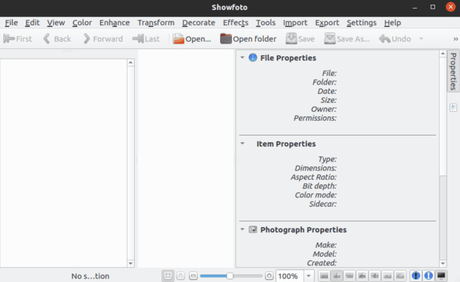
If Showfoto has been successfully installed on your system, you will be able to launch it from the application menu as shown in the image below.


You can also run the application from the command line using the command below.
showfoto
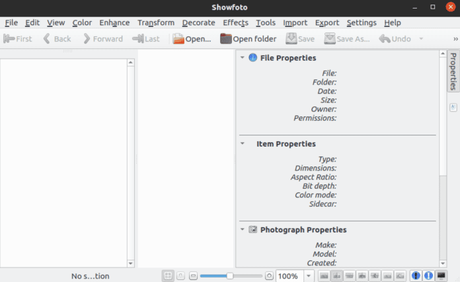
The main window of Showfoto looks something like the one shown in the figure below.
6. Inkscape
If you have a lot of experience with an editor like Adobe Illustrator, then Inkscape is the software for you. However, this does not mean that only designers who have used Adobe Illustrator can work with Inkscape. Inkscape is a free and open source vector graphics editor available for various platforms including Linux, Windows and macOS.
The graphic format you'll be most familiar with is the raster format, in which you work with a set of individual colored rectangles known as pixels. It described things like photographs and JPEG images. However, vector graphics are not made up of pixels.
Raster graphics are a series of mathematical equations that determine the properties of graphics along the x and y axes. Vector graphics are ideal because they can be easily manipulated without loss of quality. Inkscape, an application suitable for bitmap graphics, is mainly used for working with logos and application icons. It supports multiple file formats including SVG, AI, EPS, PDF, PS, and PNG.
Installing Inkscape on Ubuntu
Run the commands below to install Inkscape on Ubuntu.
sudo add-apt-repository ppa:inkscape.dev/stablesudo apt updatesudo apt install inkscape
Using Inkscape on Ubuntu
After successfully installing Inkscape on your system, launch it from the applications menu as shown in the image below.


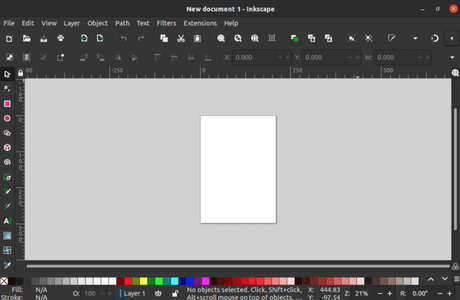
Inkscape is a powerful application with many features and tools. However, the user interface can seem a bit intimidating to beginners. However, this should not demoralize you, as there are many detailed guides on their official page and on YouTube.
