The 4 Ways for Windows to Remove Defender Protection. The 4 Best Methods for Windows 11 to Remove Windows Defender Protection History. Microsoft’s built-in security program, Windows Defender, analyses your computer and protects it against harmful software. In the Protection History tab, you can get complete information about the scans and discoveries made by Windows Defender. The Protection History log is typically cleaned automatically after every 30 days, however, you can manually expedite things if you’d like.
The 4 Ways for Windows to Remove Defender Protection:
On your PC, clearing the Protection History will free up space. Also, if Windows Security won’t open, it can assist you in fixing it. Four methods are provided in this post for erasing Windows Defender Protection History on Windows 11. Let’s check them now.
1. USE FILE EXPLORER TO CLEAR THE WINDOWS DEFENDER PROTECTION HISTORY:
Windows Defender maintains the log of Protection History as an accessible file on your computer, similar to many other programs. Using Windows 11’s File Explorer is the quickest and most straightforward method of accessing and erasing the Protection History log. This is how to accomplish it:
To launch File Explorer, press Windows + E. The Windows OS drive, which is typically C for most people, should be clicked.
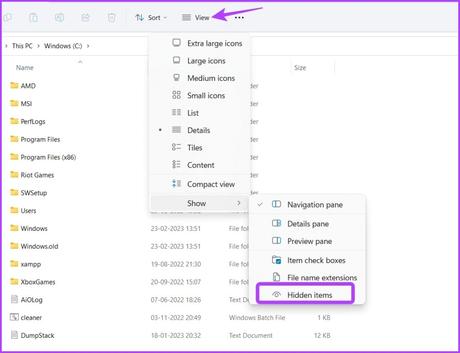
Choose the Hidden items option from the submenu after clicking the View option at the top and choosing Show from the context menu.
Read more: How to Install Fonts in Windows and Where to Find Them
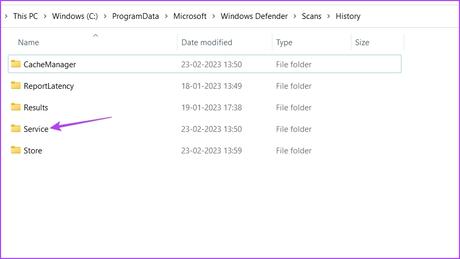
Go to the following location or copy and paste its address into File Explorer’s address bar.
C:\ProgramData\Microsoft\Windows Defender\Scans\History
Click on the Services folder.
Press Ctrl + A to select everything, then Shift + Delete to delete all history files permanently.
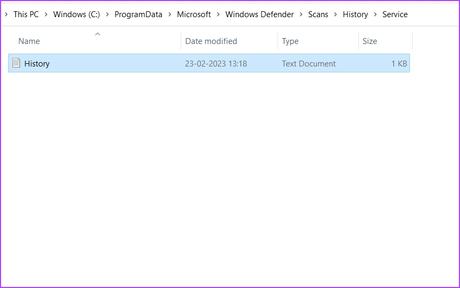
If this is the first time you’ve eliminated Windows Defender’s Protection History from your PC, some storage space you’ll gain.
2. USE THE GROUP POLICY EDITOR TO CLEAR THE HISTORY OF WINDOWS DEFENDER PROTECTION:
You may manage and edit significant Windows policies via the Group Policy Editor, a Windows application. Nevertheless, Windows 11 Home Edition does not include the Group Policy Editor. Skip this solution if your PC is running the edition.
Follow the steps below to utilize it to clear the Protection History log:
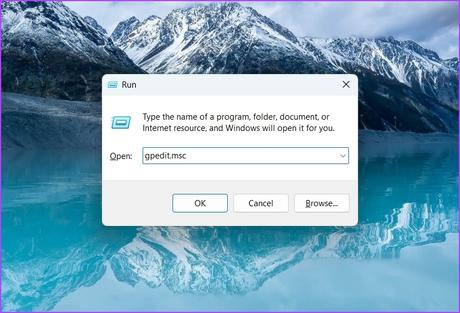
To launch the Run dialog box, press the Windows + R keys.
In the search box, type gpedit.msc and press OK.
Go to the following location:
Computer Configuration > Administrative Templates > Windows Components > Microsoft Defender Antivirus > Scan
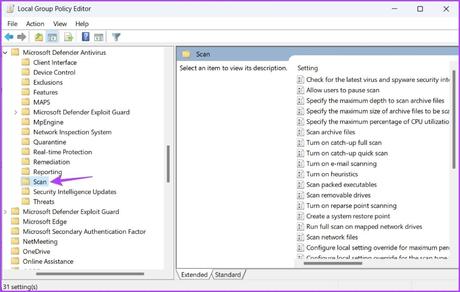
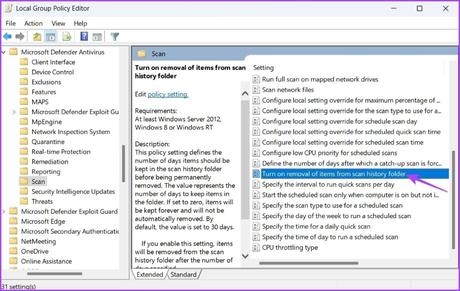
Step 4: Double-click the “Switch on the removal of objects from scan history folder” button in the right pane.
Step 5: Click on Enabled, and choose the number of days after which the history is automatically erased. It is set to 30 days by default.
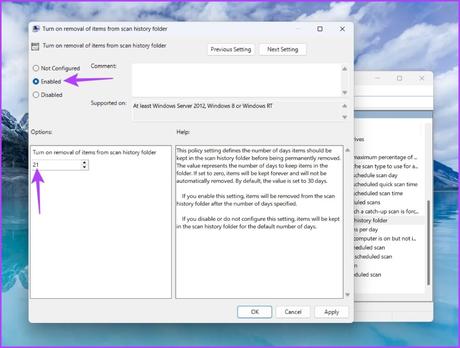
Step 6: Click on Apply and then do OK.
3. USE EVENT VIEWER TO CLEAR WINDOWS DEFENDER PROTECTION HISTORY:
In Event Viewer, Windows keeps a log of all messages from system features, including failures, warnings, information, and other notifications. So, using Event Viewer is still another easy method for erasing Windows Defender Protection History. This is how:
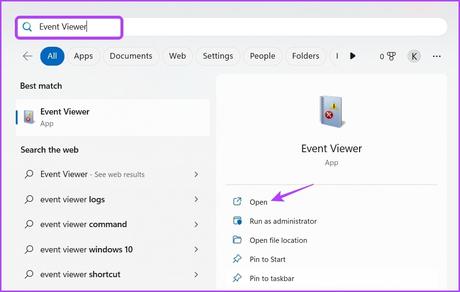
To access the Start Menu, press the Windows key, type “Event Viewer” into the search box, and select “Open” from the right pane.
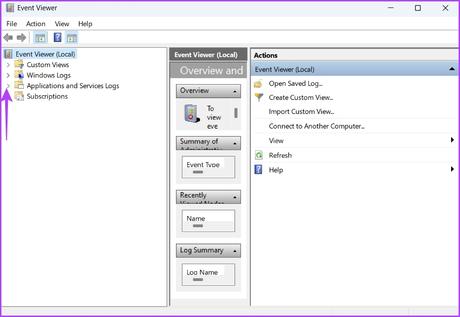
Before Applications and Services logs in the left sidebar, click the drop-down arrow.
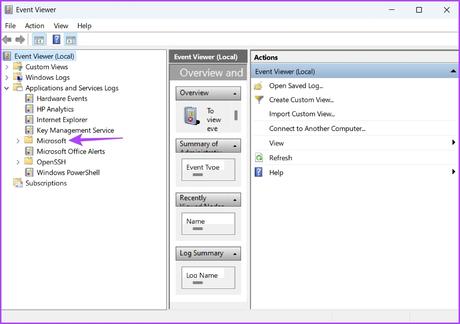
Although In the left sidebar, click the drop-down arrow next to the Microsoft folder.
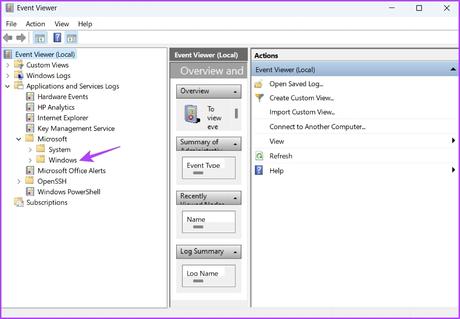
Then In the left sidebar, next to the Windows folder, click the drop-down arrow.
Although On the left sidebar, find and double-click the Windows Defender folder.
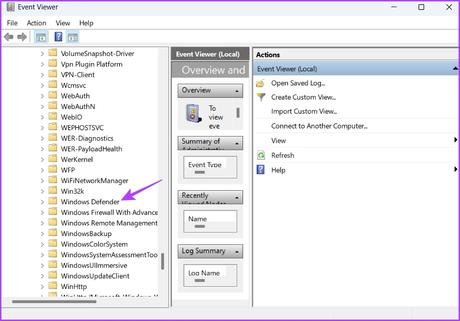
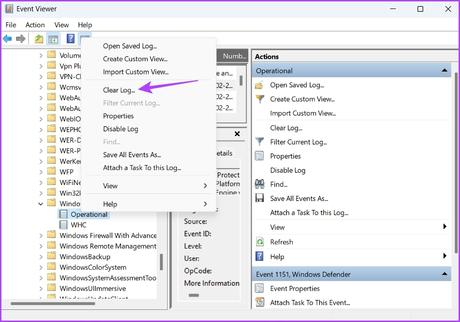
Rather From the context menu, right-click on the Operational log and select Clear log.
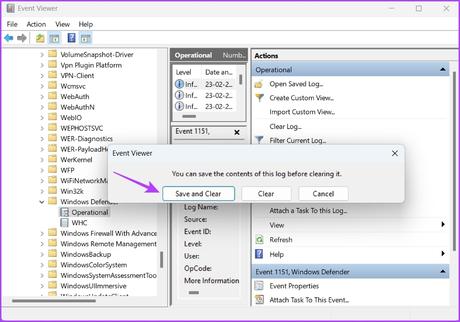
Although In the pop-up confirmation window, select “Save and Clear.”
4. USE WINDOWS POWERSHELL TO CLEAR THE HISTORY OF WINDOWS DEFENDER PROTECTION:
A command-line tool called Windows PowerShell can be used to manage software, fix computer problems, and much more. On Windows 11, you can also use it to delete the Windows Defender Protection History log. This is how:
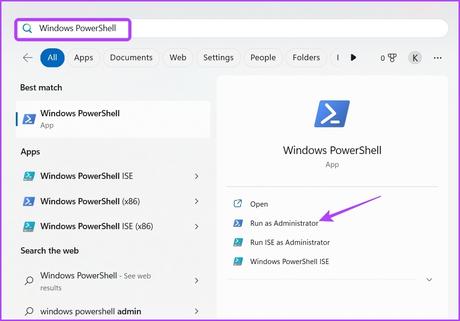
Then Open the Start Menu and type Windows PowerShell in the search box. Then, in the right pane, select Run as administrator.
Read more: How to Locate Wi-Fi Passwords in Windows
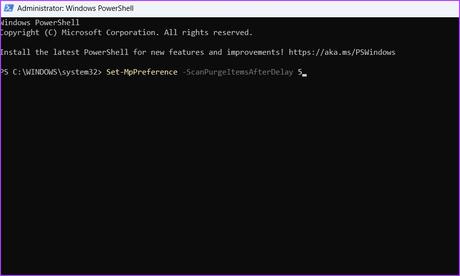
Type the following command and hit Enter in the elevated PowerShell window. The number of days after which you wish the Protection History log to be automatically erased should be substituted for Days in the command. For illustration, we’ve selected 5 days.
Although Configure-MpPreference -ScanPurgeItemsAfterDelayDays
