
(source)
This Sunday is Mother's Day here in the UK. I'm not sure why they choose to have it a couple of months earlier than they have it everywhere else, but I am sure there is a good reason for it. In any case I have a lovely variety of beautiful baked goodies to show you today from the people at Dr Oetker, guaranteed to make any mom happy. I know I would be thrilled to pieces if one of my babies showed up with one of these!
First up some really pretty Vanilla Petal Cookies . . . . little shortbread biscuits, shaped like little flowers and decorated with a variety of coloured icings and some very sweet looking wafer daisies! I love the Dr Oetker Wafer Daisy decorations.
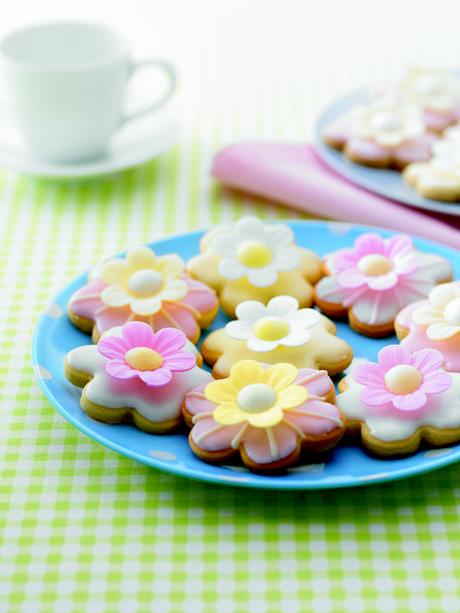
*Vanilla Petal Cookies*Makes 40 cookiesPrintable Recipe
Pretty little vanilla shortbread like cookies iced and decorated with edible wafer daisies.
125g (4 1/2oz) unsalted butter, softened
125g (4 1/2oz) caster sugar1 large free range egg yolk3/4 tsp Dr Oetker Madagascan Vanilla Extract250g of plain flour1 1/2 tsp Dr Oetker Baking powder1 sachet of Dr Oetker Egg White Powder (the equivalent of 1 egg white)275g of icing sugarDr Oetker bright red gel food colouringR Oetker Bright Yellow gel food colouring
To decorate:Dr Oetker Wafer Daisies
Line two large baking trays with baking parchment. Put the butter and caster sugar into a bowl and whisk until pale and creamy. Whisk in the egg yolk and 1/2 tsp vanilla extract. Sieve over the flour and baking powder and carefully mix together to create a mixture that resembles crumble topping. Using your hands, bring the mixture together to form a firm dough. Turn onto a lightly floured surface and knead until smooth and pliable. Divide the mixture in half and roll out to a thickness no greater than 1/4 inch. Using a 3 1/4 inch petal cutter, stamp out aprrosimately 20 cookies, re-rolling the dough as necessary. Arrange on one of the prepared baking tras. Prick lightly with a fork and chill for 1 hour. (At this time you can either wrap and freeze the remaining dough for up to six months to use at a later time, or roll it out as above and make a further 20 cookies. Place on the other baking tray, prick and chill.)
Ten minutes before baking, preheat the oven to 180*C/350*F/ gas mark 4. Bake the cookies for 10 to 12 minutes, until firm and very lightly golden round the edges. Leave to cool on the baking trays for 10 minutes before transferring to a wire rack to cool completely.
To make Royal Icing, make up the egg white powder with 10 tsp of warm water as directed on the packet. Sift the icing sugar into a bowl. Add the remaining vanilla extract and the blended egg white. Carefully combine the wet and dry ingredients together to make a soft and spreadable icing. if too stiff add a few drops of water. If too loose add some more sifted icing sugar, 1 TBS at a time. Beat until smooth and glossy.
Divide the icing between three bowls. Leave one batch white, color another with a few drops of red to make a pastel pink shade, and the other with a few drops of yellow to make a pale yellow icing.
Working with one batch at a time, spoon approximately 2 TBS of the icing into the center and gently spread it to fill, tapping gently to make an even layer and release any air bubbles. Add a little more icing to achieve a smooth well covered surface. Place back on the wire rack whilst you ice the remaining cookies.
The icing will be firm enough to pipe on after about an hour, so if liked, use any remaining icing left in your piping bags to give some extra detail to your cookies. For a firmer set, leave the icing to dry for 4 hours – this icing will not dry out to a crisp but will become more solid the longer it is left to dry. To finish use a small blog of any remaining icing to secure a wafer daisy in the center of each cookie. Leave for a few more minutes until set in place before serving.
I don't know a mother alive who wouldn't be happy to be gifted with a delicious Chocolate Cake such as this fabulous Chocolate Fudge Cake!
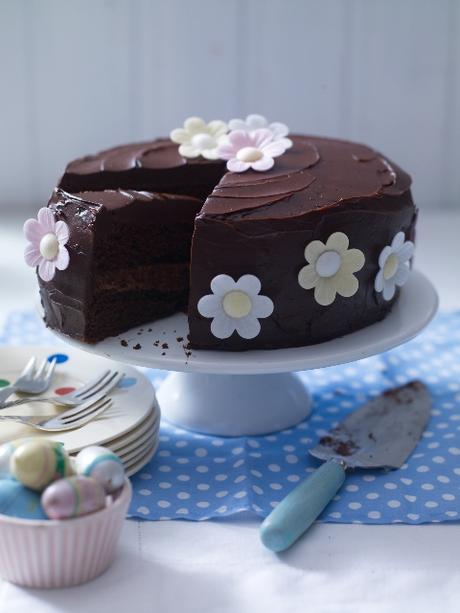
*Chocolate Fudge Cake*Makes one 7 inch double layer cakePrintable Recipe
A moist and fudgy cake with a chocolate buttercream filling and a chocoalte ganache coating, decorated with pretty wafer daisies.
For the cake:150g of butter (10 1/2 TBS)150g light muscovado sugar (3/4 cup, soft light brown)150g plain flour (1 cup plus 2 TBS)40g cocoa powder (1/3 cup plus 1 TBS)2 tsp Dr Oetker Baking powder12 tsp Dr Oetker bicarbonate of soda (baking soda)2 medium free range eggs142g of sour cream (1 cup plus 3 TBS)2 TBS golden syrup1 TBS Dr Oetker Madagascan Vanilla Extract with seedsDr Oetker Wafer Daisies
For the filling100g of butter, softened (7 TBS)200g icing sugar, sifted (1 cup)1 tsp Dr Oetker Madagascan Vanilla Extract with Seeds100g Dr Oetker Fine Cooks Dark Chocolate melted (3 1/2 ounces)
For the Ganache:150ml of double cream150g Dr Oetker Fine Cookd Cark Chocolate (5 1/2 ounces)
Butter and line two 7 inch sandwich tins with baking paper. Preheat the oven to 180*C/350*F/ gas mark 4.
Cream the butter and sugar in a bowl. Sift in the dry ingredients. Whisk together the eggs, sour cream, syrup and vanilla and then beat into the cake mixture. Divide between the tins and bake for 20 to 25 minutes. Cool in the tins, then transfer to a cooling rack.
For the ganache, heat the double cream until hot, but not boiling. Add the chocolate and leave to melt. Stir briefly until smooth and leave to cool.
Whisk all of the filling ingredients together until fluffy and smooth. Sandwich the cakes together with this. Cover the top and sides of the cake with the ganache and decorate with the wafer daisies.
These pretty little Angelic Rose Cupcakes are pleasers with their jam filling and their light as an angel batter. A pink sugar icing and frosted rose petals are the perfect finishing touch.
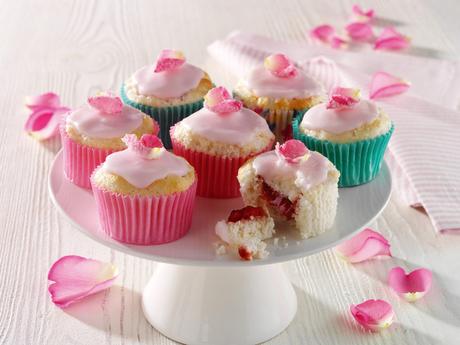
*Angelic Rose Cupcakes*Makes 12Printable Recipe
Pretty in pink angel light cupcakes filled with jam and decorated with sugared rose petals.
12 Dr. Oetker Fun Baking Cases4 sachets Dr Oetker Egg White Powder (1 sachet is the equivalent of 1 egg white)1 sachet (1 tsp) Dr Oetker Cream of Tartar 75g caster sugar (1/3 cup)50g (generous 1///3 cup)1 tsp rose flavour100g reduced sugar Strawberry jam (1/2 cup)
To Decorate:100g icing sugar, sifted (1/2 cup)Dr. Oetker Hot Pink Gel Food Colourfresh rose petals1 sachet of Dr Oetker Egg White Powder (The equivalent of 1 egg white)50g caster sugar (1/4 cup)
Preheat the oven to 180*C/350*F/ gas mark 4. Line a fairy cake tin with 12 fun baking cases.
Make up the egg white powder as directed on the packet. Add the cream of tartar and whisk until stiff. Gradually whisk in the sugar to make a light and fluffy meringue. Add the rose flavor.
Sift and gently fold the flour into the meringue in batches until well combined, trying to keep the mixture as light and fluffy as possible. Spoon the mixture into the baking cases to fill them and bake in the oven for 12 to 15 minutes until risen, lightly golden and springy to the touch. Transfer to a wire rack to cool.
Using a small spoon, scoop out a piece of sponge from the center of each cake and fill with jam. Put the scooped out piece of cake back on top.
To frost the rose petals, make up one sachet of Dr Oetker Egg White powder and lightly whisk. Using a paint brush, lightly brush individual fresh rose petals with the egg white. Shake well to remove any excess egg white, then dip in Caster sugar. leave in a warm, dry place for a few minutes until the petals become dry and crusted with sugar.
To decorate, sift the icing sugar into a bowl. Gradually mix in approximately 1 TBS of warm water to make a smooth spreadable icing. Mix in a few drops of hot pink gel food colouring to make a pretty pastel shade. Carefully spread a little icing over each cake. Allow to set for a few minutes before decorating with sugared rose petals. Your cakes are now ready to serve and enjoy.
I'm quite partial to the flavor of lemon and I think these Violet and Lemon Cupcakes with their lemon curd filling are pretty irresistible!
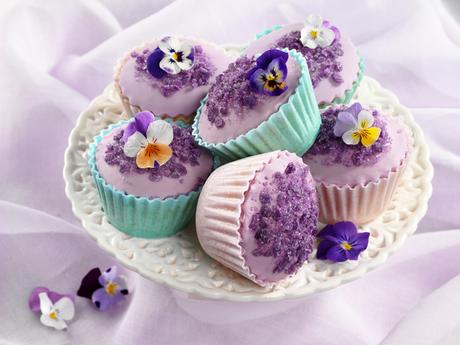
*Violet and Lemon Cupcakes*Makes 6Printable Recipe
Pretty little cupcakes with a lemon curd filling and pretty icing decoration.
6 Dr Oetker Edible Wafer Cupcake Cases65g of baking margarine, softened (1/4 cup)65g of caster sugar (1/3 cup)1 tsp Dr Oetker Sicilian Lemon Natural Extract1 large free range egg, beaten75g of self raising flour (1/2 cup plus 1 TBS)100g of lemon curd (scant 1/2 cup)
To decorate:Icing sugar to dust140g of Dr. Oetker Regal-Ice Ready to Roll White Icing (scant 1/3 pound)Dr Oetker Ultra violet gel food colourDr Oetker Violet CrystalsEdible flowers such as violas (optional)
Preheat the oven to 180*C/350*F/ gas mark 4. Arrange the edible wafer cupcake cases spaced apart on a baking tray.
Put the margarine, sugar, lemon extract and egg into a bowl. Sift the flour on top and beat all the ingredients together using an electric whisk until well blended. Divide the mixture between the cupcake cases. Smooth the tops and bake in the oven for 20 to 22 minutes until risen, lightly golden and just firm to the touch. Transfer to a wire rack to cook completely.
Using a small spoon, scoop out a piece of sponge from the center of each cake and fill with some of the lemon curd. Replace the scooped out cake on top.
To decorate,dust the work surface lightly with icing sugar. Gently knead the regal ice for a few seconds to soften, then flatten slightly and add a few drops of the violet gel food color on top of the icing. Fold the icing over the color to enclose it and carefully knead it into the icing until evenly mixed. Repeat the process, adding more color until you achieve the desirable shade.
Roll out the regal ice thinly. Using a 2 3/4 inch crinkle edged round cutter, cut out six circles, rerolling as necessary. Brush the top of each cake with the remaining lemon curd and stick the icing on top to completely cover the cake. Using your fingertips, gently rub and smooth out the icing over the cake. Brush the tops with a little water and sprinkle with the violet crystals. Decorate with a fresh edible flower if using. You cakes are now ready to serve, enjoy and eat!
These buttery cupcakes in their edible cupcake cases are quite pretty with their coloured swirls to match the cases and wafer daisy toppings. Yep you can eat the case and all!
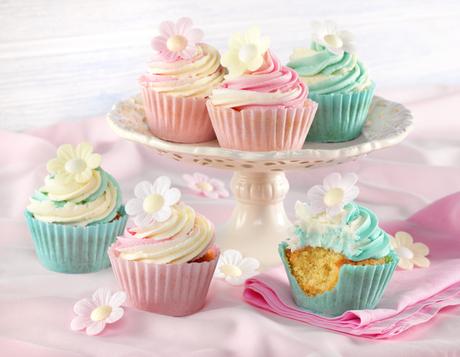
*Edible Cases Cupcakes*Makes 6Printable Recipe
Pretty little things in an edible case.
For the cakes:6 Dr Oetker Edible Wafer Cupcake Cases65g of baking margarine, softened (1.4 cup)65g of caster sugar (1/3 cup)1 tsp Dr Oetker Madagascan Vanilla Natural Vanilla extract1 large free range egg, beaten75g of self raising flour (1/2 cup plus 1 TBS)
To decorate:50g of white vegetable fat, softened (1/4 cup)50g lightly salted butter, softened (1/4 cup)190g of icing sugar (1 1/2 cups)1 tsp Dr Oetker Madagascan Vanilla Natural ExtractDr Oetker Hot Pink and Sky Blue Gell Food coloursDr Oetker wafer daisies
Preheat the oven to 180*C/350*F/ gas mark 4. Arrange the edible wafer cupcake cases spaced apart on a baking tray.
Put the margarine, sugar, vanilla and egg in a bowl. Sift the flour on top and beat all together until well blended using an electric whisk. Divide the mixture between the edible wafer cases. Smooth the tops and bake in the oven for 20 to 22 minutes, until risen and lightly golden, and just firm to the touch. Transfer to a wire rack to cool.
To decorate put the vegetable fat and butter into a bowl and beat until glossy, smooth and pale. Add the vanilla and then gradually sift and beat in the icing sugar until creamy and soft. Spoon a quarter of the icing into a small bowl and spoon another similar amount into another bowl. Add a few drops of the pin color to one bowl, mixing well, adding drops as necessary until the desired color is achieved. Repeat with the other bowl of icing using the blue gel color.
Fit a large piping bag with a large closed star nozzle. Spoon the pink icing into a separate uncut piping bag without a nozzle and half of the uncoloured icing into a third uncut piping bag. Snip the engs off both bags to make a 1/2 inch hole. Flatten the bags slightly and place them side by side in the piping bag with the nozzle. Squeeze both icings evenly down the bag towards the nozzle and twist the end tightly closed.
Starting at the middle of a cake in a pink case, pipe the icing around in an anti clockwise direction to cover the top of the cake and then continue piping round to form a generous swirl on top. Pipe the same way with the other 2 pink cases.
Repeat step 3 with the blue icing and remaining plain icing in separate bags and pipe the icing onto the remaining cakes in the blue cases. Decorate each cake with a wafer daisy. Your cakes are now ready to serve, enjoy and eat!
Finally here is a lovely cake for those who cannot tolerate Gluten! We wouldn't want to leave you out!
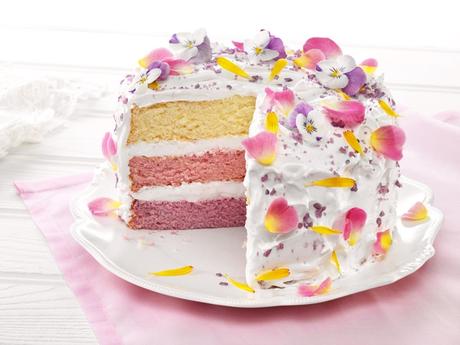
*Rose Feather Sponge*(Gluten Free)Makes one 3 layer 7-inch round cakePrintable Recipe
A beautiful option for those who are on a gluten free diet.
For the cakes:Dr Oetker Cake Release spray6 large free range eggs, separated100g of caster sugar (1/2 cup)1 tsp Dr Oetker Baking Powder150g of potato flour (5 ounces)1 TBS Dr Oetker Limited Edition Rose FlavourDr Oetker Hot Pink Gel Food ColourDr. Oetker Ultra Violet Gel Food Colour
To decorate:2 sachets of Dr Oetker Free Range Egg White powder (or 2 medium egg whites)250g of Granulated sugar (1 1/4 cups)15g of Dr Oetker Liquid Glucose (1/2 ounce)1/2 tsp salt1 tsp Dr Oetker limited edition Rose FlavourDr Oetker Violet crystalsedible flowers such as rose petals, violas, and calendula petals (optional)
Preheat the oven to 170*C/325*F/ gas mark 3. Lightly spray 3 7-inch round cake tins with cake release spray. Set aside.
Whisk the egg yolks with the caster sugar until pale, thick and creamy. In another bowl, whisk the egg whites to form soft peaks. Sift the potato flour and baking powder on top of the whisked egg yolks and carefully mix together. Add the rose flavor and egg whites, then gently fold into the mixture until well blended.
Spoon one third of the mixture into one of the prepared tins and smooth the top. Divide the remaining batter equally between 2 bowls. Colour one with the pink gel food color (about 25 drops) and the other with the violet gel food color (about 55 drops.) Spoon the coloured mixtures into the other 2 prepared tins, smooth the tops and bake all of the sponges for 20 to 25 minutes until risen, lightly golden and just firm to the touch. Sponge will shrink slightly from the edges of the tins when cooked. Leave to cool for five minutes, then turn onto a wire rack to cool completely.
To decorate make up the egg white powder according to packet instructions in a heat proof bowl. Then whisk until stiff and dry. Set aside. Put the sugar in a saucepan with the liquid glucose, 4 TBS of water and the salt. Heat gently, stirring until dissolved, then reaise the heat an cook until the mixture reaches a temperature of 115*C/240*F on a Candy thermometer. Whilst whisking the egg whites, carefully pour the hot sugar syrup on top. Continue whisking for one to two minutes until the mixture is thick and glossy like meringue. Mix in the Rose flavor.
Place the violet coloured sponge on a serving plate and generously spread with some of the meringue frosting. Top with the pink sponge and repeat. Sit the plain sponge on top and gently press down to make sure all layers are secure. Using a spatula or palette knife generously spread the remaining frosting over the top and side of the sponge. Sprinkle with violet crystals and decorate with edible flowers. Your cake is now ready to serve and enjoy!
Have a lovely weekend!

