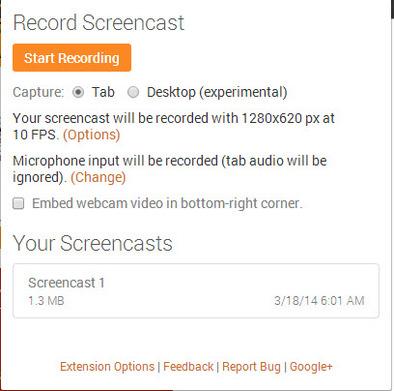
To get started using Screencastify, add it to Chrome first from the Chrome Web Store. Then, click on the extension to get started with your recording. There are a few options from which to choose once you start using this extension:
 As you can see from the image above, you can record just the tab in which you are currently browsing or you can record your entire desktop and switch from tab to tab. However, the desktop option does not allow you to pull up windows from another browser during recording; you'll see that you did while recording but it won't show up in the actual screencast (and you'll be talking about something people can't see on screen, which is always a little awkward).
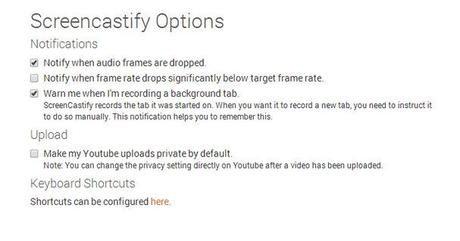
 You can record in different tabs; however, as you can see in the Screencastify options pictured below, you have to manually tell Screencastify that you want to record in a new tab. The default settings for options in Screencastify are shown below.
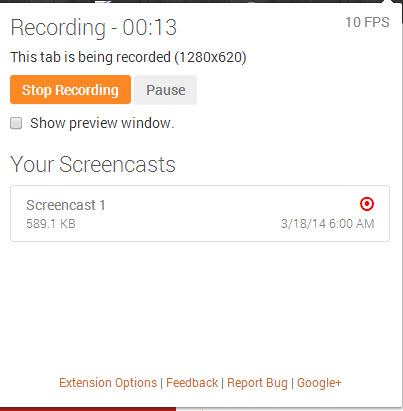
 Whatever screencasts you've recorded are "saved" in a list in the tab itself under "Your Screencasts," so you can always get back to them. However, if you want to get them somewhere where people can actually view them, you have the option of downloaded them to your computer, or of uploading them directly to your Google Drive or straight to YouTube. These options appear directly above the date and time when you hover your mouse over a particular screencast. And speaking of hovering mice, during recording the mouse arrow is embiggened for better viewing, and a red circle appears around the mouse arrow whenever you click on something. When I was screencasting for my students, they often said they didn't know where my mouse was when I was clicking away on screen; this feature in Screencastify makes it easy to see where you're moving your mouse.
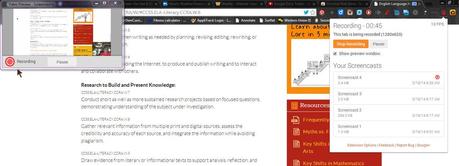
But the option I nerded out about the most was the "Embed webcam video in the bottom-right corner" option. This records you, the speaker and creator of said video, whilst you are creating the screencast, and shows you in all your wondrous glory in the bottom-right corner of the screen in the final product. However, you don't get to see yourself during the actual recording unless you check the "Preview window" option that appears after you start recording. Once this is checked, you will see a small window appear that will show you what your screencast looks like as you record it as well as what you look like in the embedded webcam video.
 Check "Show preview window" to see what's really happening during recording.
  Screencastify with the preview window showing during recording. I think this is a fantastic Chrome extension for screencasting, and something that students can easily use to record evidence of their understanding. This would also be a great tool for teachers, in case they wanted to screencast directions, an overview of a website, or if they wanted to screencast some of their instruction in a flipped classroom sort of way. If you have a Chromebook and are searching for a good way to do screencasting, I think Screencastify is your best bet. If you know of any other good screencasting apps for Chrome, please feel free to let us know in the comments.
