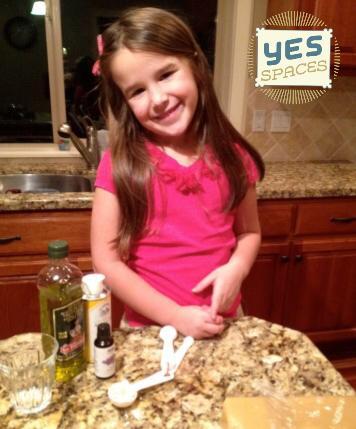
A quick search on Pinterest will net dozens of DIY lip balm recipes, but since this was a project I was doing with my daughter I chose one that would incorporate ingredients that I could pick up at any health food store.Before you read on: I highly recommend this project. Not only were the results what I expected on the first try, it's something that will be easy to customize in the future.
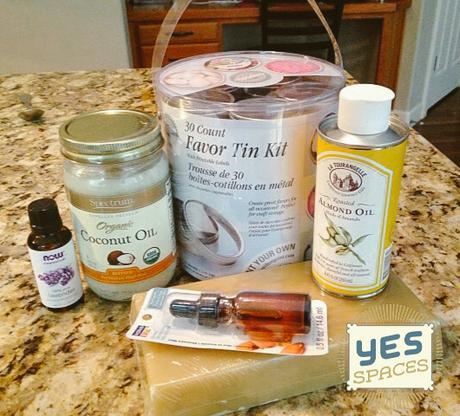
The most difficult ingredient to find was the beeswax. If you're unsure then call around but I found it at Whole Foods and at Michaels. I bought a whole pound for $18, which will make about a thousand cans of lip balm. As a heads up, if you're only planning on one batch you will really only need about a 1/2 cup shredded. I also used coconut oil which is known for its moisturizing ability and health benefits, but it also smells amazing and the combination of the beeswax and coconut give the balm that firm but movable consistency.Per the recipe, vitamin E oil was added and I assume due to its numerous health benefits when it comes to skin, but it's also cheap and easy to find (I had some in my cabinet already).As far as the other oils, I chose almond oil, lavender and honey because I had them in my house and I love (love) lavender! We've also always been a fan of Burts Bees lip balm and I thought I would try to emulate that flavor, especially because it would give me a comparison on how close this project comes to the real thing. The next time I do this I may try tea tree and peppermint!
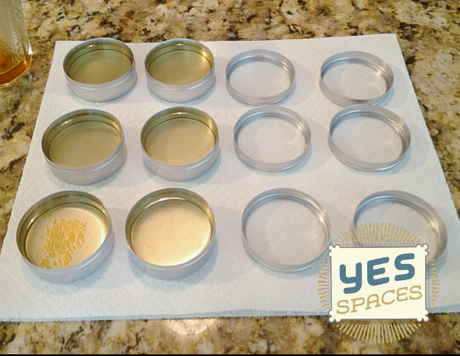
Lastly, don't forget to buy some containers for your lip balm. I've seen people use empty Altoid containers, but since I didn't have any, I bought a canister of 30 small metal containers from Michaels for $19.99 (before the coupon, of course). You'll find them in the wedding party favor section. The recipe below made about 12 containers of the 30 I bought. It was a little more than we really needed/wanted, but I literally have about 500 tins worth of ingredients with the supplies I have now (in the coconut oil and beeswax), so cost-wise, the main expense will be the additional oils and containers.

1/2 cup shaved beeswax (you can use a cheese grater or a knife, but be careful, this was by far the hardest part of the project)
3/4 cups coconut oil
1 tsp vitamin E oil
1 tsp of Honey or,
1 tsp of sweet almond oil (optional, this can be an allergen for some so exclude if you're giving as gifts)
1 tsp Olive Oil
If you choose to add essential oils, you will only need several drops based on how potent you want the balm to be.
Step 1: Melt the beeswax and coconut oil together.
To avoid burning the beeswax, melt it using a double boiler system. If you don't have a double boiler, you'll need a pot and a metal bowl that fits over it. Put 2-3 inches of water in the pot and turn on the heat (make sure there's room for the bowl to sit without touching the water). Put your beeswax into the bowl and place it over the pot once the water is boiling. Add the coconut oil to the beeswax and stir until melted, and remove from the boiling water pot. Now add your vitamin E oil and optional oils/flavors and mix in while still hot. Pour into your container of choice, and let cool.
It will take about 2 hours for it to cool to a balmy consistency, and it will be white with a tinge of yellow.

If you like your lip balm softer - use more coconut oil. If you like it firmer, use more beeswax. If you don't use enough beeswax it will result in a semi-clumpy consistency. Don't worry though - it'll still be effective and some people prefer a lip balm that is easier to 'scoop.' Have fun with it!
If you choose to add honey, you'll notice that the honey is heavier than the oil so it collects at the bottom. The solution seemed to be to fill the containers almost to the top, then let them cool a little, then heat up the remaining oil/honey and drizzle it on the top. It gives it a sweet smell and taste. This step is optional, but I liked the result.
Have fun with it! Adding some of your favorite lipstick will tint your lip balm. If you wanted to make it sparkle, you could also add sprinkles on top, or visit your local cake decorating store for additional decorations, like sprinkles on top for a birthday party of a holiday theme.
Remember, this lip balm will keep your lips very moist but it does not have any UVA/UVB protection, so if you're going to a very sunny climate make sure to double-up. And, while the lip balm will not go 'rotten' you should try to use it as it will go stale after a couple months. Experiment with it, but this is also totally effective cuticle cream!
Labels: If you are the creative type, or have lots of time on your hands you can design/print and affix some really cute labels on your lip balm and include them in teacher gifts, new neighbor gifts, party favors, and other fun events and occasions. You can add ribbons to the tins or include them in a gift basket!
So much fun, for me, my daughter and we'll definitely be doing this again.
Amanda

