Collections
Now that you’ve made a set and a template, you’re ready to start thinking about organizing your sets and favorite items into collections. A collection allows you to put both sets and items together onto a page. You can have a description for your collection, as well as a slideshow option.
Why should I make a collection?
- Collections are awesome for organizing your sets and favorite items.
- You can label collections by certain themes.
- Both your own sets and items as well as others from the Polyvore community can be included in your collection.
- You could showcase your fan’s sets that includes your products in a collection of yours
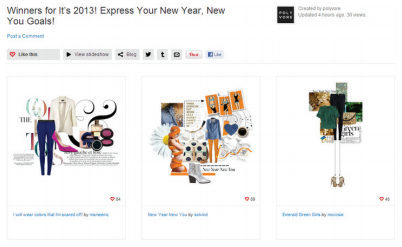
A collection by Polyvore composed of sets ↓
How to Create a Collection
Step 1
Move your curser over the “Create link at the top of the homepage of Polyvore.

Step 2
You will see a drop-down menu. Click “Collection.” You will be directed to the set application.
Step 3
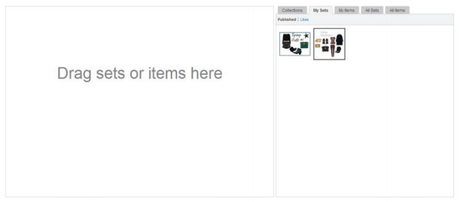
Your sets will appear under the tab “My Sets” as seen above. You can drag them to the collection and drop them
as you would on a set.
- The other tabs to choose from are:
- Collections (your collections)
- My Items
- All Sets (other member’s sets)
- All Items
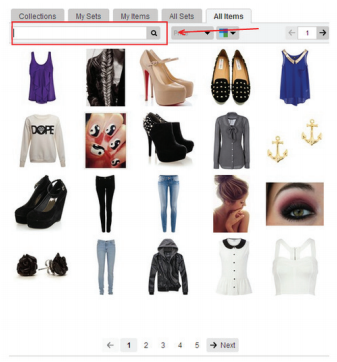
You can browse “All Items” as you would on a set as well, just without the categories. You can browse the items shown
initially or do your own search in the search bar.
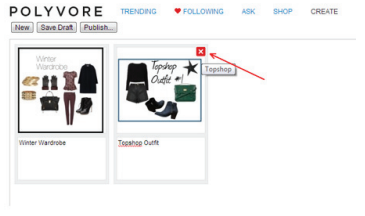
*NOTE: To delete a set or item from your collection, simply highlight the unwanted item and an “x” outlined in a red square will appear in the right hand corner of the image.
Step 4
If you’re having troubles inserting items or sets into the canvas (see Glossary), refer to Chapter 4.
- You can add descriptions of the images you put on the canvas.
Step 5
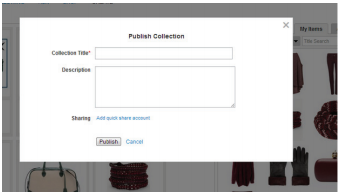
Once you are satisfied with the collection, press “Publish.”

Step 6
A pop-up box will appear, and you will be prompted to fill in the name of the collection.
The option to making a description and enable sharing is available. Click “Add quick share account” to connect to social networks like with sharing your set.
Check out “Polyvore Guide for Retailers & Brands: Templates”
