What is The Clipper Tool?
The “clipper tool” is the tool that allows you to import your products from your website to Polyvore. People including
yourself, your business, and your fans can put your products into their fashion collages.
Polyvore users help spread the reach of your brand by including your products in their sets and collections.
Installing the Clipper
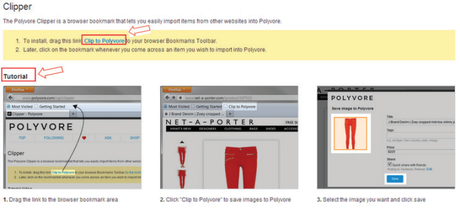
1. to install the clipper, click here. you will see the link in blue near the top of the page.
2. simply drag the link onto a space on your browser’s bookmarks toolbar.
3. it will appear like this:


That’s how easy it is to install!
Now, let’s get clipping.
Clipping your items to Polyvore
Step 1
First, go to your website.
Step 2
Then, navigate to the page with your desired products on it (ex. Shop, Women, Dresses, etc).
Step 3
Once you are on the correct page, click the “Clip to Polyvore” Clipper Tool.
Step 4
A pop-up box will appear with products and certain areas to input text. You can either upload many products at once, or one a time. You have the option to add a Title, Tags or Price to the items. Although remember if you are submitting them in bulk, the Title, Tags, and Price will all be marked the same.
Step 5
Fill in the areas you find applicable to your products and click save.
*NOTE: Do not “clip” products or images that you don’t want other
people to use. All images are open for anyone on Polyvore to use. An
image can’t be deleted off Polyvore once it has been clipped.
Check Out “Polyvore Guide for Brands & Retailers”
