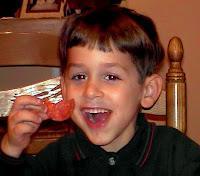
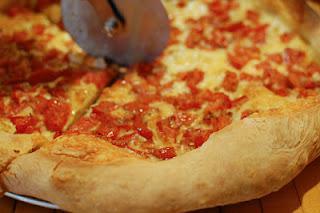
 Additional deliberations ensue as to the method of consumption: knife-and-fork versus hand-to-mouth, folding versus flat, and the on-going cold-for-breakfast debate which rages perpetually in our house as Dom and Nic think it is absolute bliss (and will attempt varying methods to outmaneuver one another for the last sliver) while Sonny and I find it disgusting and offensive to the olfactory nerves prior to the noon hour.
 Lately we have noticed a renaissance in the trend to “improve” the pizza experience. New no-knead dough recipes, upside-down deep dish pans, and grilling domes are among the latest fads. Sur la Table is currently featuring a new pizza cone set complete with dough shape cutter, edge crimper and baking cones. Pizza cones? Really? The proportions would be all wrong, too much goopy product at the top and all dough at the bottom. Why mess with a good thing? If it isn’t broken, don’t fix it!
What is wrong with regular pizza? While we have been known, on occasion, to stray from the basic Italian ingredients (salad shrimp, red onion and smoked gouda/gyro meat, feta and olives), generally pizza in our house consists of a basic pizza crust, pomodoro sauce and standard toppings. Pizza has never been a vehicle for other meals. If we want tacos, we make tacos; not taco pizza. The same is true for cheeseburgers, barbeque, and kung pao chicken.
We have been making pizza for over 20 years using the same now-memorized dough recipe with simple fresh ingredients. We make the dough in the morning or early afternoon, punch it down after an hour or two and it is ready for dinner. When the weather is cold and fresh veggies are few, perhaps a pie with sliced potatoes, a little bacon and cheese will suffice. When the weather is warm, cooking the pizza on the grill keeps the house cool. When there are fresh peppers in the garden, those are tossed on the top with some pomodoro sauce and a smattering of Parmesan for Dom’s childhood favorite Brier Hill-style pizza.
Pizza night should be fun and relaxing; not a stressful event. Do as much as you can ahead like chopping veggies, slicing pepperoni, and grating cheeses. And, don’t worry about the flour on the floor, you can vacuum tomorrow.
Need to Knead Dough
1 cup warm water (110-115 degrees)
1 tablespoon active dry yeast (or one packet)
1 teaspoon sugar
4 cups bread flour (all-purpose works just fine too)
1 teaspoon salt
Add sugar to the warm water to dissolve. Water should be warm to the touch; not hot. Hot water will “kill the yeast.” Add the yeast to the sugar water to proof. If the yeast does not start to bubble within five minutes, discard the yeast and start over with cooler water.
Mix together dry ingredients and add slowly to yeast mixture. Knead dough until smooth and elastic before transferring to a greased bowl and cover with plastic wrap. If you have a Kitchen Aid or other stand mixer with a dough hook, let the dough “knead” in the machine for 3-5 minutes. However, don’t underestimate the therapeutic power of kneading. It can be a very cathartic activity.
“Wetter” dough is better, so add more water as needed to get a moist consistency. The dough should not be sticky to the touch but should not be too firm or dense either. It should feel like touching a baby’s cheek.
 Let the dough rise for at least one hour or until the dough doubles in size. If you are making the dough well in advance, punch the dough down by removing plastic wrap and “poking” the dough with all five fingers of one hand several times. Replace the plastic wrap and let dough rise again until ready to use.
Preheat oven to 500 degrees F. When you are ready to use the dough, roll into your pizza shape by rolling and stretching and then let it rest for 10 minutes or so.
At this point you can cook the dough as flat bread by placing it on a pizza stone in your oven or on your grill and browning both sides. When done, brush the pizza with olive oil and sprinkle with coarse sea salt.
If using toppings, spoon cooled sauce on the dough and gently spread across the pie and add a light layer of toppings over the top. If you are cooking your pizza on a stone rather than a pizza pan, use a peel (a big firm piece of cardboard works well also,) to slide the pizza onto your pizza stone.
Cook for about 10 minutes and then check the bottom of the crust to be sure that it is not getting too brown. Add any additional toppings, fresh basil and cheeses at this time, and cook until toppings are bubbling and crust is toasty brown. Remove pie from oven and allow to cool for 5 minutes or so before cutting. Why? If you cut it immediately after removing from the oven, all your sauce, toppings and sauce will slide right off and onto your pan, making serving it a royal pain in the backside.
Romeo Secret: You may have noticed that there is no oil in our pizza dough. This keeps it from burning in the oven as easily. If you plan to cook your dough on the grill (like we do in the summer,) you will want to add ½ cup of olive oil to the yeast water mixture before you add the dry ingredients to form your dough.

