Recently a friend told me she had made yogurt and was in love with the taste and texture. She had made her batch using the oven light to keep the yogurt incubate the cultures overnight. Brilliant. Dom eats the small fruit-on-the-bottom cups of yogurt for breakfast each day and I like to use yogurt in smoothies; that’s a whole bunch of little yogurt cups… So I got online, did a little research and decided to try my own.
Here’s what I learned:
- You can use any type of milk (unpasteurized, whole, 2%, skim or nonfat dry milk) with the exception of ultra-pasteurized.
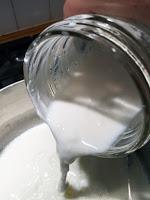
- The milk is heated to 180° Fahrenheit to kill off any wild bacteria, yeast or mold spores that would compete with your yogurt cultures and denature proteins in the milk to bind with caseins to create a firmer, thicker yogurt curd.
- The heated milk should be held at 180°F for 30 minutes. This is the most important step in creating the creamy consistency and texture you want for your yogurt. I did this by keeping it in an oven pre-heated to 180° F.
- Allow the milk to cool to 115°F since this is the ideal temperature at which yogurt cultures reproduce.
- Skim the ‘skin’ from the surface of the cooled milk. This step is actually optional but most people dislike the texture it adds to the finished product.
- When the milk has cooled to the proper temperature, stir in your yogurt culture. You can use a powdered culture for a particular strain or a high quality commercial yogurt that has “live active cultures.” Add roughly 1 tablespoon of starter for each quart of milk (1/4 cup of yogurt for a gallon of milk).
- Pour your yogurt into glass jars you wish to store the yogurt in.
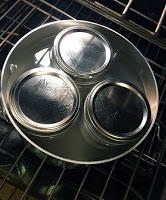
- Maintain the temperature of the jars between 100° and 115° for 5 to 10 hours. To accomplish this, I allowed the oven to cool with the door open while the milk was cooling (remember I left the milk in the oven at 180°F for 30 minutes), then I placed the jars in a pot of water that was 115°F. I placed the pot in the oven with the oven light on and left the pot in the oven overnight.
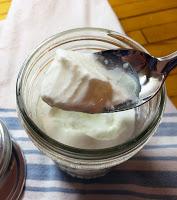
- You can test the yogurt at any point by tasting it. It should have the consistency of panna cotta, showing a nice separation when you dip into it with a spoon. Out of curiosity, I tested the mixture at the 3-hour point. A more solid mass was developing at the center, but the yogurt was still very loose. At the 10-hour mark, the yogurt was fully developed.
- The finished yogurt will have likely have a watery liquid that rises to the surface. This is milk whey which can either be stirred back into the yogurt or can be drained for a thicker finished product. Add the whey to your favorite smoothie recipe.
- If you like your yogurt even thicker, you can strain it further to make a Greek-style yogurt by carefully scooping the set yogurt, being careful not to break up the curds, into a colander lined with cheesecloth. Allow the yogurt to drain over a dish until it reaches the consistency you prefer.
- Refrigerate for at least two hours to allow the yogurt to set completely. It will continue to thicken and achieve that stark white opaqueness you are looking for.
- Don’t forget to set aside enough yogurt as starter for your next batch of homemade yogurt!
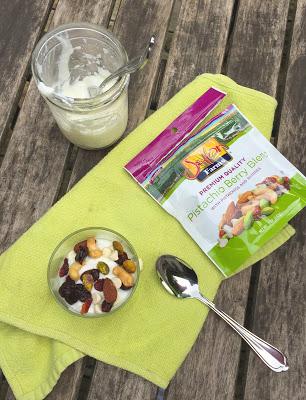
The newly made yogurt was begging to be eaten which provided me the perfect opportunity to try Setton International Foods new Pistachio Berry Blend made with tart cherries and cranberries, roasted almonds, cashews, and of course, pistachios. A match made in heaven! The dreamy, creamy yogurt, crunchy nuts and chewy berries will most definitely be my new breakfast addiction.
While we received a complimentary sample from Setton International Foods, Inc., all opinions are honest and unsolicited.

