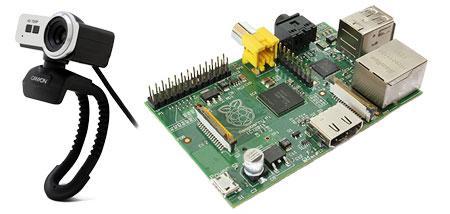
If you have a Raspberry Pi and a compatible USB webcam, you can easily create a live online feed over HTTP. In other words, you can use your cam connected to your Pi to stream a live feed of anything you want over the Internet. You can use it for surveillance of your house or yard, to see what your dog is doing while you’re away, to watch the birds in a birdhouse or who knows what else you might come up with.
The software that we are going to use to transmit the video stream is called MJPG-streamer. It was written by Tom Stoeveken and is available at sourceforge.net:
- MJPG-streamer project page
- MJPG-streamer wiki page
MJPG-streamer acts as a small HTTP server installed on the Raspberry Pi, transmitting the video feed captured using the webcam over HTTP, in motion jpeg format. To view the feed, you can just open a web browser and type the address (IP or domain name) of your Raspberry Pi and the port number associated with MJPG-streamer. What’s really great about MJPG-streamer is that you can easily embed the feed into any webpage by using a simple IMG tag, as we will see a bit later.
Installation, configuration, testing
1. Connect the webcam to the Raspberry Pi via USB.
A list of compatible webcams can be found here, so if you plan to buy a new one, verify that it’s on the list. If you have one laying around, give it a try even if it’s not listed as compatible. I’ve personally tried 3 webcams, none of them being on the list and all of them have worked.
To verify that your webcam is recognized by the Pi, just plug it in and check that the /dev/video0 entry is present in the system:
ls dev/video0
2. Make sure your system is up to date:
apt-get update
apt-get upgrade
3. Install the libv41-0 package on the Pi:
apt-get install libv41-0
4. Download the mjpg-streamer package onto the Raspberry Pi. I have put together a custom package which should work well on the Pi (Please note that MJPG-streamer is the work of Tom Stoeveken and the start-up script originates from HowToEmbed.com, I have merely customized and enhanced the package in order to optimize it for the Raspberry Pi and to make it easy to use for our purposes):
wget http://iqjar.com/download/jar/soft/mjpg-streamer.tar.gz
5. Unpack the package:
tar -zxvf mjpg-streamer-rpi.tar.gz
6. Change into the newly created mjpg-streamer directory:
cd mjpg-streamer
7. Start the server application:
./mjpg-streamer.sh start
8. Test the live feed:
Open a web browser and in the address bar type the address of your Raspberry Pi and the port number associated with the mjpg-streamer server:
http://example.com:8083/?action=stream
(mjpg-streamer will start on port 8083 by default)
You should now see a live feed from your webcam in a web browser. If you want to embed this feed into a web page, just put this into the HTML code:
<img src=”http://example.com:8083/?action=stream” width=”640″ height=”480″/>
Simple and nice! Obviously you can change the width and height parameters, but you should make sure that they are not more than the actual resolution of the feed.
When you start mjpg-streamer, it is possible to tell it which port to listen to, what resolution and what frame rate to use. The syntax of the start-up script looks like this:
mjpg-streamer.sh [start|stop|restart|status] [port number] [resolution] [framerate]
That’s pretty much it! Start the feed, open it in a browser, sit back and enjoy!


