The moment of instant panic begins when you have plugged in your laptop but it is not charging. It has happened to us multiple times too and it can be frustrating.
Hence, we have tried out multiple tricks to solve this problem and it surprisingly worked every time. So, to help you out as well, we have created a list of every tip in the book that you can try out as well.
It does not matter which laptop you are using, it could be anything. Whether it is your MacBook or any Windows laptop, simply follow the methods that we have tried on all these systems to make sure it works for you as well.
Let us look at all the things we can try to solve the issue.
Laptop Plugged In But Not Charging? 8 Tips to Solve Your Issue
1. Check all the Wires and Connections
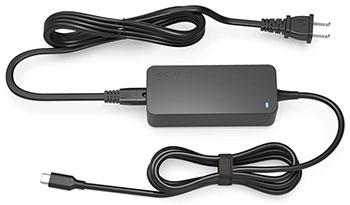
The first method you should try is simply checking the cables and the connections to your laptop.
Make sure that you have properly inserted the cable in your Windows laptop and that no wires are loose from that end.
If you are using an Apple laptop with a magnetic cable, there are times when the connection gets loose. Hence try reversing the point and insert it again. Similarly, you can try checking the wire from the adapter.
Every laptop has a charger cable with an adapter that can be removed from its source so that it can be packed easily when needed. Now, there could be a chance that the connections are loose and you need to tighten them.
Lastly, make sure the charger plug is properly inserted in the main socket at your home or office and the plug is switched on.
2. Is your Charger Compatible with your Laptop?
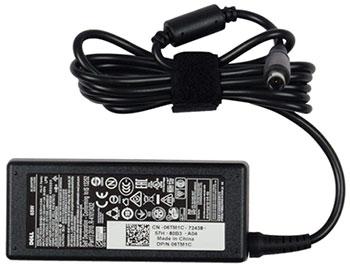
Next, you need to check whether or not the charger you are using is good for your laptop or not?
There are multiple times when people simply use non-compatible chargers for their laptops because either they have lost their original and switch to something cheaper, or else they had a spare one with them.
It is always recommended to use the original charger meant for your laptop. These chargers are built only for your laptop that knows the right voltage it requires and charges accordingly.
If you are using a third-party charger that is meant for fast charging but your laptop does not support it, this will not work for a long time and hence it will stop charging ultimately.
3. Try using your Laptop without the Battery
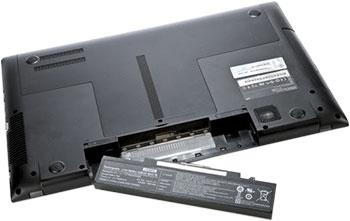
Well, it is possible that many of you were not aware that you can use your laptop without a battery.
It does not make sense at first, but of course, you will need to connect it to a power source. Simply remove the battery and plugin the charger.
Now, here we have to test whether your battery is the issuer of the charger. Once you remove the battery which is pretty to work out, you can try plugging in the charger to your laptop and try starting the system.
If it works and everything looks normal as it should, then the problem could be with your battery. Or else if this method does not work, it could either be the charger or the socket in your laptop that needs to be checked.
4. Damaged Ports? Get it Checked
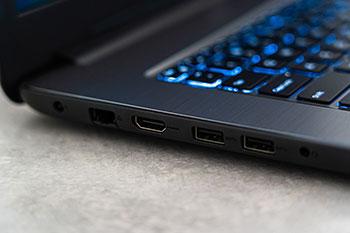
Have you ever thought about the fact that the ports in your laptop could be damaged?
It is a major reason, especially with MacBook users that the ports have dirt on them or have been damaged and hence the laptop fails to charge.
Now, the ports could be anything It could be the main socket board that seems damaged or it could be your laptop.
Sometimes, old Windows laptops experience multiple wears and tear over the years and the ports simply are no more in the best condition to work.
If you are unable to check these ports and make out what’s wrong. You can always take them to a service center and get them checked out.
5. Reduce the Usage of Power-Hungry Programs
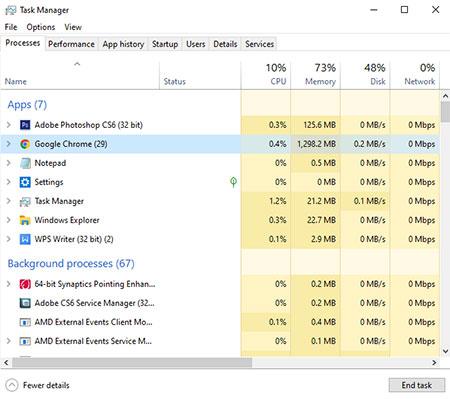
Your system consists of both hardware and software.
While we are evidently all focused on the hardware issues, it could easily be because of multiple software on your system that is stopping your system from working on its basic activities.
Your laptop is constantly running power-hungry programs such as Google Chrome that eats up a lot of your resources when used for longer hours.
This in turn takes up all the energy your laptop has left and makes the system extremely hot. Hence, your system could simply restrict the charging capability which can make the system even hotter.
If this is something you feel might be the issue, it is time to force quit these apps from Windows Task Manager (Ctrl + Shift + Esc), or from your MacBooks.
6. Check for Driver Updates
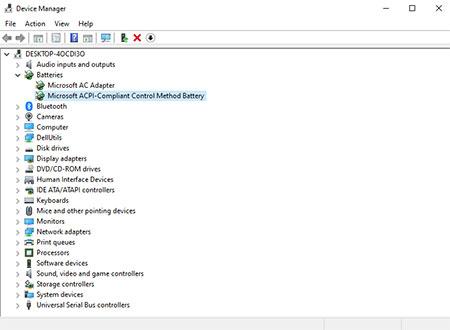
You might be aware that Windows laptop has a Device Manager that consists of all the info you can get about the hardware in your device.
Well, you can choose to update them, uninstall, or even reinstall them when needed.
Even after trying all the steps, you feel that nothing seems to be working, this is the best way you can choose to go.
All you need to do is open the Device Manager on your laptop and update the drivers under the battery sections. Here is how you can do it.
- Click on Win + X to open Start Menu.
- Now, look for Device Manager and click on it.
- Scroll down and tap on the Batteries section.
- Select the battery option from the drop-down menu and choose to update the Drivers.
If this does not work, you can also download the latest driver update from the internet and add them manually here.
7. Check Power Options
Windows laptops have a particular option where you can choose the sleep and display settings for your system. Here you can either go with the plan that has already been selected for you based on your usage and charging activities. Or else you can make your plan settings.
Now, for this, you can follow the steps mentioned.
- Open Settings on your Windows laptop.
- Now, go to System and choose Power & Sleep
- Next, click on Additional power settings.
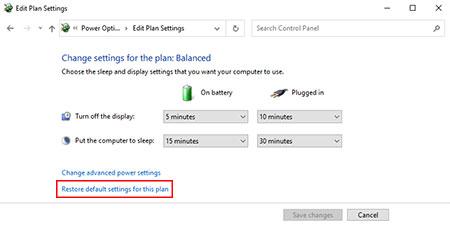
Once you open this, you can change your plan settings and go to “Restore default settings for this plan”.
This will ensure that all your previous custom plan is restored back to the one that did work.
You can now try connecting your laptop to the charger and see if it works.
8. Get a New Charger Now
There is no point in trying anything if your charger is the main culprit here. Imagine trying all the complicated methods and ultimately it was your charger that is fried up and will not allow your system to work.
As we had already mentioned before, you only need to use the original charger that you can get from your local yet authorized stores. Do not try buying it from unauthorized stores that act as a service centers. Using third-party chargers might look good and low-cost, but they are not worth it.
Final Verdict
Do these steps work for you? Hopefully, these methods will genuinely help you to charge your laptop whether it is a new one or 5 years old. Make sure to try all of these steps before buying a new charger since the issue could be anything or nothing at all.
We have also made sure that there is nothing complicated that you cannot do by yourself. So, take your time and use all these methods unless one of them works for you.
