Water transfer printing is known by other names such as immersion printing, water marbling, hydro dipping, hydrographic, and many more. It is a method or technique in which a design is applied to 3D objects such as wood, metal, plastic, and other materials. Although the origins of the technique itself are unknown, it is said that the first known piece of machinery that utilized water transfer printing was registered for a US patent in 1982. Outside the technical information, we ask ourselves can we do water transfer printing as an easy DIY project? The simple answer is, yes you can. Today, we'll talk about how it works and what materials you need to get started.
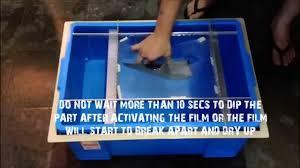
How It WorksAs the name implies, water transfer printing consists of dipping a 3D object into a mixture that contains water and an activator (more on that later). The image is printed on a water-based soluble film. The mixture will allow the printed image to float on the surface of the water. The 3D object is then dipped into the, now floating image, transferring it onto the 3D object. The water pressure of the water mixture, when submerging the object, will aid in adhesion. When transferring is complete, the object is removed from the water mixture and the image will now be affixed onto the object.
MaterialsIf you are to utilize an image, it must be printed on a polyvinyl alcohol hydrographic film. This specific film is used similar to regular printing paper. However, unlike regular paper, this film will maintain your image while its base (film) dissolves into the water mixture (so you don't have to worry about pieces of film flaking off or leaving a residue behind on the object). The next item on the list is a tub or a dipping tank suitable to fit the object or objects that will be used during the process. Now comes the water-activator mix. The activator is essential in hydro dipping because it is the component that allows the image or paint to stick or bond to the object. There are many available brands in the market and instructions in using the chemical may vary. Whichever brand you choose, read the instructions carefully, as too little or too much activator can fail in achieving adhesion. Depending on the type of object being used during the process, it is recommended to apply a clear coat to the object as the last step in completing the process. Other materials may include prepping tools such as sandpaper (if needed), primer, cleaning clothes, gloves, etc.
Whether you are hydro dipping to decorate objects in your home, your vehicle, or on a 3D printed object always adhere to safety precautions. After all, chemicals are being used during the process and you want to make sure that safety comes first. Have fun and get creative with your DIY water transfer printing project.

