Nginx, the most popular open-source, HTTP and reverse proxy server with high-performance, use to handle the load of largest sites on the internet.
We can use Nginx as a web server and as a reverse proxy for another web server like Apache.
If we compare Nginx and Apache, Nginx is capable of handling more number of concurrent connections.
In this tutorial article, we will learn how to install Nginx on Debian 10 Operating System.
Prerequisites
Before starting the Nginx installation process, make sure you have a Debian 10 running system, and a user to log in system with sudo privileges.
You should also make sure the other web server like apache not installed into the system and port 80 and 443 opened from outside.
Nginx install on Debian
To install high performance web server Nginx, you need to follow below steps:
Step 1 – Update repository packages
Before start installation any package we need to update the repository package list by using the following command:
$ sudo apt update
Or
$ sudo apt-get update
Step 2 – Install Nginx
Once the repository list updated, you can install Nginx by using the following command:
$ sudo apt install nginx
Or
$ sudo apt-get install nginx
Step 3 – Verify Nginx Service
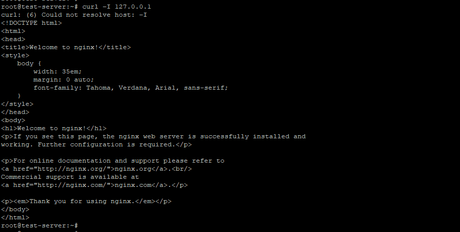
After successful installation of the Nginx web server, it automatically starts the nginx service, which you can verify by using curl command, as shown below:
$ curl –I 127.0.0.1
Step 4 – Configure Firewall for Port 80 and 443
If you are using iptables as your server’s firewall you can use below command to enable http and https port:
$ sudo iptables -A INPUT -p tcp --dport 80 -j ACCEPT
$ sudo iptables -A INPUT -p tcp --dport 443 -j ACCEPT
If you use UFW firewall configuration in your server, you should use below command to enable http and https port:
$ sudo ufw allow 80
$ sudo ufw allow 443
Or
$ sudo ufw allow in “Apache Full”
Nginx Services manage with systemctl
Debian 10 comes with systemctl to manage service; you can manage Nginx service with systemctl like below examples.
To stop the Nginx server, type below command:
$ sudo systemctl stop nginxTo start Nginx server use following command:
$ sudo systemctl start nginxTo restart Nginx server run the below command:
$ sudo systemctl restart nginxYou can reload Nginx server by using the following command:
$ sudo systemctl reload nginxTo disable Nginx service, so it not auto start on system boot, you can use below command:
$ sudo systemctl disable nginxTo re-enable Nginx service again type:
$ sudo systemctl enable nginxNginx important and configuration file structure
- /etc/nginx/ is the main directory of Nginx server, all configuration files are located here.
- /etc/nginx/nginx.conf is the main configuration file of Nginx Server.
- Create new Nginx server block files with extension “.conf” and it is stored into /etc/nginx/sites-available/ directory and making simlink files into /etc/nginx/sites-enabled/ directory.
- Nginx server always read sites configuration from /etc/nginx/sites-enabled/ directories.
- It is recommended to make separate configuration files for each sites to make changes easily.
- Nginx server’s log files saved with name “access.log” and “error.log” are located in the /var/log/nginx/ directory.
- The website files you can store in any location and set the path into configuration files but commounly used webroot directories are below:
/var/www/<site_name>
/var/www/html/<site_name>
/home/<user_name>/<site_name>
/opt/<site_name>
Conclusion
Now you have learned how to install Nginx Web Server on Debian 10. You are ready to deploy any website or application behind Nginx web server.
If You Like What We Do Here On LinuxConcept, You Should Consider:
Stay Connected to: Twitter | Facebook
Subscribe to our email updates: Sign Up Now
We are thankful for your support.
