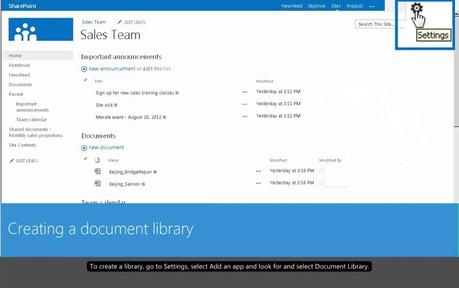
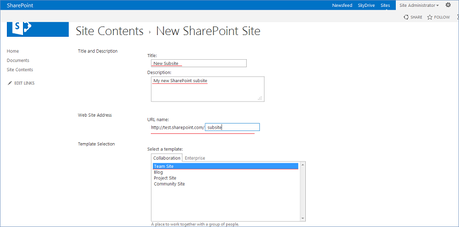
Sharepoint is a program developed by Microsoft which is a perfect entity of browser-based online document management platform. It permits groups to set up a centralized, password-protected environment for document sharing. It is a cloud-based service.
So, if you want to know How to Use Sharepoint then you are in the right place. In this article, we will tell you about the same in easy and simple steps. So, here we go:
What is Sharepoint?
According to Wikipedia,
SharePoint is a web application platform in the Microsoft Office server suite. Launched in 2001, SharePoint combines various functions that are traditionally separate applications: intranet, extranet, content management, document management, personal cloud, enterprise social networking, enterprise search, business intelligence, workflow management, web content management, and an enterprise application store.
Sharepoint can be used for the following purposes:
1: Personal Cloud.
2: Enterprise content and document management.
3: Intranet and corporate social network.
4: Software framework.
How to use Sharepoint?

How to add a file to Sharepoint?
Step #1: As the very first step, you need to log in to your Sharepoint account. The login process is exclusive in terms of the team members and the groups. ?
More particularly, a web address will be provided to you if you are using the free version of Sharepoint.
Once you are equipped with the login path, you need to have the login credentials with you which would be provided to you by your Sharepoint administrator. The login credentials include username and password.
Now, you have to use these in order to log in to Sharepoint. Once you are done with all this then you are good to go to the next steps.
Step #2: This step requires uploading the documents which can be shared among your group members. In order to do so, you have to navigate for the documents section and once found, click on it. After this, you need to click on “Shared Documents”.
Once you are done with the mentioned, now you need to locate for the “Upload” tab which is usually positioned at the top navigation bar. Once found, you have to click on it. This will open a small drop-down menu for you from which you have to choose the “File” option.
Now, search for the desired file in your directories. Once you have found it then you have to select it and then click on the “Open” button which you will be seeing at the bottom of the dialog box.
Additionally, if the file which you have selected is already present in your Sharepoint directory and if you still want to upload it again then make sure to have a check on the checkbox next to which “Overwrite if the document already exists” is written.
Step #3: Now, all that you have to do is to click on “Save”. This will save the document for you. Now, if you will look at your shared document page then you will have the document which you have just uploaded to your Sharepoint directory.
How to create a new document in Sharepoint?

Step #1: Make sure to be logged on to the Sharepoint. Now, you need to click on the “Create” tab and from the follow-up drop-down menu which appears, you need to click on the “Word Document” option.
This will open the editing area for you. Now, create the document by typing the desired input. You can create document types like word, excel, HTML and PowerPoint.
Step #2: The moment you are done creating the document, you need to save the document. You can easily do so by going to the File menu and then clicking on the save button.
Now, you will be prompted to enter the name of the document. So, you are required to do so. This way you just created a document and that document can be seen in your Sharepoint library.
While creating the document, you should be aware of the fact that anyone who has access to the Sharepoint page can view your document. So, make sure not to put in any private data to it as it may be misused.
How to connect to a Sharepoint site?

In this method, we will make use of WebDav in order to achieve our goal to connect to a Sharepoint site. This method works best in Sharepoint 2010.
So, let’s get started:
Step #1: As the first step, you require clicking on the start button and then right-clicking on the “Computer” option. Alternatively, you can also right-click on the “computer” icon at your desktop.
Right-clicking on the computer icon will open a menu for you from which you have to select the “Map network drive” option.
Step #2: In the subsequent window which will appear as a result of your recent activity, you will be prompted to enter your Sharepoint site URL next to the Folder field. Once you have provided the mentioned then you need to click on the “Finish” button.
Step #3: In this step, you will have to enter the Sharepoint credentials in order to link to the SharePoint site. Once you have provided the same then all that you have to do is to click on the “OK” button and this way your Sharepoint site will appear in a new window.
You can access your site by clicking on the computer and you will see your Sharepoint site right there.
Wrapping up.
This wrapping up section brings us to the end of this tutorial cum guide on “How to use Sharepoint?” We hope that we were efficient enough to satisfy your curiosity about this topic.
We firmly believe that we have left no stone unturned while getting into the nitty-gritty of the topic and making you understand the entire concept of it. But if you still have any query regarding using Sharepoint then feel free to drop your query via comments below.
We will try our level best to resolve that.
Moreover, if you found this article helpful and worthy, do show your love by sharing it socially. Thank you for crossing by and giving it a read.

