


Anyone immersed in the Apple ecosystem can readily access iCloud for no extra charge, but there are a few tricks to learn to make the most of it.
Apple's iCloud is not an application, but rather an application suite, one that's directly baked into the framework of nearly all Apple products. It's designed to be a repository of your digital life, a place to store and backup your photos, personal files, and application data so you never lose anything. Despite its slick design and simple execution, however, setting it up for the first time can be a pain. We've put together a guide on how to use iCloud.
Setting up and signing into iCloud
Signing up with iCloud is completely free and simple to do with an Apple ID. Each free account automatically grants you access to 5GB of remote storage - available for backups, mail, app data, documents, and other components stored in the cloud - with 50GB, 200GB, and 2TB storage offerings available at an additional cost.
If your devices are recent, you shouldn't have any issues with compatibility, but we recommended quickly scanning over the minimum requirements to get a better understanding of what will and will not work on your device. Afterward, follow the guidelines for your respective device below.
Setting up iCloud on MacOS
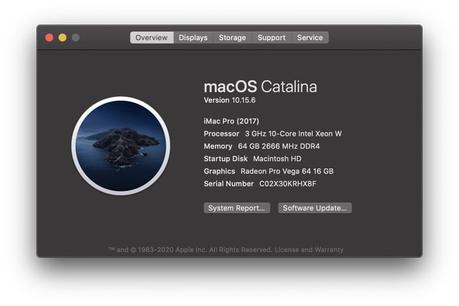
Step 1: Update your Mac (optional) - It's always a good idea to update MacOS prior to setting up a new utility or application on your iMac or MacBook. If you haven't done so already, click the Apple icon in the upper-left corner of the desktop to access the main Apple menu, and select About This Mac. Then, click the Software Update button. The App Store should open up. Head over to the Updates tab, then click on the particular software you wish to update. Or, click Update All in the upper-right corner of the application window to download and install all available updates.
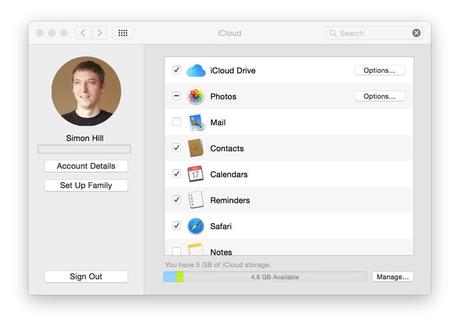
Step 2: Enable iCloud - Once again, click the Apple icon in the upper-left corner of the desktop to access the main Apple menu. Afterward, select System Preferences from the drop-down menu, and choose the iCloud option in the System Preferences panel (the logo is a blue cloud). Enter the Apple ID and password you want to use with iCloud and click the Sign In button directly to the right of the password field when finished. It's also never a bad idea to pop that password into a password manager at this point.

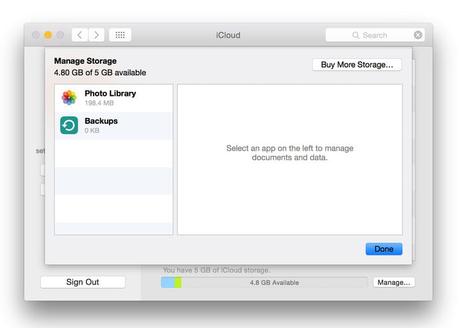
Step 5: Check out optimized storage (optional) - All right, so you're all set up, and you have your iCloud storage, your Apple ID, and your shiny new Mac. If you've been away from the MacOS ecosystem for a while, there'a feature you should know about: It's called Optimized Storage, and it uses your iCloud storage to free up even more hard drive space on your Mac. Check out our full guide on how to get it all set up.
Setting up iCloud on iOS
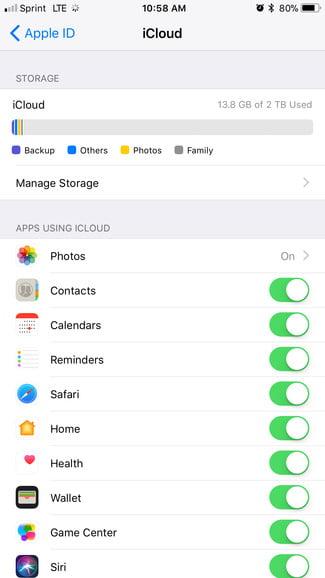
Step 1: Update your iOS device (optional) - It's always a good idea to keep your iOS devices up to date, especially with the release of iOS 13. If you haven't done so already, tap Settings located on your device's home screen, followed by tapping General, then the Software Update option and the resulting Download and Install button. Wait for the latest version of iOS to download and install before proceeding to the next step.
Step 3: Select your iCloud services - iCloud will present you with a list of services. Just toggle the slider directly to the right of the application to choose which ones you'd like to sync across your various devices.

Setting up iCloud on PC
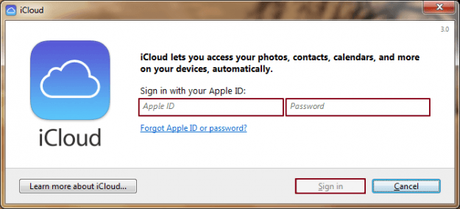
Step 1: Enable iCloud on another device - Apple's iCloud software is designed to work seamlessly with iOS and MacOS. Begin by enabling and setting up iCloud on another device prior to setting up the software on your Windows PC. Luckily, the two tutorials above will help you get started on both your Mac and iOS device.
Step 3: Enable iCloud - Launch the iCloud Control Panel and enter your Apple ID and password corresponding to your previously-registered iCloud account. Click the Sign In button in the bottom-right corner when finished.
Backing up and restoring iOS devices with iCloud
Apple's iCloud may be a terrific way to sync data between your iPhone, iPad, and computer, but the software also offers an effortless way to back up your devices. Backup information includes everything from device settings, like your chosen wallpaper and app organization, to direct purchases from the App Store and text messages.
How to back up to iCloud
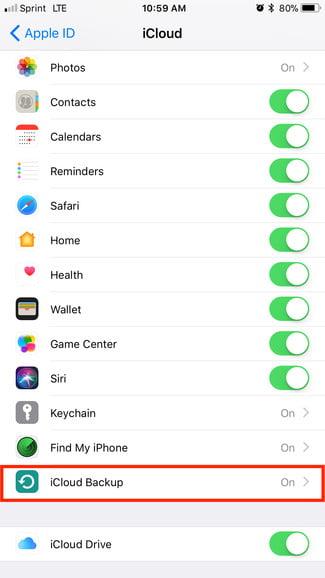
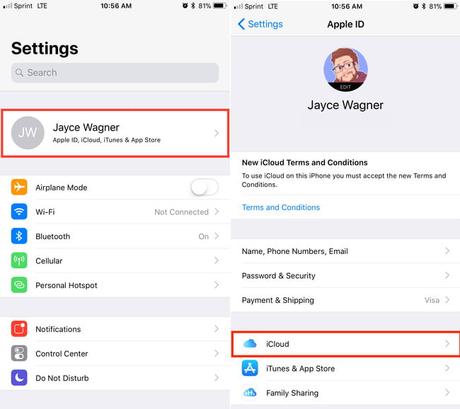
Step 1: Navigate to the iCloud storage settings - Tap Settings > Your Apple ID > iCloud.
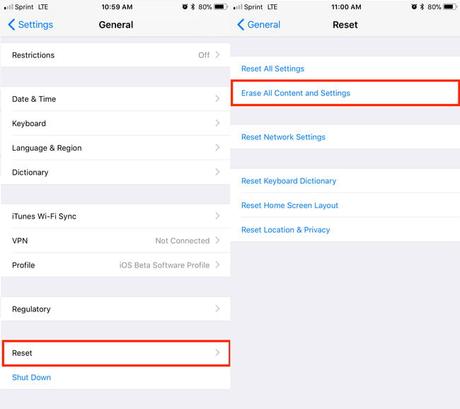
Step 2: Toggle on iCloud Backup - At the bottom of the iCloud page, you'll be able to toggle on the iCloud Backup option to allow the software to automatically back up your camera roll, accounts, documents, and settings when your device is plugged in, locked, and connected to Wi-Fi. Alternatively, tap the Back Up Now option to manually back up your device when connected via Wi-Fi.
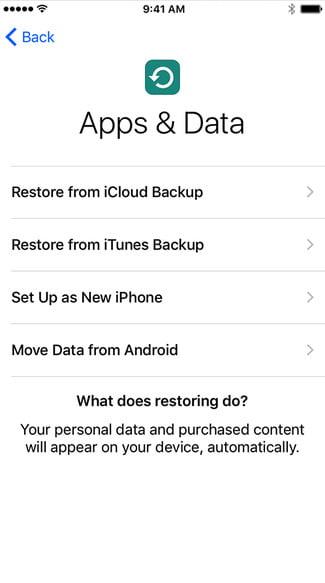
How to restore from iCloud
Step 2: Restore from backup - Once you've begun the initial setup assistant, you'll be prompted to either set up a new device, restore from iCloud, or restore from iTunes. Select Restore from iCloud Backup, enter the Apple ID corresponding to your iCloud account, and tap whichever option you'd like to use. If you choose iCloud backup, you'll see the three most recent backups for each of the devices on which you've enabled iCloud Backup.
Fortunately, your work in restoring the iCloud backup is now complete. The setup assistant will finish the job, and a progress bar will notify you about the download and installation headway. You can double-check that you're connected to Wi-Fi to help speed the process along. After the installation completes, your iPhone or iPad will automatically reset and download the same version of any apps you previously put on your device. Finally, you'll be asked to enter your password. Simply type it in, and everything will be ready for you.
Deleting iCloud backups
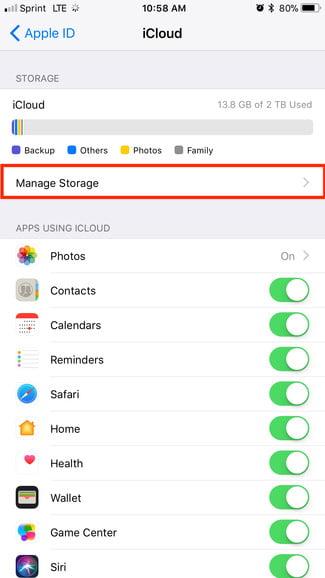
The iCloud is an incredible and independent tool for storing data and syncing information universally across your iOS devices. Despite its usefulness, one downside is that the cloud's 5GB of storage feels pretty limited when you seem to be always backing up an iPhone, iPad, and MacBook using the same iCloud account. To save some space, you can manually delete specific backups directly from your iOS device. This feature is beneficial if the backup is no longer needed, outdated, or you no longer own the device that corresponds with that backup.
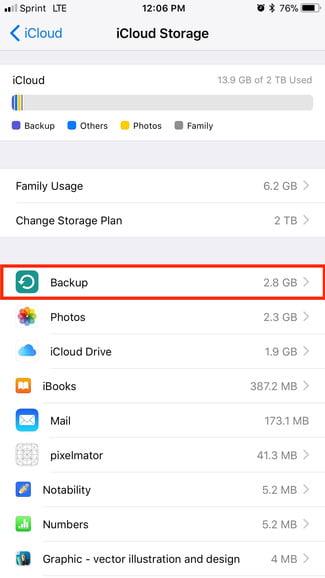
Step 1: Find the backup - Click Settings > Your Apple ID > iCloud > Manage Storage.
Step 2: Delete the backup - Within the Manage Storage page, find Backups. Tap on the backup you no longer want and then, on the next menu, select Delete Backup. Each backup will list helpful information, like its size, its original date, and the device it's from. This way, you won't have any issue identifying your backups. We recommend keeping at least the most recent backup.