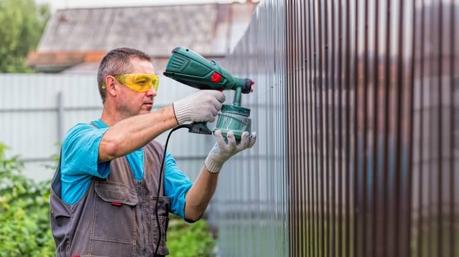
Those who have never used spray paint technology don’t shy away. It hardly takes few minutes to get used to it. In this article, I will be discussing how to use an electric paint sprayer. Then some tips and lastly a short conclusion to clear your doubts.
Let’s begin
Steps to use an electric paint sprayer
An easy way to start working with an electric paint sprayer is to test it on some cardboard or just anything rather than the actual project.
The manual is simple, fill the reservoir with paint, and you are ready to start painting.
Step 1: Paint flow controller
- You’ll find a paint flow control on the side of your unit. Turn that down to speed 2 to start with, and that will project paint out nice and slow and just a small amount at a time.
- After a while, you can change the speed to 4 or 5 if you are comfortable enough to handle it and then work on that cardboard till you can manage speed 10.
- The higher the setting is, it will project out more paint so you can do a larger area quicker.
Step 2: Width
- The paint comes out the very center of the nib on the front of the gun. There are two airflow controls top and bottom which directs the paint. And then you have a manual setting on the top where you can reduce it down to a very narrow pass over of paint or the high you take up, it goes wider.
- It can go up to 50 mm all the way to 200 mm that will give you the flexibility of getting into nice tight corners or around window reveal. And then, of course, the larger pass over that will allow you to do large flat areas like walls and ceilings.
Step 3: Dial settings
- The final setting on the front allows you to spray from side to side or up or down by simply moving the dial on the front.
Some important tips
- When spraying the wall, keep the nib away from the surface; you also want to keep it moving at all times at a consistent pace.
- Spraying up and down, you should pass over 50% at a time, so you kind of get in two coats of paint when you are going up and down.
- Once you have done one wall turn the nozzle and then go from side to side. That way, you will get two solid coats up and down and left to right, which is going to give you a truly professional finish in a fraction of time.
- You will get a perfect finish once it has dried.
- Use an old toothbrush or brush to thoroughly clean it after every use.
Where can it be used?
This is a primary question when you are looking for a sprayer gun; you have a lot of projects in your mind and want a tool that can handle all or most of them. So, here’s a short guide to tell you where and what it can be used for.
Fence panel
This gun has absolutely no difficulties in spraying a fence panel whatsoever. It is actually its primary purpose.
Wood treatment solution
It can be used to spray wood liquid treatment solution. It is not just used for spraying paint. If you are looking to apply for wood protection before installing your wooden floors, then there you have it.
Acrylic Priming
It can be used for priming walls or wood material.
Emulsion
It can spray emulsion. The thick liquid or more viscous liquid won’t be an issue while using a sprayer.
Satinwood
It can spray water-based satinwood without any issues or distractions. It is perfect for that job.
Metal paint
It can be used to paint metal with metal paint. You will get satisfying results, and it can be used for cars and other metal products.
This sprayer can be used for multiple projects concerning different materials, be it be wood, wall, metal, or just anything.
Conclusion
It’s actually the best value for money tools. It is a small sprayer that does a magnificent job on all kinds of material.
I hope the article was helpful!
