- iPhone 4 or iPhone 3GS
- iOS firmware file
- 0.9.15 version of Redsn0w
Step 1: Download Redsn0w tool for the relevant operating system (Windows/Mac) and save it to a familiar location on your machine.
Step 2: Download and save the latest version of iOS file that is relevant to either the iPhone 4 or iPhone 3GS depending on which device you are upgrading.
Step 3: Extract the contents of the download Redsn0w archive file into the folder located on the desktop.
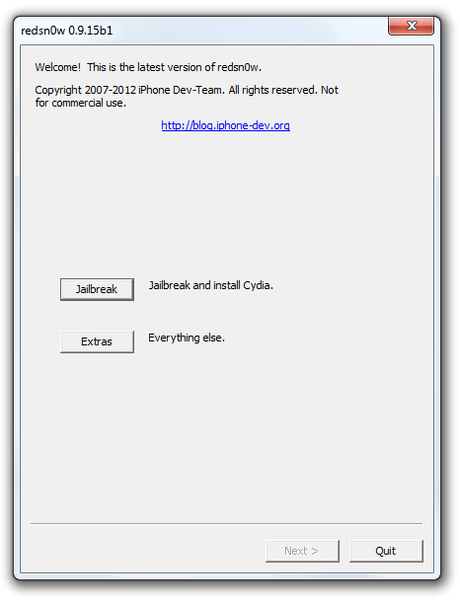
Step 4: Run the Redsn0w executable file.

Step 5: Select the Extras option from the main interface of the Redsn0w tool.
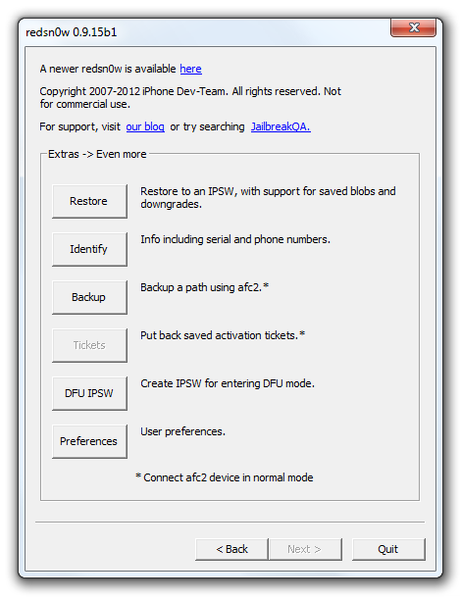
Step 6: Select the Even More option from the displayed interface of Redsn0w.
Step 7: A new set of options will be displayed. Select the Restore option which should be the top button on the interface.

Step 8: Select the IPSW option that allows you to locate and pass the downloaded IPSW file into Redsn0w.
Step 9: Selecting the IPSW option will open a navigator window. Select the downloaded iOS firmware file that you wish to upgrade your device to.
Step 10: Redsn0w will then provide a user facing alert that requires user input. Select the Yes button to allow Reds0w to modify the firmware file to ensure that the baseband version is preserved.
Step 11: A secondary alert will be presented that is advising the tool requires a Pwned DFU Mode to continue. Select the OK option to proceed. Connect the iPhone 4 or iPhone 3GS to the computer via the supplied USB cable and turn the device off before selecting Next from the Prepare To Enter DFU Mode screen.
Step 12: Follow the on-screen steps to put the connected device into DFU mode. Redsn0w will then detect the device and begin the process of injecting the Limera1n exploit, preparing a restore image and then finally restoring that firmware image to the device.
Step 13: Finished. Restore should be a success with an iPhone 4 or 3GS that will be on the version of iOS you wanted to upgrade to with a successfully preserved baseband.

