hMailServer – a Free Email Server for Microsoft Windows, used by Internet service providers, companies, governments, schools and enthusiasts in all parts of the world. hMailServer Webmail works on SMTP, POP3, and IMAP for performing outgoing and incoming mail services.
You can integrate hMailServer with Microsoft SQL Server, or you can make use of an external Microsoft SQL Server, PostgreSQL or MySQL database for the same. Features of hMailServer are it consists of multiple domains, auto-reply and forwarding options, Active Directory support, distribution lists, built-in backup, etc.

If you want to use hMailServer, then firstly download from here and after that, you have to Set Up Own Email Server. To setup hMailServer is a typical task, so today in this article I will give step by step guide on Setup My Own Email Server
Step by Step guide on:
How to setup hMailServer
#) Connecting to hMailServer
Step 1:
Download hMailServer from here and install it to start setup hMailServer.
Step 2:
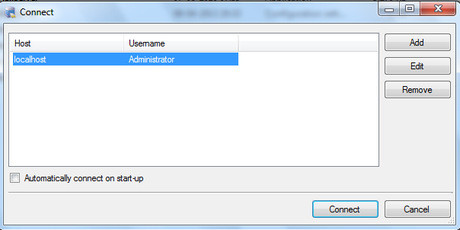
Open “hMailAdmin” (C:Program FileshMailServerbinhMailAdmin). A dialog box will be opened that allows you to connect to different hMailServer services.
Step 3:
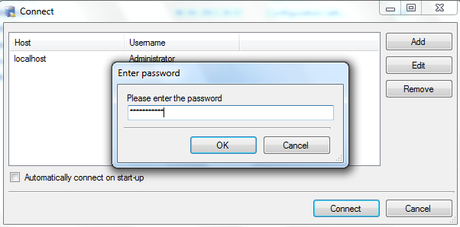
Double-Click on the “localhost” to connect hMailServer. A small dialog box will be opened asking the password. Enter your password which you specified during the installation of hMailServer and click on “OK”.
Step 4:
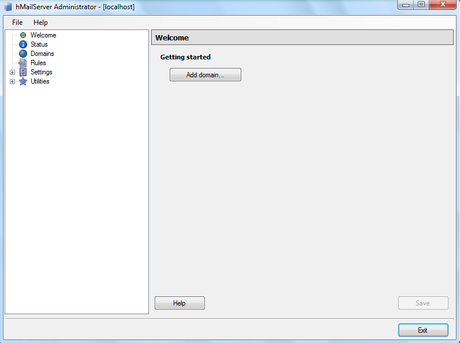
If the password is correct then you have successfully started hMailServer Administrator.
#) Domains & Accounts
Now you have to specify your domain name for which you have to setup hMailServer.
Step 5:
From the last opened window, click on “Add Domain” or you can also start “hMailAdmin again”.
Step 6:
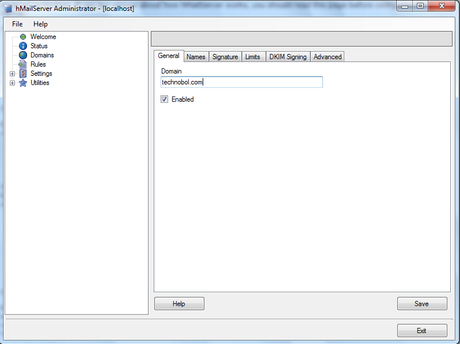
Enter your specific domain. As example, I have inserted “technobol.com” and click on save.
Step 7:
Now, you have to specify your email address on which you will receive and send an email. For that, Expand the Domains node in the tree to the left.
Step 8:
Click on your given domain name and click on “Add Account”.
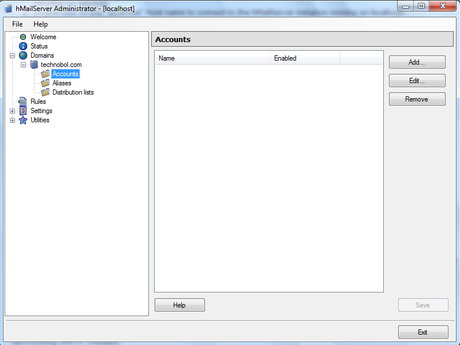
Step 9:
Now, enter “webmaster” or “info” or you can put any name as per your choice in the Address box, set the password and click Save.
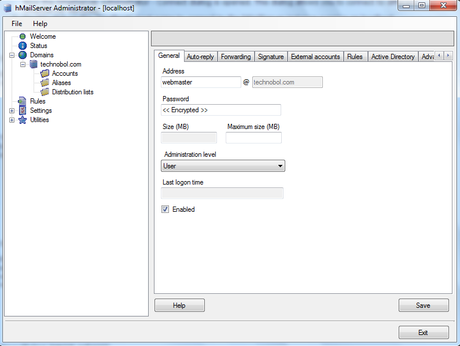
Step 10:
Now, in the tree to the left, you will find your Account and Address both.
#) Specifying the public hostname and SMTP relayer
For the working of hMailServer, you have to specify the public hostname.
Step 11:
From opened Window or start hMailAdmin and in the tree to the left, go to Settings > Protocols > click on SMTP
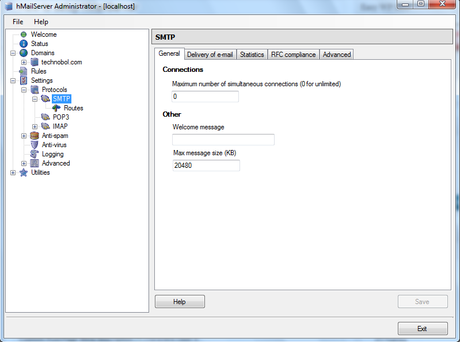
Step 12:
From the right-hand side click on Delivery of the e-mail tab. Into that, under the hostname enter the public hostname of the computer where hMailServer is running and click on Save.
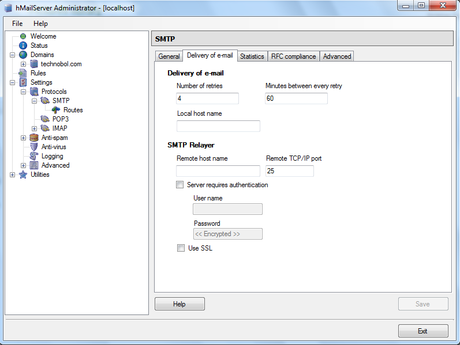
Step 13:
Now, you have to specify SMTP relayer, so enter the hostname of your ISP’s email server, along with your credentials on that server in case it demands authentication and click on save.
Step 14:
You have successfully setup hMailServer and now you can use it.
So, a guide on How to setup hMailServer is completed. I hope you have understood the guide and cam setup hMailServer by own. If you are facing any problem while doing setup hMailServer then connects us via comments so that we can resolve your problem.

