There are certain things you don’t want to happen to your computer because it is a pure hell to get it back to work properly. One of such things is something called “bad sectors”.
Essentially, this is a cluster of data that is stored on your hard drive that is not willing to either respond to or write certain requests. It is rather unpleasant and, unfortunately, can happen to pretty much anything – a mechanical drive, an SSD (which stands for Solid State Drive) and even to flash media! (i.e. your memory cards and USB drives)
Generally, bad sectors can be caused by one of two things – by physical damage (that would happen if you drop your device), which, unfortunately, cannot be restored or repaired in any way (if that happened, you should immediately back up your data and choose another drive to use) OR by a damage caused by some software issues, which, thankfully, can be fixed.
Software related issues come in many forms: a bad drive shown in S.M.A.R.T. or if you decide to go for a surface scan with any kind of utility that was specifically created for drive diagnostic. Windows also has a similar tool, it’s called ‘CHCKDSK’, so do look it up!
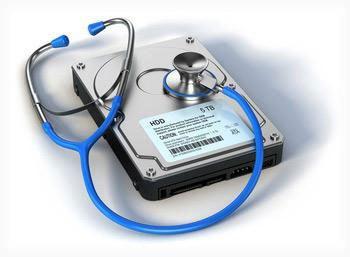
Of course, you are going to wonder what in the world has caused bad sectors on your device, and this is why we have created a list of some of the most frequent causes for such an issue.
- Your hard drive has overheated. Please make sure that your system is all clean and that there is no dust or crumbs in it. Check the fan temperature from time to time so as to know when it’s better to stop it from running for a moment.
- You run your drive at full capacity ALL. THE. TIME. DO NOT make your drive full to the brim with data!! That leads to damage!
- Your drive has been constantly crashing for some time and you decided to leave it be instead of checking it. Bad sectors can also appear if you live in such a house that has inconsistent power supply and you, therefore, frequently suffer from power failures. Do pay attention to how your device performs!
- You bought a faulty device in a store. Of course, if you buy from a store you trust, they should give you some kind of a warranty so that your device can be sent back for an extra check. Remember, that law is always on the customer’s side, so do ask them for a warranty if they do not want to give it to you.
If you don’t want all of that to happen, then please use preventive measures so that everything is okay with your hard drive and it leads a healthy and happy life!
- At least once every two weeks clean out all the dust and weird crumbs from under the case of your computer. This way, the temperature of the computer’s fans will stay at normal and that, in its stead, will keep your hard drive cool as a cucumber!
- Remember that overclocking your hard drive can lead to more heat creation. Please do not forget to use the cooling system regularly.
However, if you happen to stumble upon bad sectors, there is a solution to that! One of the best ways is to test your drive out using a utility called Hiren’s Boot CD.
Here’s how to use it properly and how to scan a hard drive for issues. You can do this so easily that you won’t believe your own eyes!
Step 1. Download the utility from the Internet
- Hiren’s Boot CD Windows 8 can be easily downloaded off of any website, but we recommend you going for the one we left the link for!
Just click the big green “Download” button for the magic to start happening!
Once that is all finished, proceed to the next step.
Step 2. Open the .zip file that you now have in your downloads folder. You can do this by right clicking on the .zip file itself.
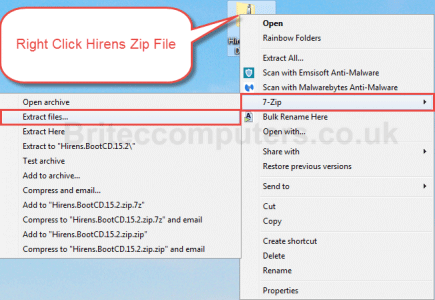
Step 3. Extract the utility whenever you fancy extracting it to.
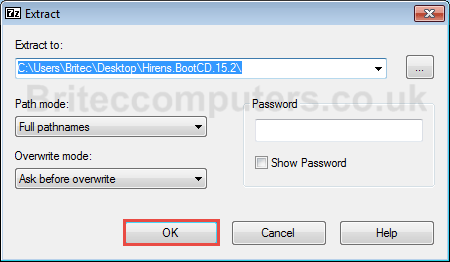
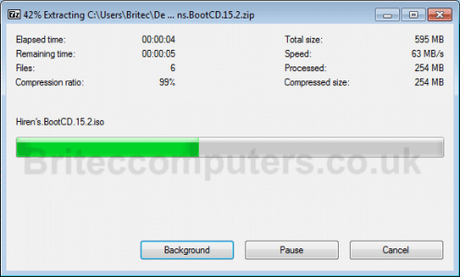
Step 4. Burn the Hiren’s Boot CD to either a CD or a USB flash drive. (If you decide to go for the flash drive, then make sure that you have a special booting software installed).
Step 5. Once the .zip file is all extracted, go into the corresponding folder and locate the Hiren’s Boot CD .iso image file. Burn that one to a CD (or a USB, if that’s what you fancy).
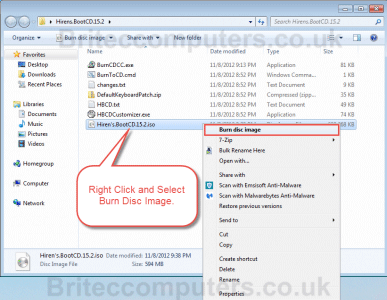
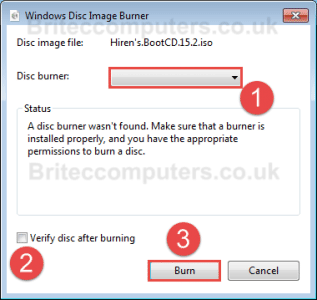
Step 6. From the drop down menu, select a DVDRom Drive, press ‘Verify’ and then burn the file.
Step 7. Place a CD or a DVD or a flash drive into the appropriate slot on your computer.
Please do not forget to check if your CDRom Drive (or a USB) is ticked as first boot device – otherwise, the whole thing will simply not work.
Step 8. Restart your PC.
Step 9. After your system opening once again, a Hiren’s Boot CD menu should pop up on your computer’s screen. Use cursor arrow keys in order to select the appropriate option. Once selected, click ‘Enter’.
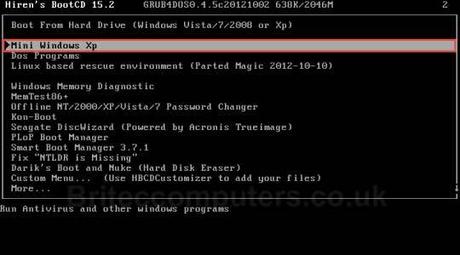
Step 10. Pick the Hiren’s Menu and then navigate to Partition / Boot / MBR -> Partition Wizard Home Addition.
Step 11. Surface test your device by right-clicking the device you are desperate to check.
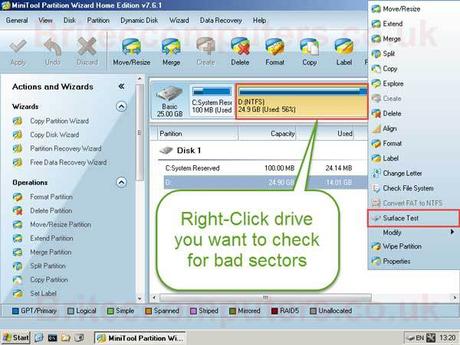
Step 12. After your scanning process is all finished, you should see something like this:
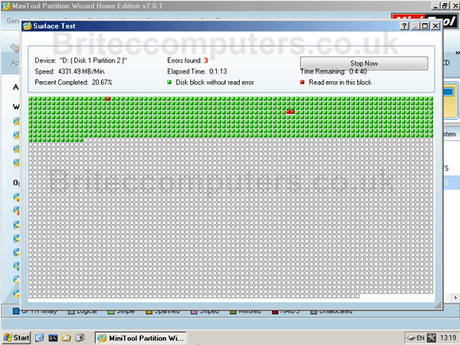
The red squares show all the bad sectors that the program has found.
So that’s it! You have successfully learned how to check your device for something called bad sectors and how to prevent them from happening! A good day altogether, isn’t it?
