Are you looking to Rotate or Flip your image in Lightroom? If yes, then go through this article. I have explained the process in detail here.
How to Rotate Image in Lightroom?
I am using Adobe Lightroom Classic in this Lightroom tutorial.
#1. Import Image
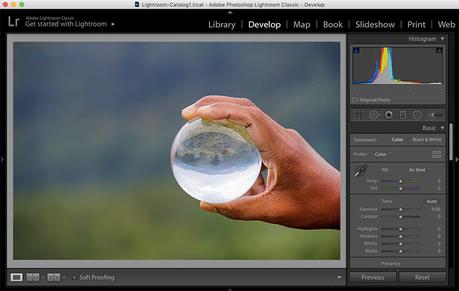
Open Adobe Lightroom. Open the Catalog, which has the image to be rotated.
If you have not created a Catalogue, then go to the “File” menu and create one.
Now, Import photos to this Catalogue. Select the image to be rotated. Press the “D” shortcut key to open the image in the Develop module.
#2. Rotate Image
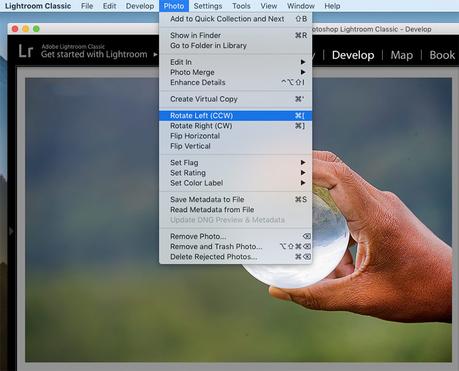
Click on the “Photo” drop-down menu. You will see two rotate options: Rotate left (CCW) and Rotate Right (CW).
Click on the “Rotate Left option” to rotate the image by 90 degrees in Counter Clockwise selection.
Use Shortcut Key “Cmd+[” in Mac, and “Ctrl+[” in Windows to Rotate Left.
If you want to rotate it by 180 degrees, then click “Rotate left option” once more.
If you want to rotate the image in the clockwise direction, then click on the “Rotate Right” option.
Use Shortcut Key “Cmd+]” in Mac, and “Ctrl+]” in Windows to Rotate Right.

How to Flip Image in Lightroom?
#1. Import Image
Select the image for flipping in Lightroom. Hit the “D” button to take the picture into the Develop module.
#2. Flip Image
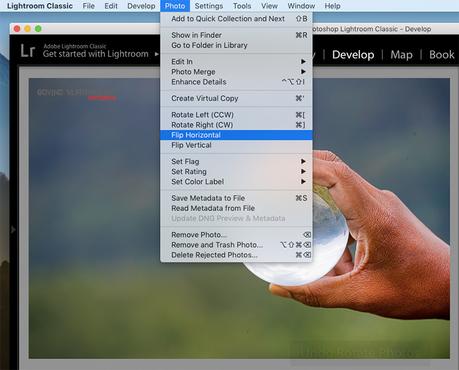
Click on the “Photo” drop-down menu.
You will see two flip options: Flip Horizontal and Flip Vertical.
So, click on either of these options to flip your image horizontally or vertically.

Conclusion
So, Now, you know how to Rotate and Flip photos in Lightroom. So, what are you waiting for? Give it a try.
CONSIDER READING:

