Are you using a Mi Max 2? Well, if you are then, we would like to tell you that you can actually get a lot out of this amazing Android Device from Xiaomi. How, you ask? Well, have you ever heard of the term, Rooting? If you haven't, then it's the high time you do. Rooting basically allows the users to make changes to the Android System files and gives you privileges to some useful and advanced applications. You can literally change whatever you want to by gaining the Root Privileges or the Root Permissions on your Mi Max 2.
Unfortunately, a lot of people don't know how to Root their Mi Max 2. And there are also some who might not wanna root their device as they have heard a lot of "myths" about Rooting like, it will damage your Android Device. A rooted Android Device is safe as long as you know what you are doing. Anyways, today, in this post, we would be covering on How to Root Mi Max 2 | Unlock Bootloader & Install TWRP Recovery. Now if that sounds interesting, let us hop into it.
How to Root Mi Max 2 | Unlock Bootloader & Install TWRP Recovery
This guide is divided into three simple steps. In the first step, we would be unlocking the bootloader of our Mi Max 2. Then, in step 2, we will flash the TWRP Recovery and finally, we will be rooting our Mi Max 2 in the third step. With that being said, let us now take a look at the first step of this guide.
Here is a list of things which you'll need for this guide:
- A Windows PC with ADB and Fastboot Drivers installed.
- Your Mi Max 2 should have at least 60% of charge left.
- An Active Internet Connection.
- You need to enable the USB Debugging and OEM Unlock on your device. To do this, simply go to the Settings >> About phone and tap the build number 7 times. Now, go back to Settings >> Additional Options >> Developer Options >> Enable USB Debugging and OEM Unlock.
Step 1: Unlocking Bootloader
Here are the steps which you need to follow in order to unlock the bootloader of your Mi Max 2:
- First of all, you need to go to any browser like Google Chrome and open this link.
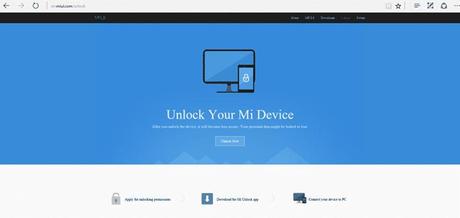
- Now, click on the Unlock Now button and log in to your Mi Account.

- Once done, fill in all the details correctly and give a good reason behind why you wanna unlock the bootloader of your device.

- After filling in the details, submit the application and wait for the approval.
- Once the request gets approved, Download the Mi Unlock Tool on your Windows PC and install the same.
- After installing the tool, open it and sign in using your MI Account.
- Now, connect your Mi Max 2 to your PC via a USB cable and click on the Unlock button.

- Wait for the unlocking process to get completed.
- Once done, disconnect your device since you have completed this step successfully.
Let us now take a look at our next step. Should we?
Step 2: Installing TWRP Recovery
Here are the steps which you need to follow in order to install the TWRP Recovery on your Mi Max 2:
- First of all, you need to download the TWRP Recovery Image for Mi Max 2 on your PC.
- Now, rename this file as img and place it on your Desktop.
- Do a right-click on your desktop while holding down the shift key and select the Open Command Window here option from the context menu.

- Now, connect your Mi Max 2 to your PC via a USB Cable.
- Once connected, type in the following command in the Command Prompt Window and hit the Enter key on your keyboard.
- This command will reboot your device into the bootloader mode.
- Once your device is in the bootloader mode, type in the following command in the Command Prompt Window and hit the Enter key on your keyboard.
fastboot flash recovery TWRP.img
- Now, we need to format the userdata to bypass device encryption. To do so, simply type in the following command in the Command Prompt Window and hit the Enter key on your keyboard.
fastboot format userdata
- That's it! You can now disconnect your Mi Max 2 since you have successfully flashed TWRP Recovery.
Now, it's time for the final step. Are you ready?
Here are the steps which you need to follow in order to root your Mi Max 2.
- First of all, you need to download the latest SuperSU or Magisk Zip on your Android Device.
- Once done, power off your Mi Max 2.
- Now, boot your device into the TWRP Recovery mode by pressing Volume down + Power keys altogether for a few seconds.
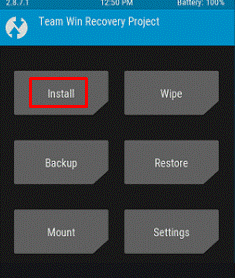
- Once your device is in the recovery mode, tap on install.

- Now, select the SuperSU or Magisk Zip file you just downloaded.
- Once selected, simply swipe the button to confirm the flash.
- Wait for the process to get completed.
- Once completed, simply tap on Wipe cache/Dalvik cache option and swipe to confirm.
- Finally, tap on the Reboot option to reboot your Mi Max 2.
That's it! You have done a great job! The process of Rooting has been completed and you now have a Rooted Mi Max 2. We hope that this guide was helpful. Just in case if you still have some doubts or questions related to this, then feel free to leave them in the comments section down below.
