Musci industry is off the charts and we are witnessing another revolution with so many YouTubers taking up Indie music. One of the most popular themes is cover songs. A cover song is re-inventing an already released song with some or no changes to the basic background score.
A lot of us are interested in singing cover songs. Cover songs are one of the most popular formats for musicians to show their skills as singers. You like an Ed Sheeran song and wants to sing on the original track, you search the web to look for its instrumental version. But, it is always a struggle to find a free instrumental track.
However, you can easily remove the voice of vocal of a song from any music editor software like Audacity which is free of cost and gives to amazing output.
In this blog, we are going to break-down the process to remove vocals from any song. Before we start if you are not aware of Audacity. Let us give you a summary for the software.
What is Audacity?
Audacity is essentially an audio editing software that helps you master your raw recording to make edits and give a refined output. Not everyone spends thousands on studios, we sometimes record it on our phone and edit the song on Audacity to refine it for free. Audacity has various features like record, trim, add layers, effects, noise cancellation and etc.
Here are simple steps that can help you get an instrumental piece of your favorite song.
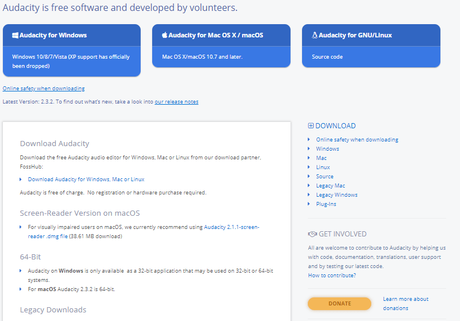
STEP 1– Download Audacity
If you don’t have Audacity installed. You can download it for free from here – Audacity Free Download. Once you have downloaded the Audacity software, just install it on your system. It is a basic process, just follow the instruction on the screen.
STEP 2 – IMPORT TRACK
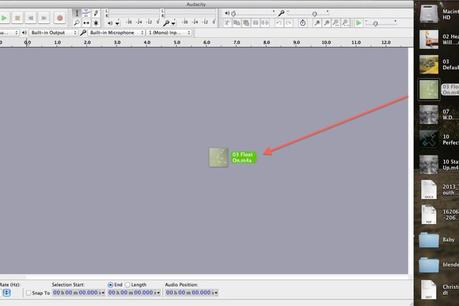
Now the next step is to import high-quality file for the track that you want to edit. Importing high-quality track will ensure the output quality when you remove the vocals from it.
STEP 3 – SPLIT THE STEREO TRACK
Once you have imported your track to edit. Now, we need to split the stereo track from the main track. The stereo track is nothing but a different layer for various elements and divides the track into two different channels. This is an important step.
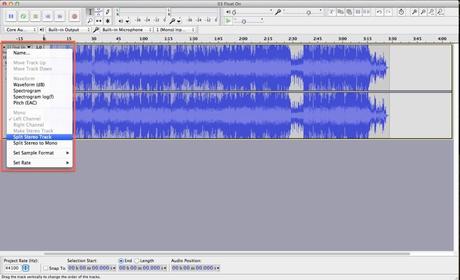
Once you have clicked on the Split Stereo feature, you will be able to see your track in two layers. Also, the song might sound weird but will be fine when you convert them to a mono track again.
STEP 4 – INVERT EFFECT
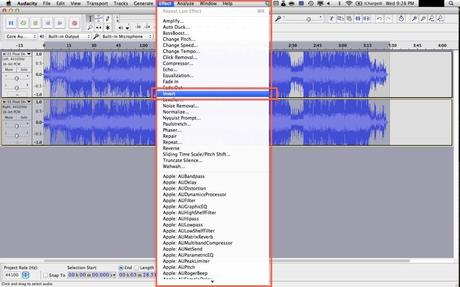
After completing the previous step, you could easily select the bottom track and add an invert effect. To add the invert effect, simply select the layer. Go to effect tab at the top toolbar, select invert and apply it. You have successfully inverted one layer of the song. Now it’s just two steps before you can get your song without the vocals.
STEP 5 – MONO TRACKS
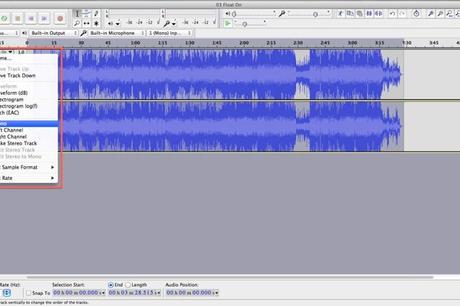
Once you have added the invert effect, you need to convert both the layers to mono channels. To do this simply select the drop-down arrow next to the name of the song, and click on “Mono”. Make sure, you do this for both the layers and then save it.
STEP 6 – EXPORT
The final step is to export the final edit. But before that just try playing it once on the software to see if the vocals are edited. There might be some hint of original vocals but that is okay as your voice will come above that. To export the track, go to file menu and select exports as mp3 and you are done.
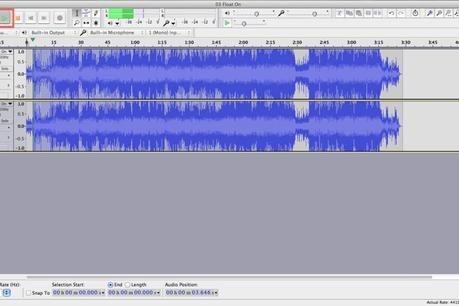
See, how easy it is to create a karaoke/ instrumental edit of your favorite song. Some additional tip, if you want to record your vocals on this, you can easily do it on Audacity itself or you can simply hire a studio, record vocals and paste the layer on the edited track.
I think, covering songs with original background score makes it more impactful as users will be able to listen to your version of that song which can be really cool. If you try these steps, do not forget to share the links in the comment to showcase your work and we will give a shout-out to the best track.
Have something to say about this article? Comment below or share it with us on Facebook, Twitter, or our LinkedIn.

