How to Remove a Windows Login Password. Windows 10 and Windows 11 are complicated and competent operating systems, but this article focuses on one of their most basic features: password authentication.
For many years, this was the sole option to add security to the login process. Some devices now allow you to unlock using your fingerprint or face, and Microsoft also allows you to delete your password from your Microsoft account.
However, with older systems, this is just not feasible. There is no official solution to remove the password totally unless you are ready to tolerate using a local account instead. There are, however, workarounds that allow you to do precisely that. Everything you need to know is right here.
How to Remove the Windows 10 Login Password:
The User Accounts feature in Windows 10 allows you to eliminate the username and password required for any account. This is how it’s done:
- Enter netplwiz in the Start menu search field, then choose the first result to execute the command.
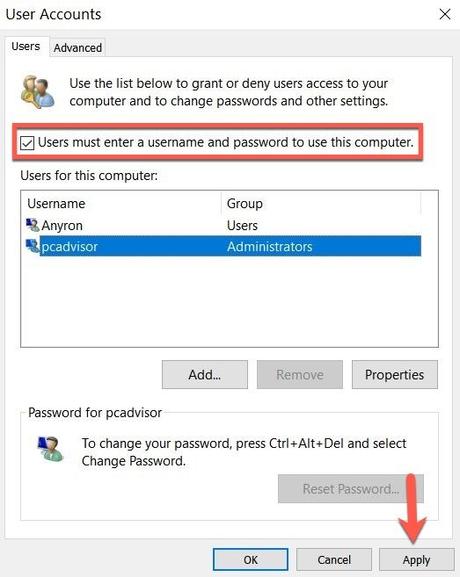
- Uncheck the box next to ‘Users must enter a user name and password to use this computer’ and click the ‘Apply’ button.
Read more: How to Determine Whether Your Computer Has Bluetooth
- Enter your username and password, then enter them again. Click the ‘OK’ button.
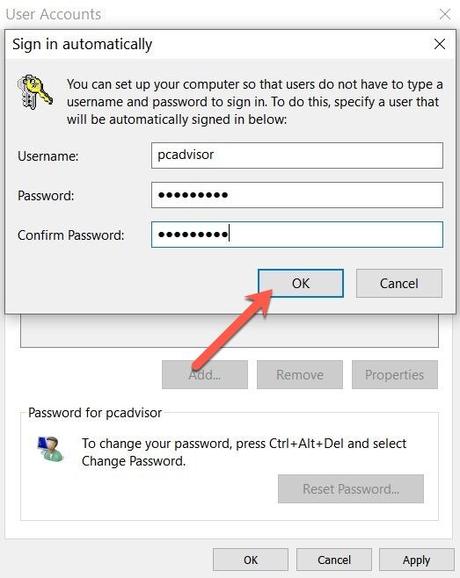
To save the changes, click ‘OK’ once again.
Return to this settings menu and check the box next to ‘Users must provide a username and password to use this machine’ to reactivate Windows password login.
How to Remove the Login Password in Windows 11:
Things become significantly more difficult with Windows 11. Because that option is not available through the User Accounts tool, you must utilize the Registry instead. You must be cautious, though, and carefully follow this guide to avoid inflicting irreversible damage to your device:
- To open the ‘Run’ window, press Windows Key + R, then type’regedit’ and press enter.
- Click ‘Yes’ to indicate that you want modifications made to your device.
- You should see the word ‘Computer’ in the address bar. Double-click it, then type ‘ComputerHKEY LOCAL
- MACHINESOFTWAREMicrosoftWindowsNTCurrentVersionWinlogon’ into the search box and press enter.
- Double-click the ‘DefaultUserName’ option from this menu.
Read also: How to Install Google Play on Windows 11
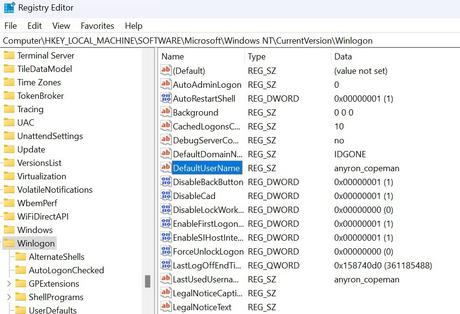
- As the ‘Value data,’ make sure your Microsoft Account login or email is selected. To confirm, press the ‘OK’ button.
- Select New > String Value from the context menu when you right-click a blank space.
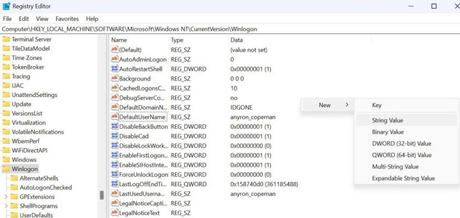
- Name it DefaultPassword, then double-click on it and input your Microsoft password as the ‘Value data’. To confirm, press the ‘OK’ button.
- Double-click ‘AutoAdminLogon’ in the same ‘Winlogon’ folder and enter ‘1’ as the ‘Value data’. To confirm, press the ‘OK’ button.
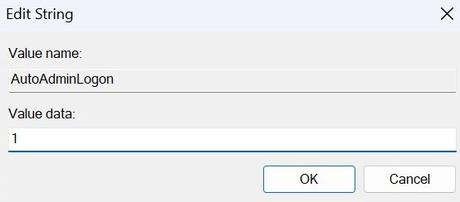
- After closing the Registry Editor, restart your device.
That’s all! When logging in, you should no longer be asked for your password.
