We get traffic from different countries and some of this traffic is not English speaking countries. If a Chinese man bump into your site through search engine and your content can’t be translated he’ll just close your site and move on to the next one, right?
We have plugins that can do the job, but I’ve personally search for the one that can suit my need but none I could find, so I decided to use Google translator which does not affect resources.
On my today post, I am going to show you how you too can put a Google translator like the one below so you won’t have to lose any more people again.

HOW I PUT GOOGLE TRANSLATOR TO MY SIDE WIDGET MANUALLY
Now follow the steps carefully…
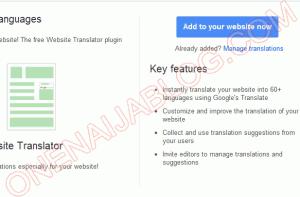
First go to Google translate manager here GOOGLE TRANSLATOR and click “Add to your website now” (see shot below)

NOTE: If you have not login your Gmail account before, you will be asked to do so before proceeding.
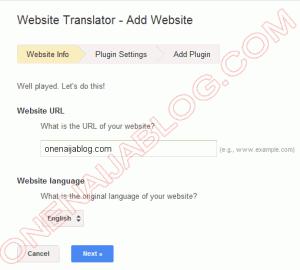
On the next page, you will be asked to provide your website address and give your website language. After filling it, click on the “Next” button (see shot below)

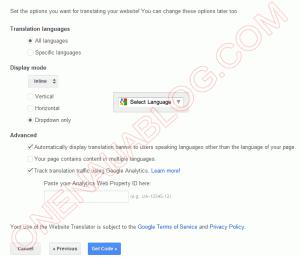
This stage is the main part of the show. This part is where you set the translator to how you want it to be.
On “Translation Languages” select the “All Languages”
Display Mode “inline” and select “Dropdown only”
In the “Advanced” part mark both “Automatically display translation banner to users speaking languages other than the language of your page.” And “Track translation traffic using Google Analytics.” (See shots below)

In the “paste your Analytics Web Property ID here” insert your Google analytic id there but if you don’t have a Google analytic code then don’t check the box “Track translation traffic using Google Analytics”
Now click “Get Code” to take you to where your code is. We have successfully almost finished the race.
Step #2
Go to your wordpress admin dashboard and click “Appearance” and click “Editor” to take you to your editor’s panel
In your “Edit Theme” panel, locate “Header (header.php)” and click it. The reason we are clicking the header.php is because we are going to put the first Google translator code there.
Go to your Google translator page and copy the first code found there and past it in the editor before the closing of tag. So it will look like the screen shot below

Click “update file” and you’re done with the editing.
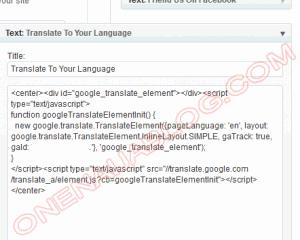
Go to your “Widgets” area and drag the “Text” widget to a side bar where you want the Google translator to be. Now paste the second code from the Google translator page to the text widget so it will look like the screenshot below.

Click the “Save” button and you’re done. Check your blog and you will see the Google translate. Now almost all countries can finally read your blog.
NOTE: always do a backup before editing a code, in case you messed up the code you can easily replace it.
You can drop your questions and comments using the comment box below…
If you love this post and this post is of help to you, kindly click the like button and don’t forget to recommend us to friends. You can subscribe to our feed for post on the go

