Here’s How To Paint A Radiator
Painting a radiator is becoming more and more popular in the world of home heating.
Just pay a visit to some of the bigger DIY accounts on Houzz and Instagram and you’ll find some amazing examples of radiator paint jobs that have been achieved by people with very little painting experience.
But why paint a radiator and can you do it yourself?
Why Paint My Radiators?
Painting your radiators can help to make them the stand-out feature in a room, blend them into the background or have them complement the space – it all depends on what you want to achieve.
But, whether you want your radiator to match your color scheme or make it the main point of focus in a room, if you are going to paint your radiator, you’ll want to get the job done properly – and it is definitely something you can do all by yourself!
So, in this ultimate guide, we’ll show you how to paint your radiator, which kind of radiator paint you should use and give you all the expert tips and advice you need to finish the job in style.
This is the ultimate guide to radiator painting!
A Step-By-Step Guide to Painting A Radiator
You will need:
- This ‘Ultimate Radiator Painting Guide’, obviously.
- A spotlessly clean radiator – you could use our cleaning guide to help you do that.
- Something to protect the floor– old sheets, newspaper, flattened cardboard.
- A pair of ‘paint pants’ and a ‘paint t-shirt’ – you might get a little messy.
- A few of sheets of sandpaper – of various grit grades.
- Some radiator primer.
- The radiator paint (spray or tinned) of your amazing new color.
- Some paintbrushes – various sizes will help to get the job done.
Top Tip – If you are going to paint your pipework too, it’s probably a good idea to have a little extra cardboard to hand to place between the wall and the radiator – this will help to avoid any unwanted splashes that could spoil the look. We will talk more about painting radiator pipes later.
Time needed: 2 hours.
A step-by-step guide to paint radiators.
- Turn OFF Your Radiator & Open A Window
It may sound obvious, but before you begin to paint your radiator you must be sure it is off and completely stone cold.
If it’s still a little warm, the paint will probably go a little ‘drippy’ and not adhere to the surface of the radiator properly, so make sure it’s off – and that is won’t come back on – until the paint is dry.
It’s also important to make sure you ventilate the room properly.
Open a couple of windows and doors to ensure you’re not breathing in paint fumes – this is even more important if you choose to use spray paint. - Clear The Area
Get the vacuum out and clear the area of as much dust and dirt as you possibly can.
Move furniture out of the way and be sure that anything that could get stuck to the paint is also out of the room – this includes cats and dogs too!
Remember, no matter how careful you think you are, paint is going to get splashed – 100% – so, clear the space and put your old sheets, cardboard or newspaper down to protect the area as much as you can. - Clean The Surface Of The Radiator
You may not realize it, but your radiator will have picked up a good deal of dirt, grease and grime over the years.
No matter how clean your home is, there will be a build-up of dirt that you need to get rid of before you can start to paint your radiator.
A quick wipe down with a damp cloth or sponge, some warm water and mild detergent or washing up liquid should do the trick.
If you have a particularly dirty radiator, you could use our ultimate radiator cleaning article to help you.
Once your radiator is nice and clean, dry it off and begin to sand it down.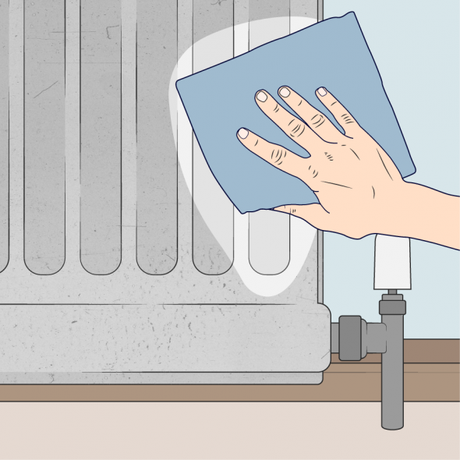
- Sand The Radiator
Sanding your radiator will help to slightly roughen the surface, making it easier for the paint to stay in place.
Using both higher and lower grit sandpaper to get rid of any unwanted surface debris – and paying close attention to any rough spots you come across – begin to sand the surface of your radiator.
Taking the time to do this properly will ensure you have a nice even surface to start painting – if you just slap the paint on, it will always look rough.
Once you’ve removed all the rough edges and rust marks, dust the radiator clean again.
It may be a good idea to use a vacuum cleaner at this point to remove any fine bits of dust and use a damp cloth to wipe it down again, being sure to let the radiator dry completely before you start to apply paint.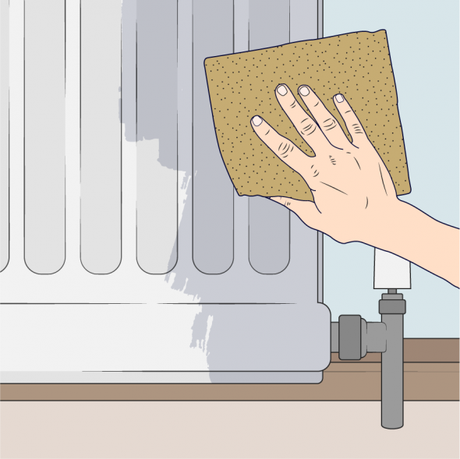
- Add Your Radiator Primer
Before you can add a glorious new top coat of paint to your radiator, you’ll need to apply a metal primer or a specialist radiator primer first.
It’s very important to do this to ensure that any bare or rusty parts of the radiator are protected and to provide a good, solid base for the rest of the paint to cling to.
If you came across a few rust spots whilst you were sanding your radiator down, it may be worth using an anti-corrosive primer as this will prevent the rust from getting worse over time.
To apply the primer coat, you can use a standard paintbrush or, if you have a particularly unusually shaped radiator to paint, perhaps invest in an angled radiator brush instead.
If you are using a metal primer spray, make sure that you keep the nozzle about 6 to 8 inches away from the radiator’s surface to avoid spraying too heavily.
Glide the can in smooth motions up and down the radiator to prevent to paint from dripping and to get a nice even finish.
Whatever kind of primer you choose to use, always leave it to dry completely before reaching for the paintbrush.
If you’re unsure how long the primer will take to dry, check the manufacturer’s instructions.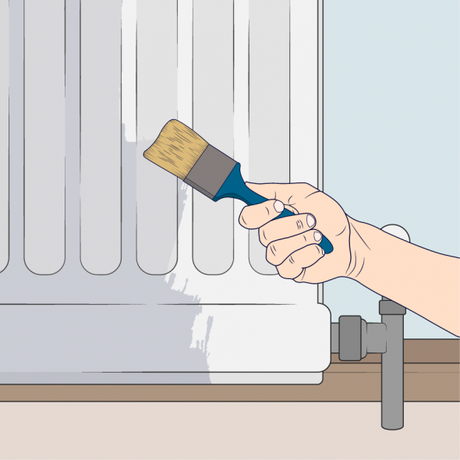
- Apply Your Top Coat Of Radiator Paint
Being sure that your radiator primer is completely dry and that the room is well ventilated, give your radiator one last wipe down before you start to paint.
If you’re using tinned paint, give the tin a good shake before you open it up and, once you have it open, give the paint a good mix with a stick.
Take your chosen brush and apply the paint to the surface of the radiator – being careful NOT to overload the brush.
Please Note: Paint in the same direction as the grooves of the radiator for a neat finish.
For the best results, you should paint a radiator in stages – painting the edges first, before moving on to the face of the appliance.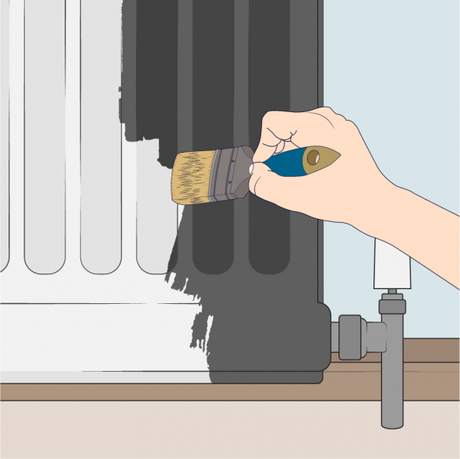
This involves making your way across the top and bottom of the radiator – using long, sweeping strokes of the brush – and then focusing on the ridges of the mouldings individually.
Work your way from one side of the radiator to the other, slightly overlapping each section as you go.
Making sure you neatly join each section into one-another will help you to create a nice and even finish. - Take A Well-Earned & Deserved Rest
Though it is possible (and likely) that your radiator will require another coat of paint, for the time being, you can let the first coat dry and kick back to take a well-earned rest.
Whether you need to add another coat will depend upon the paint that you use and down to your personal feelings about the job you’ve done.
But for now, at least, well done – you’ve just painted a radiator!
If you can, leave the paint to dry overnight. Adding another coat when the first is still a little damp and tacky will lead to a disappointing result all round.
What Paint Should I Use To Paint My Radiator?
As ‘radiator specialists’, we should tell you that you should only ever use ‘proper’ radiator paints to do the job of painting your radiator.
But do you want to know something?
If you want to go right ahead and use normal emulsion paint or a satinwood alternative, there’s really no reason to not do so.
Yes, some lower cost paints could chip and peel over time, but most good quality emulsion paints can be used to paint your radiators.
You just need to be sure you cover it over with a clear radiator overcoat after you’ve applied the emulsion.
So, what are your paint options?
Four Radiator Paint Options
1 – ‘Proper’ Specialist Radiator Paint
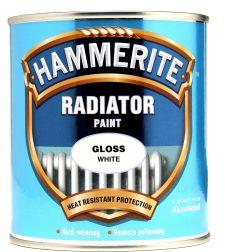
If you decide to paint your radiator white, the only real option is to use a specialist radiator paint.
Specialist radiator paint is less likely to yellow over time as the radiator heats up and cools down and is also heat resistant, which is obviously handy as that is what your radiator is going to do.
Keep in mind, this sort of paint is only available in a limited number of colours, so if you’re trying to make a feature of your rad, then maybe option 2 is the way to go, but if you want specialist radiator paint, we would recommend going for one of the more prominent brands like Hammerite.
2 – Solvent-Based Paints (Satinwood)
Traditionally speaking, solvent-based paints have been popular for use on radiators and other heated surfaces, but more modern water-based paints can do the job too these days– and they are less likely to give off a smell when you turn your radiators back on again.
You are very likely to find a paint that matches your wall colours and complements the room too, as non-drip gloss and satinwood paints are available in a wide selection of colours and shades.
We found that Dulux’s collection of satinwood paints adhered really well to the surface of the radiator and left a clean and smooth finish.
3 – Radiator Overcoating (Clear)
Thirdly, you could use a standard emulsion paint to paint your radiator – after you’ve applied your primer, of course – and cover it with a protective clear radiator paint.
This is not too dissimilar to a varnish that you might apply to wood to protect the surface. It is heat resistant and ensures the surface of your radiator is well protected against scuffs and bumps.
Of all the overcoats we have tried, the one we found to be most hardy was Ronseal’s clear enamel radiator gloss. Perfect for if you want to add a touch of color to your radiator, this overcoat dries quickly, is relatively inexpensive and a liter tin should cover two standard-sized radiators pretty easily.
4 – Spray Paint
Your fourth and final radiator paint option is to spray paint. There are couple of good spray paints that have been specially formulated for radiators, but colours are a little limited.
If you do intend to spray paint your radiator, it may be a good idea to remove it from the wall completely and do it outside or in the garage.
You can do it inside but be sure to protect the surrounding area well – covering furniture, protecting the wall, curtains and anywhere nearby – as spray paint is tough to direct and has a tendency to drift around.
You should also wear a face mask and ensure you have ventilated the room properly.
It may also be a good idea to wear gloves with spray paint as the nozzle can drip and it is very tough to get your hands clean once the spray paint is on your skin.
I Want To Paint My Radiator Anthracite, What Paint Should I Use?
As ‘radiator specialists’, we should tell you that you should only ever use ‘proper’ radiator paints to do the job of painting your radiator.
Anthracite gray is one of our most popular radiator finishes and it is easy to see why! It complements virtually any color scheme and has a calm, modern quality that is perfect for living spaces.
If you want to update your existing radiator to match our anthracite range without spending money on a brand new radiator, we would recommend using the following shades.
- Dulux RAL 7016 Anthracite Grey
- Rust-oleum 2189 Anthracite Quick Dry Spray Paint
Does The Colour Of The Paint Effect The Radiator’s Performance?
Well, that really is a question now, isn’t it?
For a few years, the question has received a bit of attention in the heating industry – particularly here at BestHeating.com – but the ‘true’ facts have perhaps never been fully understood.
See, a radiator isn’t a radiator at all.

Most of the heat that a radiator supplies into a room is produced through convection – whereby cold air meets the warm air from the radiator and is ‘convected’ – or transported – around the room.
Only about a quarter to a third of the heat a radiator gives off is through radiation – or ‘radiant’ heat.
So, if we accept that the color of your radiator probably won’t have much of an impact on its ability to convect heat into a space, what about the effect the paint might have on its radiating qualities?
Well, while digging around the depths of the internet, I came across a rather interesting article that mentions a 1935 study by the United States National Bureau of Standards.
The study covers the different effects various types of paint have on a radiator’s ability to emit radiant heat.
In it, they state that the only coat of paint that could influence the overall heat output of a radiator is the very last coat that you paint on and what that paint consists of.
According to the study, if you were to take two radiators – of the same size and heat output – and painted one with standard white paint and the other with a metallic-based alternative, the one painted with the standard paint would give off more heat.
This is due to a reduction in the radiating power of the radiator’s surface when it has been painted with metallic paint.
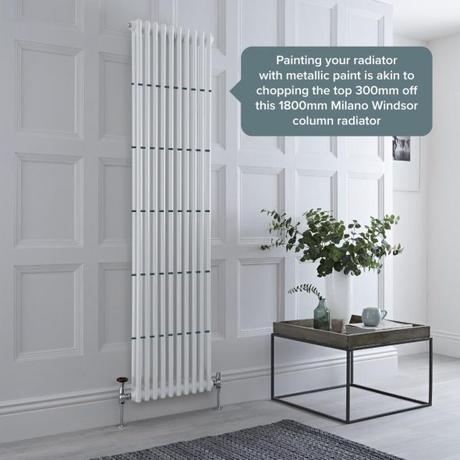
The article even goes as far as saying that the effect of coating your appliance with metallic-based paint is the equivalent of removing 1/6 of the radiator.
A 1/6th! That is a whole 30cm (or 1 foot) off the top of this Milano Windsor column radiator.
Can I Paint My Radiator Pipes?
Absolutely. If you have gone to the effort of paint your radiator, the chances are that you will want nice coordinating pipes.
The process of painting radiator pipes is similar to painting a radiator. So, here’s a quick step by step how to paint radiator pipes.
- Allow your radiator pipes to cool down completely before you start.
- Cover the base of the pipes with masking tape or newspaper to protect the floor from any drips.
- Place a piece of cardboard or large sheet of paper onto the wall behind the pipe to create a protective barrier from the paint.
- Clean the pipes with a damp cloth and mild detergent to remove any grease or dirt.
- Use sandpaper to sand the pipes down in one direction to help the paint stick and dust off any excess with a dry paintbrush.
- Give your pot of metal primer a good stir and paint an even coat onto the pipes. You may find that you need 2 coats of primer to get a nice even finish.
- Allow the primer to dry for at least one hour, preferably overnight.
- Now for the topcoat. Give your pipes 2 coats paint using a light up and down motion, you can use the same paint that you used for your radiator.
- Be careful not to paint over your radiator valves to make sure that you don’t seal them for good.
- Try to leave your radiator to dry for a few days without turning it on to allow the paint surface to harden.
Top Tip – If you want to avoid painting your radiator pipes but want to give them new life, you can easily turn copper radiator pipes into chrome with some adhesive metal tape, chrome pipe covers and some multi-surface polish. This is ideal for updating heated towel radiator pipes with a simple and cheap solution. Job done!
Can I Re-Paint My Radiator?
The answer is, Yes. We’re only human and we are all capable of changing our minds or simply getting tired of something.
So, the good news is if you are changing you color scheme or just want to give your radiator a quick re-vamp, it is perfectly fine to re-paint your radiator a different color.
It might take more than a couple of minutes and require a little elbow grease, but it can be done.
First you will need to sand the radiator down with coarse sandpaper to remove as much paint as you can.
Then, wearing gloves and protective goggles, use a good quality paint remover like Nitromors and paint onto the entire radiator. Leave it for about an hour until the paint has softened.
Once the paint has softened, you should be able to scrape it off using a thin scraper. Depending on how thick the original paint is, you might need to repeat the process to get every last bit off.
Ensure that the radiator is thoroughly dry and rust-free before repainting.
If all this sounds a bit too Grand Designs for your liking, then you can always send it out to be sandblasted then re-paint it yourself.
Then voila! Your old radiator now perfectly complements your new look, for the time being anyway!
Can I Paint A Heated Towel Rail?
The idea of painting a heated towel rail is kind of uncharted territory that we are not convinced should be explored.
Since most heated towel rails are designed for bathrooms, the majority are covered with a chrome finish that would be difficult for paint to stick to.
Even if you sanded it down first, you are likely to damage the chrome surface, leaving you with an uneven, unhappy looking towel rail that you wished you hadn’t touched.
But, if you’re feeling courageous and want to have a go at painting your heated towel rail, we would recommend removing it from the wall and spray painting it outside.
Spray metal primer and paint should give the rails more of an even finish. Just make sure it is cleaned and prepped by following the same previous process for how to paint a radiator.
Things To Remember When Painting A Radiator
- Be sure that the radiator you intend to paint is turned off.
- Always wash and dry the radiator before adding paint.
- Always use a good-quality primer before painting.
- Ensure that the room is well ventilated and cover any furniture, carpets or anything else well to avoid damage.
- Keep a ‘wet edge’ to avoid unsightly brush marks.
- Allow paint to dry for at least 24 hours before applying a second coat of paint.
- When completed leave the radiator off for a day or two before turning back on.
- There will be a smell for a few days, this is normal, keep the room ventilated.
And remember, if all else fails – or you just can’t be bothered painting your radiator – BestHeating stock one of the largest ranges of designer radiators, heated towel rails and accessories available online.
Let us know how you’ve got on painting your radiators below and don’t forget to say “HI!” on Facebook and Twitter and check out our design ideas on Instagram and Pinterest.
Good luck!


