Since 2015, I have been a happy subscriber to the NameCheap web hosting services. When EasyWP managed WordPress hosting was launched in 2017, it took 3 years before I could try it.
I stayed a bit too long on the Shared Hosting services before I could make the move to a managed WordPress hosting package.
In the first quarter of 2020, I moved from the Shared Hosting to the EasyWP managed WordPress hosting services, this was a move I'm so grateful I finally did.
While migrating an existing blog from the Shared Hosting to managed WordPress hosting solution, there were a few challenges along the way.
The EasyWP dashboard interface is very different from what I'm used to - cPanel - there's a bit of confusion at first. EasyWP doesn't use cPanel features, it comes with a simple, clean, uncluttered administrative dashboard.
Also, if you're familiar with Cpanel, you'll find EasyWP a lot easier to use, and installing WordPress is a one-click setup process.
But thankfully, you don't have to figure things out yourself.
I'm here to answer all your burden questions concerning how to install WordPress on EasyWP and other related obstacles, too.
Let's start with the obvious question most beginners would like to know about subscribing to the EasyWP plan.
How to Subscribe to EasyWP
Whether you're migrating an existing blog or starting with a brand new one, the first thing you'd need to do is to subscribe to a hosting package on the EasyWP page.
If you're starting a blog the first time, the starter plan might be a better option to take. The EasyWP starter plan allows up to 50k monthly visits and 10GB SSD storage space.
For blogs with an existing online presence and a decent traffic level, you may want to try the EasyWP Turbo plan. The Turbo plan gives 1.5X more RAM processing power, 1.5X CPU, 200k monthly visits, free SSL Certificate, and Supersonic CDN.
For large websites with high traffic levels of up to 500k monthly visits, the EasyWP Supersonic plan is a perfect choice.
The EasyWP Supersonic plan gives 100GB SSD storage, 500k visits per month, 2X RAM, 2X CPU, a 99.99% uptime guarantee, a free Supersonic CDN, and a free SSL certificate.
To subscribe to any of the EasyWP hosting plans of your choice, click here. You can also get a 30-day EasyWP free trial offer from the link.
Note: Since EasyWP is a hosting solution from NameCheap, you need to create a NameCheap user account to use EasyWP.
How to Install WordPress on EasyWP Hosting
To install WordPress on EasyWP is simple and required no complex process, or too many steps to complete.
If you have an active EasyWP hosting account, continue reading. If you don't, sign up from here first.
Type https://dashboard.easywp.com/ on your browser and log in with your NameCheap account details.
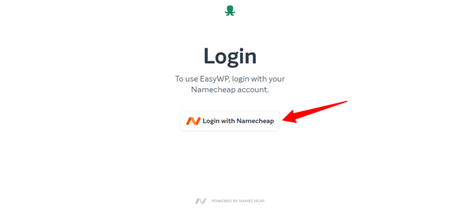
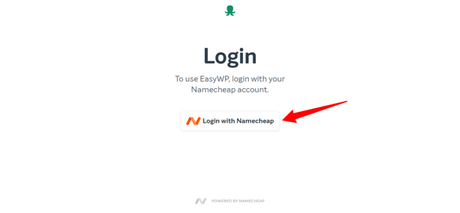
Enter your NameCheap account details in the appropriate space like in the image below. Then click on the sign-in button.
You'll be taking to your EasyWP admin dashboard.
On this page is where you have access to manage all your website files and databases. This is where you also have to install WordPress on EasyWP and perform other tasks like regular WordPress backup, access to PHPmyadmin files, WordPress folders, etc.
At the time of writing, this is a typical EasyWP WordPress dashboard.
To install WordPress on EasyWP, there are five steps to complete at the time of writing this line. I will walk you through all five steps in detail.
Step 1 - Name Your WordPress Blog
Click on "Set up WordPress" as seen in the image above.
After clicking on the Set-up WordPress link, a new page will open where you need to enter a few basic info.
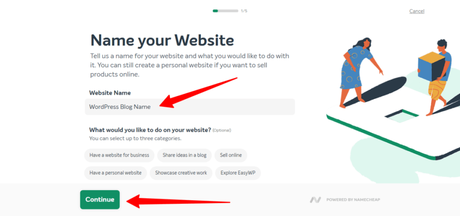
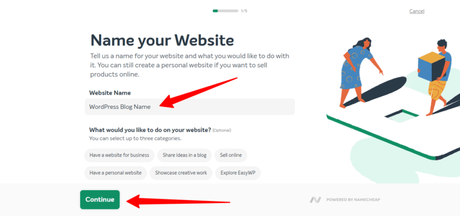
Enter your website name in the field. Note, this is not your website homepage address. This is your blog name.
If you haven't given your blog a name, feel free to input anything in the space. You can make changes later on.
The other question just below the website name field is optional. You can jump over the selections and click on the green button that says "Continue".
And if you wish, you can select relevant answers from the options on the page. The option you choose here doesn't set your blog purpose in stone.
Your blog is yours and can be used for whatever you want now or in the future.
Step 2 - Choose a Domain Name
EasyWP allows you to use a domain name from one of three sources with your blog.
Here's a brief explanation of how to apply each option to your EasyWP blog.
Domain From EasyWP - Free
You can use the free EasyWP subdomain name with your blog.
The free EasyWP domain name is a subdomain that comes with your subscription. In an ideal world, the subdomain is not recommended for a business website.
The blog name you enter in step one is used to generate the subdomain for your EasyWP blog.
Your blog name will look something like this:
https://wordpress-blog-name-238cd0.ingress-earth.easywp.com
This is unprofessional, doesn't help for SEO, branding, and long-term business value.
Your Domain on NameCheap
If you have a domain name registered with NameCheap, click the second option on the page and enter your NameCheap domain name.
It should appear on the list as in the one below.
To use this option, your NameCheap domain must be pointed to the NameCheap basic or premium domain name server. If your domain name registered with NameCheap is pointed to a different DNS, it won't appear in the list.
To learn more about how to point a domain name to NameCheap Basic or Premium DNS, read this article.
Domain on Other Provider
If your domain is registered with another web host, choose this option. However, you won't be able to enter the domain name here, you'll be able to connect it after your blog is created.
If you choose this option, a temporary subdomain will be generated for you like this one: https://wordpress-blog-name-238cd0.ingress-comporellon.easywp.com
You'll be able to point your primary domain name to your hosting DNS later.
Whatever option is right in your situation, select it and click on the "continue" green button on the page.
Step 3 - Choose a WordPress Theme
To get you off the ground as quickly as possible, EasyWP comes with three default WordPress themes.
You can go with any of these themes if you want to, or you can ignore the step by clicking on the "skip step" link on the page.
Whatever option you choose, will take you to the next step.
Step 4 - Install Popular WordPress Plugins
As with the themes, EasyWP allows you to install a few popular WordPress plugins before installing WordPress.
This is an option, you can choose to skip the step or install relevant plugins.
For most WordPress blogs, Yoast SEO is the go-to SEO plugin. This is one of the plugins you should consider for your blog on-page SEO optimization.
Another popular WordPress SEO plugin is the All-one-SEO plugins from Syed Balkhi of WPBeginners.
This is a very helpful and advanced WordPress SEO plugin. It is the best alternatives or rival to Yoast.
Step 5 - Review Your Entry
Here you can review your entry to see if everything is okay.
If there is something you want to edit or change completely, click on the navigation "back" link on the page. However, if you want to cancel your order, use the "cancel" navigation link.
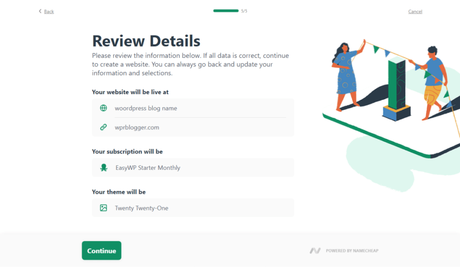
If you're satisfied with the details, click on the green "continue" button.
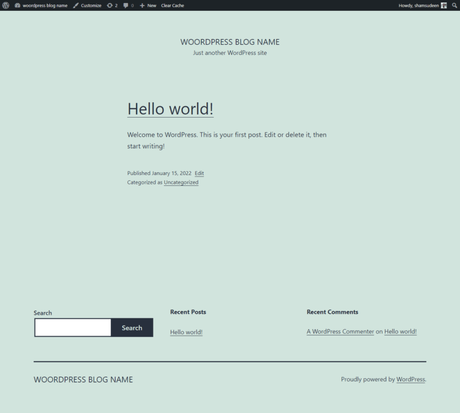
Give it a minute, your WordPress installation is ready and your blog will be live at the URL you specify in step 2 above.
Now our blog is live so we can start to create pages, posts, and media content.
You can now login to your WordPress blog admin dashboard to start customizing your theme, install plugins, create important pages, blog posts, etc.
You will receive a welcome message via your NameCheap email address on file. The email message contains your blog username and password.
Keep this safe, secure, and confidential.
You will need them to change your WordPress admin login details to your password of choice later.
How to Manage files, WordPress Admin, phpMyAdmin, and Database on EasyWP
Managing files, WordPress blog admin, database, PHPMyAdmin, and content in EasyWP is done through your dashboard.
Here's a typical EasyWP dashboard where you can gain access to all WordPress administrative backends.
If you want to navigate to your WordPress blog admin area, click on the "WP Admin" button. This will open up another browser tab and take you to the WordPress admin dashboard.
This is where you manage things like plugins, create content, install themes, create pages, and single posts.
Your WordPress blog admin backend contains all the tools necessary to build your blog.
To manage WordPress files through an FTP program, database, backup, service integration, click on the manage button on your EasyWP dashboard.
A page like the one in the image below will open.
Here you can schedule WordPress backup, manage files and databases, and integrate other services. Also, you can manage your billing setting, hosting plan, and SSL certificate.
There is two important access you need most when accessing WordPress files and database.
Let's dive in and see how easy it is to access these files in EasyWP
Accesing Files Through SFTP
To access your website file through an FTP program like FileZilla, EasyWP provides an easy way to do that.
A file transfer protocol (FTP) program allows you to make changes to website codes and troubleshoot most server issues.
First, you need to specify how long the access to your website files and server will last. Select your option from the drop-down menu, and click on the "Access Files" button.
Then copy the login credentials to your FTP program to connect to the server.
In the case you're giving someone else access to your server, you can revoke the access at will. Simply click on the revoke link in the time field.
That's it, any access given is revoked and the server automatically timeout.
Accessing WordPress Database Through phpMyAdmin
The process to access your WordPress database through PHPmyadmin is the same as the one described above.
First, you need to select the timeframe the access will last. Choose between 1 hour, 12 hours, 24 hours, and forever. Click on the "Access Database" button.
I don't know about you, but the forever option is just out of it.
After that, copy the login details to access your database. The next thing is to click on the "Go to PHPMyAdmin" link at the bottom.
This action will open a new browser tab to enter your log-in details.
This is your database login page. Now enter the login credentials you copied earlier and paste them into the appropriate field.
You're in!
Conclusion...Installing WordPress on EasyWP
As someone who has practical first-hand experience using EasyWP from NameCheap, I'm able to tell you this is a fast and reliable managed WordPress hosting solution you can trust.
EasyWP made it easy to get your online business off to a good start without the technicalities that come with Cpanel hosting.
At the time of writing, these are the steps you need to follow to install WordPress on EasyWP from NameCheap.
If you have comments, questions, or need help with setting up your blog on EasyWP, I'm always here to help.
