


If you want to control your existing ceiling lights with Alexa or Google Assistant, but can't imagine replacing each individual bulb with a smart bulb, you're not alone. Luckily, there is a way to integrate your lights for smart controls, and that is with a smart light switch. You can find smart switches online and at physical stores like Best Buy, Home Depot, Target, and Walmart.
But does a smart light switch require a phone call to your electrician? Our opinion: not if you feel a little comfortable. Depending on the electricity in your home, the process of installing a smart light switch can be a bit tricky from time to time, but most people with DIY skills can handle the task. For those who are trying this weekend project, we've done the research for you and put together this handy guide to make installing your new smart light switch easier.
The things you will need
- Phillips screwdriver
- Flat head screwdriver
- Smart light switch that adapts to your wall switch and wiring configuration (more on that later)
- Cutting pliers
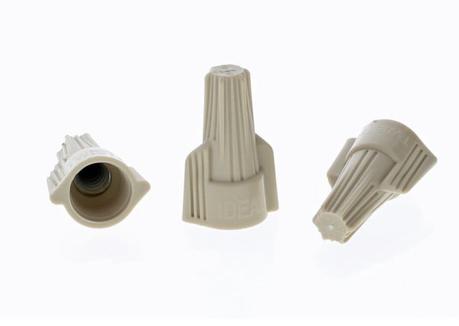
- Wire connectors
- Battery operated flashlight or lantern
- Electrical tape
How to install a smart light switch
Step 1: Learn your existing wall switch and wiring setup. Before you buy a smart light switch, you will need to determine the type of switch you need. If the wall panel has only one switch, you need only one group. If it has two switches (maybe one switch for a light and one for a ceiling fan), you will need a smart two-gang light switch. If it has three switches, you will need a three gang switch.
You should also know the type of wiring you have. Turn off the power at the fuse box to avoid electric shock. If you don't know which electrical circuit your lights belong to, it's not a bad idea to take a Voltmeter (if you don't already have one). The Klein combo pack we paired with above even comes with a non-contact voltage tester, so you won't have to worry about wires and wires.
Next, open the existing switch on which you want to install your smart switch and examine the wiring. To open the switch, unscrew the screws from the wall plate (they are usually located at the top and bottom of the plate). Use a butter knife or flathead screwdriver to pry the plate off the wall, as it may stick in place (often from the paint). Then unscrew the screws from the actual light switch and gently pull the switch forward.
Look at the wiring configuration. Most smart light switches require a ground wire, an "input" wire, an "output" wire, and a neutral wire. Most homes have input, output, and ground wires, but some homes built before the 1980s do not have neutral wires. Typically, the neutral wire is a white wire (or a group of white wires). If you don't have a neutral wire, there are still plenty of smart light switches you can install, but you'll need to purchase a specific type of smart light switch that doesn't require a neutral wire. For example, the Lutron P-PKG1W-WH-R Smart Light Dimmer will work without neutral wire, but requires its own bridge.
2nd step: Choose a smart light switch. Once you've familiarized yourself with your wiring setup, choose a smart light switch that matches your situation.
With two gang switches, you may come across traveler threads and other unique situations. Therefore, the instructions for going ahead will assume a one-gang smart light switch with a neutral wire, like Wemo smart light switch.
Step 3: Remove your old light switch. (Again, make sure the power is off at the circuit breaker). Completely unplug the old light switch by disconnecting each wire one at a time. Take note of which wire when you disconnect them to avoid confusion later. If they're not labeled, take different colors of electrical tape and make labels as you go.
Step 4: Connect the wires from your smart light switch to the wires inside your wall. Connect the input wire to the input wire, the output wire to the output wire, the ground wire to the ground wire, and the neutral wire to the neutral wire. Secure your connections with wire connectors and make sure you don't have any loose or bare wire in the box. (Keep in mind that the ground wire may be a bare wire.) Depending on your wiring, you may need to use a wire stripper to properly prepare the wires for your new switch.
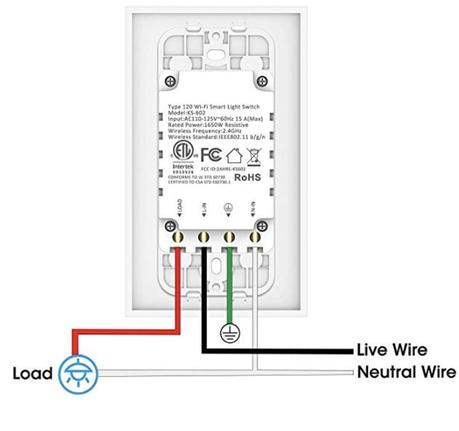
After connecting and securing all the wires of the smart switch, test them by turning on the power. If the switch works, you can proceed to the next step. If your switch doesn't turn on, you need to reexamine your connections.
Step 5: Make sure the smart light switch is secure. Turn off the power in the circuit breaker box. Organize and insert the wire connections into the wall box. Be aware that this can be a tight fit, so it can be difficult to get all of the wires in the box. While it may be tempting to push them inside, we suggest you slow down and place them neatly in the box. This will help prevent loose connections and fires. Sometimes you can tie the wiring together with electrical tape. Overall, you don't want to do anything that increases the chances of causing an electrical fire.
Once you have finished putting all the wires in the box, screw the smart light switch back into place. Turn on the circuit breaker and check that all connections are stable. If all connections are complete, snap in the wallplate and start configuring your application.
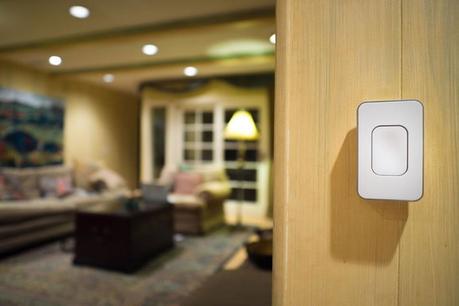
Step 6: Then connect your smart light switch to your specific network. To do this, you must first download the Smart Light app and connect to your Wi-Fi. Once done, name the switch whatever you prefer and attach it to Alexa or Google Home so that you can use the voice control function.
Advice
- Before setting up your smart light switch, read its instruction manual through to make sure you understand its wiring and function. Designs vary, so don't worry if they're significantly different from a traditional light switch.
- Don't automatically assume that all of your rooms will be configured the same. Wiring may vary from room to room.
- If you're having trouble connecting your switch to its app, make sure you have it on a 2.4GHz network. If that doesn't work, you can reset the switch by pressing and holding the "on" button for about 10 to 15 seconds.
- If you need to install a two or three gang smart light switch or install a neutral wireless smart light switch, we recommend that you consult your instruction guide.
Editor's recommendations
https://www.digitaltrends.com/home/how-to-install-a-smart-light-switch/