Before you read: I am not a professional, and have not been trained in dyeing at ALL. I just have common sense, I know how to research, I’ve self-taught myself many things, and I have self-dyed my hair many, many times before so I have a general idea of how to dye my own hair. I read up on this particular brand of dye and how well it worked quite a bit before going ahead with it, so while I’m confident in what it can do based on many online reviews and my own experience, I have to emphasize: I cannot guarantee it will work the same way for you! Do some research of your own, evaluate your own hair, and proceed with much caution.
Also, while I did not have to pre-bleach my hair, as in, I didn’t have to lighten it and THEN apply color, this dye DOES have bleach in it. So if your hair is sensitive to bleach or particularly fragile, you might want to reconsider.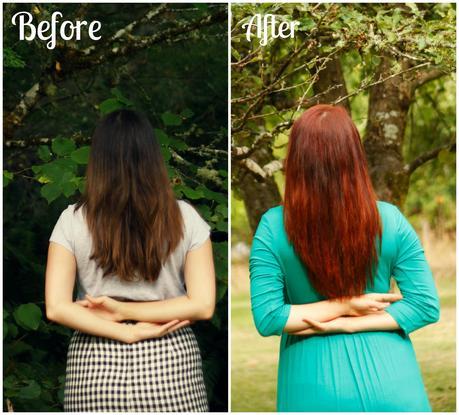
So, as you guys know and can see from the pictures, I recently dyed my hair red. At home. Without pre-bleaching it. And I wasn’t sure how many of you would not know how to do this, but since I’ve gotten at least 10 requests (if not more) for a post, here goes!
A few things about my hair: it’s pretty long, as you can see. About half of it has leftover bleach from when I went blonde last year, as well as old dye from when I went back to brown a month later. It’s been at least a year since I last dyed my hair, and other than a few split ends, it is pretty healthy. You can see the natural color at the top, and I have been told by hairdressers that it’s only two or three levels away from being black, so it’s quite dark. When I went blonde at the hairdresser, it took her six hours to completely lighten and dye it blonde. But dyeing it red myself, it took, in total, about two hours plus time to rinse.
So, let’s get started!
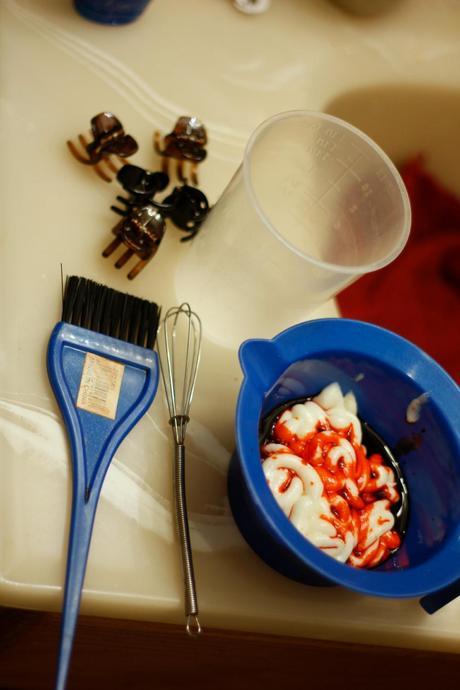
- 3 boxes L’Oreal Excellence HiColor Reds for Dark Hair Only in H8 – Red Fire (note- given the length and thickness of my hair, I could have used four boxes. So, for up to shoulder-length, average thickness hair, get two boxes. For up to waist-length, get four.)
- 1 bottle 30 volume developer (with 4 boxes of dye, I would have needed 2 bottles)
- One mixing bowl
- One applicator brush
- One small whisk (already had)
- One measuring cup with ounces written on side (already had)
- One pair reusable plastic gloves
- Hair clips (non-metal)
- Brush
Also needed:
- Shampoo and conditioner for dyed red hair (I grabbed a John Frida one because I forgot to look at the beauty supply store. It works, although it’s recommended you use sulfate-free shampoo as sulfates can dull dyed hair.)
- Several packets of conditioner for immediately after you’ve dyed your hair
You will be doing this twice, so either allow yourself a good two to three hours to process, rinse, dry, and re-process your hair, or do it over a few days’ time. I did the second process on the second day, but according to my research into what other women did, it worked just as well and didn’t damage the hair at all to do it all in one day.
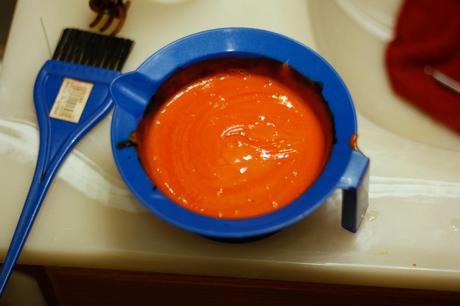
Step one: mix up one half of your total boxes of dye according to the package directions! When you’re opening up the little tube of color that comes in the box — it will come with a large tube and a small tube — be careful how fast you squeeze it. That stuff quite literally shoots out and splashes everywhere if you do it too hard! I used a whisk to mix my dye, simply based on the recommendation of a few sites I visited, however you don’t NEED a small whisk if you can’t find one. Just be sure your dye is very smooth and well-mixed! Note: since I only got three boxes when I should have gotten four, I used 1-1/2 boxes each time and hoped it would work. It did, but I highly recommend buying either two (for short hair) or four (for long/thick hair) boxes and using half of it each time.
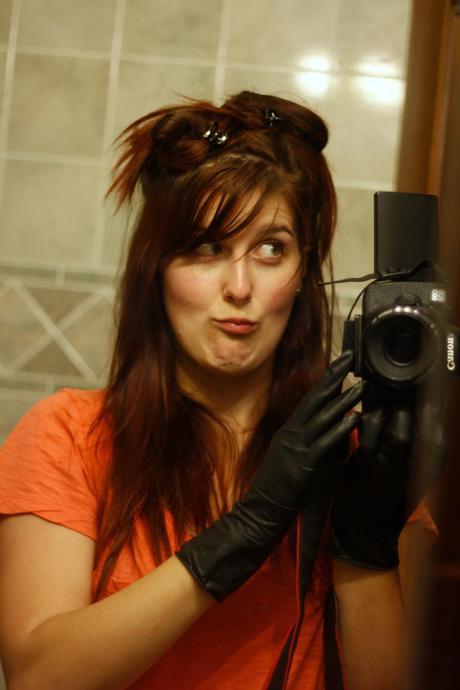
Step two: brush your hair to get any tangles out, and section it off into easily-manageable portions. You’ll look a little bit like a crazy muppet, but y’know. It’s all for a good cause.
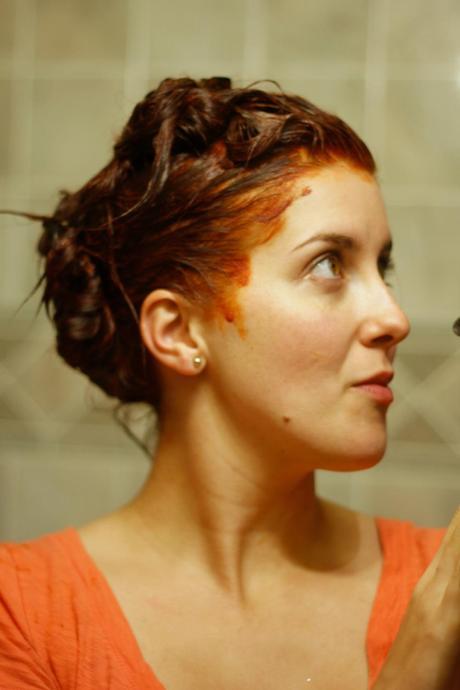
Step three: from those sections, make even smaller sections and paint the dye onto your hair, tip-to-root. (side note, you can put Vaseline around your hairline to keep your skin from getting dyed. Mine turned orange, but was only orange for a few days.) The first time around, leave any virgin hair untouched and process the dye for 20 minutes, and then paint your virgin hair and leave for another 10 minutes, to ensure a more even coverage. Virgin hair will dye faster, and you don’t want to come out with bright orange roots and dull red tips! The second time around, you can paint on tip-to-root without worrying about leaving the roots undone for 20 minutes. And don’t forget all of those wispy little hairs around your ears and face; you don’t want dark wisps and red hair! It’s easiest to take some dye on your finger and apply to get those little hairs.
Step four: rinse and wash your hair according to the package directions, using a red-hair friendly shampoo (the box said to rinse then wash the hair, for any of you who might say you shouldn’t wash just-dyed hair. So that’s what I did!) and lukewarm water. Then, you can either blow-dry your hair and repeat the process, or let your hair dry naturally and do it all again.
Here’s a comparison for those of you wondering what the first process did:
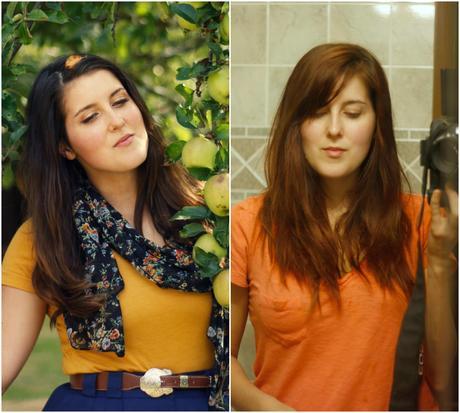
As you can see, it did turn my hair reddish, but the color was much more of a light auburn than a true red. The second time around, though:

BAM it is red. I promise, I didn’t bump the color in these pictures at all; that is how red it will be using this particular shade of dye.
A few tips to keep in mind:
1. Do NOT skimp on dye! Because you have to process it twice, you’ll need more dye than usual, and it’s much safer to grab an extra box than to get to the last chunk of hair and realize you’re nearly out. I just barely squeaked by with three boxes; the last bit, I wasn’t sure if I could get it all covered. Thankfully, I did. But get extra dye, just in case! If you don’t end up using it, you can always put it to use touching up your roots when you need to.
2. Unless your bathroom is incredibly well-ventilated, you might want to grab a floor fan to circulate air, or your nose will burn and you won’t be able to breathe. Because there is a small amount of bleach in this dye, it stinks to high heaven. But a little fan blowing air in totally solves that problem!
3. I highly recommend you use the brush-on system, as using a bottle to squirt the dye on will make it much harder to get even coverage. And with a color this drastic, you’re not going to want splotches of darker hair in the mix!
4. Wear a button-up shirt that you don’t care about, and don’t wear a sports bra, or you’ll likely get dye on it when you go to rinse your hair.

Now, I did a lot of research and I have a pretty good general knowledge of how to care for dyed hair, but if you’re new to the red-hair game, there are a few things to consider:
First of all, say goodbye to hot, hot showers. We all know that red is the hardest color to keep, and this is because the molecules of the red dye are much larger than other colors, making it harder for them to hold on to your hair. So if you want to preserve your red hair for as long as possible between touchups, it’s best to wash it in cool or cold water, so unless you grab yourself a shower cap to protect that hair, you’re gonna be giving up your heated showers to keep a pretty, vibrant red going.
Second, be ready to retouch your hair quite often, as the red will fade much quicker than other colors. I’ve washed my hair twice now, and it’s been red for a week, and I’m not seeing any super noticeable fading yet, but I’ve read around and most of hte ladies have retouched their roots and re-dyed their hair (with non-bleach dye, unless you want it lighter) anywhere from 3 weeks to 2 months after they dyed their hair.
Third, every time you wash your hair you will see color come out of it. This is pretty normal; I’ve had it happen with brown dye as well. But it may also stain your towels, so beware!
Fourth, the first time you dye it will be the most expensive. The dye alone cost me $25, plus supplies; I think I spent about $35 on everything. Compared to a salon dye, that’s pretty cheap, but if you’re like me… it’s above my normal price range. So be prepared to spend a little more to get it red. Upkeep should only cost about $10 a month (if you do touchups that often), though.
Fifth, if you decide to keep up your red hair, unless you want it to get lighter, do not use a dye that needs a developer. This dye/developer has some bleach in it, so while I didn’t have to pre-lighten my hair, it DID bleach my hair and if you keep using this, it will probably damage your hair over time as well as get your hair lighter and lighter every time. So, use it on your roots only, and grab a non-bleach dye to brighten the rest of your hair.
Sixth, know your coloring! Don’t be afraid to ask the person at the store for their opinion. A great way to figure out whether to go with blue-based red or a more orange-based red is lipstick: when you swipe red on your lips, is it more blue/purple, a true red, or more orange? I tend to look better in orange lipstick and orange-based reds, so I went with a more copper shade.
And last of all, be ready to switch up your makeup a little bit. I still use my normal foundation, but I no longer go for pink cheeks as the red in my hair tends to really emphasize the pink in my skin. Temporarily, I’m wearing a more coral blush, but I intend to run to Target one of these days to pick up something a little bit more subtle.
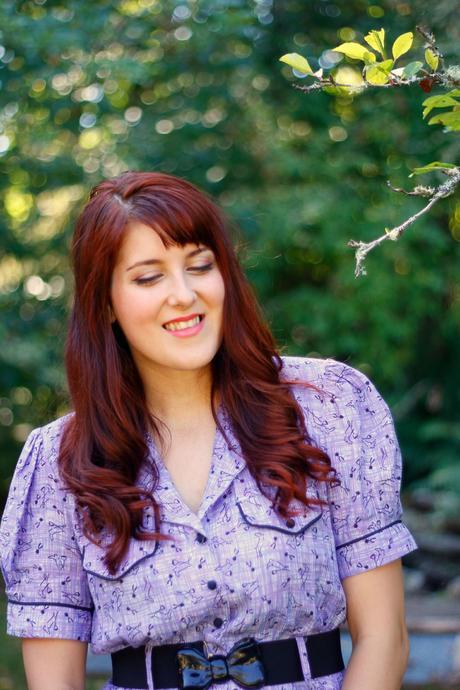
P.S. No, I did not dye my eyebrows too. In case you didn’t see my comment about that in a previous blog post: find a matte eyeshadow that is one or two shades lighter than the red hair, and brush it through your brows with some brow wax or brow gel to make it appear as though your brows match your hair.
I think that’s it!
Have you dyed your hair red before? Any tips that I missed? Got questions? Ask me and I’ll try to answer them asap!
Happy Tuesday!

Bloglovin|Chictopia|Facebook|Twitter|Pinterest|Instagram|Fiction Press|Tumblr

