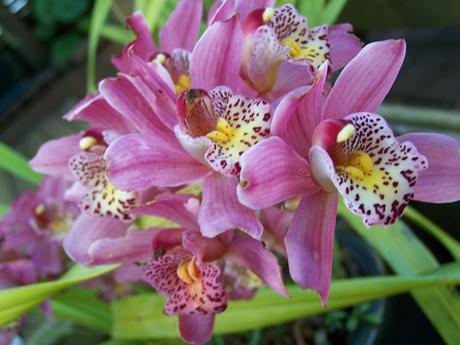
Orchids are probably one of the most beautiful flowers and they can give any room a much needed touch of class. These elegant beauties make the perfect gift for special occasions. Although cut orchids are probably the longest lasting of all cut flowers, why not send a potted orchid instead? Potted orchids look amazing when in bloom and they are still very much attractive during their dormant stages. This year, when placing your order for Mother’s Day flowers, do yourself a favour and have a look at the potted orchids at your local florist too. They could easily cost the same or possibly even less than your traditional Mother’s Day arrangement. If you do choose to buy orchids, here are some helpful care tips to help then thrive.
Replicate their natural conditions
When you take any plant out of its natural environment, you need to do everything in your power to recreate that environment in your home. In the case or orchids, they are partial to fairly strong (but not direct) sunlight, high levels of humidity, temperatures between 10 and 30 degrees Celsius and airflow around the roots. They are also accustomed to dry periods followed by a fair amount of rain so take this into account in terms of watering.

Orchid roots
The roots of these plants are quite unique. Unlike other potted plants, the roots should not be completely covered by soil or peat moss. The roots should be allowed to protrude through the surface of the soil. This prevents the roots from rotting in soggy soil and it allows them to dry out a bit so that they can breathe.
Repotting tips
This first big rule when it comes to repotting an orchid is to avoid doing so while the plant is in bloom. After the flowers have perished, you can carefully remove them and prepare to repot. Pots for orchids are different from regular pots to make sure that you select your new pot with care. They should have large slits to allow for rapid water drainage. If the water does not drain quickly, the soil will remain soggy and cause root rot.
Make sure that you have some orchid potting mix ready before to remove the orchid from its current home. Orchid mixes are usually quite chunky in nature to allow for proper water drainage. When you remove the orchid from its original pot, make sure that you carefully remove as much of the old potting mix as possible. Healthy orchid roots are white with green growing tips. If you see any dark or blackened roots, remove them carefully before repotting.
Place the orchid inside the new pot and cover the roots partially with potting mix. The orchid should be well supported but not completely anchored. As it grows, it will secure itself to the pot itself and stay firmly in place.
Sun and water
If you place your new orchid in an east facing window, you will ensure that it receives the warmth of the morning sun while avoiding the harsh rays later on during the day. As for watering, you should place your pot inside a deep, wide tray filled with gravel. This is great for catching run-off water and for creating a humid environment for the orchid. In the summer, your orchid should be heavily watered once a week. In the winter, make sure that you keep the plant warm and water once a month or so. Spray the pant with water to maintain the humidity.
Other important tips
Orchids enjoy fertilizer during the growing season. Make sure that you find one specifically designed for orchids and follow the instructions to the letter. During the winter, you will not need to fertilize.
Your orchid might not be able to talk but, if there is something about their surroundings that they don’t particularly like, you will know it! If you notice a lack of growth or deteriorating condition of the plant (i.e. yellowing leaves), then you will need to analyze the situation and make some changes until you perfect your orchid’s environment.
In terms of precautions, orchids are not known to be poisonous in any way. That being said, you might want to keep your pets and little ones away from these rather delicate plants to protect them from getting damaged leaves or stems.

