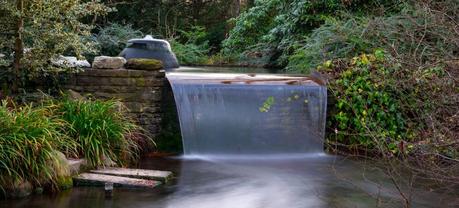
Ponds add a unique aspect to your garden, improving the atmosphere of your outdoor spaces, providing a great habitat for wildlife and can even add value to your property!
It doesn’t matter if you have limited space or resources. Ponds can be designed to fit almost any backyard or budget.
Just follow this simple guide, and you will be well on your way to creating your very own, Perfect Garden Pond.
Article Contents
- Before you get started
- Installing a Liner Pond (Flexible Liner)
- Installing a Preformed Pond (Shell Liner)
- Installing a Pond Waterfall
- Choosing a Pond Pump
Before You Get Started Building a DIY Garden Pond
Planning ahead
Planning ahead will provide you with an idea of how much your pond will cost, and therefore what size and features you can afford. It will also help you avoid costly and timely mistakes.
Decide what type of pond you would like?
Most ponds traditionally use a Pond Liner, however you also have the opportunity to use Preformed Ponds (solid plastic moulds) which can make installation easier and can include self-contained features such as pond waterfalls and fountains, however these tend to be more expensive.
Location, Location, Location
Do:
- Choose a level site with ample sunlight.
- Choose a visible and accessible site.
- Use a circuit breaker or GFI (Ground Fault Interrupter) with all pond equipment
Don’t:
- Place your pond below too many overhanging trees. (leaves contaminate the water)
- Dig before checking for underground wires or pipes. (check your house plans and call your local utility company.)
- Place your pond in an overly wet area.
How big do you want your pond?
Do you want a small garden pond to add a certain charm and soundtrack to your garden, from the trickle of a pond waterfall to the flow of a small water feature, or do you want a large pond – to home koi and provide a large expanse of water to reflect your property and garden.
How do you want it look?
A great way to start, is by searching the internet, gardening magazines and Gardening TV Shows for inspiration. My personal favorite is the Chelsea Flower Show, which showcases the most creative and innovative gardens from around the world once a year.
Remember good design never goes out of fashion! Using local natural materials and design ideas is a great way of making your pond fit into your backyard and endure the test of time.
Night time
Ponds aren’t just for the day! Show it off at night, by using well positioned lighting to create beautiful reflections. (and to stop people falling in…)
How To Install a Flexible Liner Pond
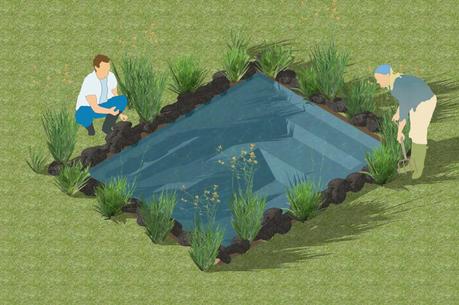
Installing a Pond Liner (Flexible Liner)
Step 1: Safety first!
-You don’t want any unwanted surprises when you break ground, so check your house plans for underground cables and pipes, and call your local utility company to make sure that the ground is clear. Shovels and electricity don’t mix.
-If there are any wires, pipes or hazards near your pond site, mark them out very clearly.
-Also ask your friends and family for your help, especially if you’re embarking on a large project, pond construction is far more enjoyable with company – not to mention it’s a lot quicker!
Step 2: Marking Out
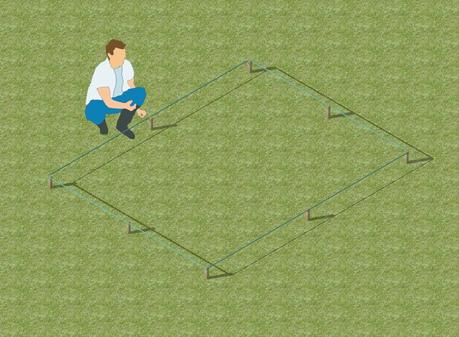
Mark out the ground where you’re going to dig your pond.
A simple way to do this is to stake sticks in the ground and connect them with string, to make a clear outline that won’t disappear when you start digging.
Step 3: Breaking ground
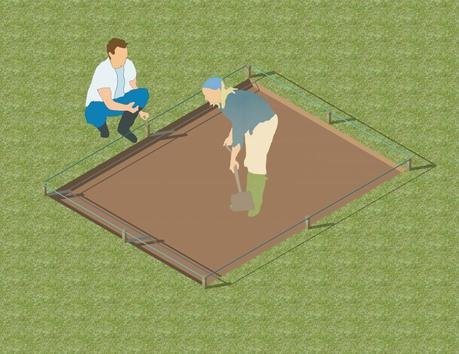
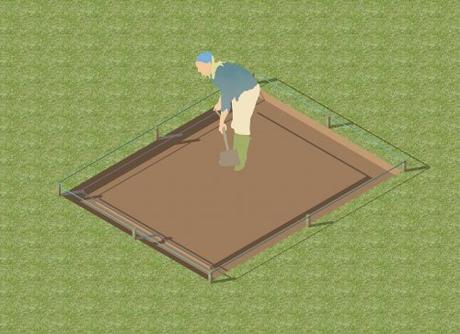 Step 4: Preparing for the Edging Stones

-Dig around the inside of the pond you’ve marked out, you want to make a trench that is around 8 – 10 inches deep and as wide as your edging stones. This be where your edging stones or slabs will sit.
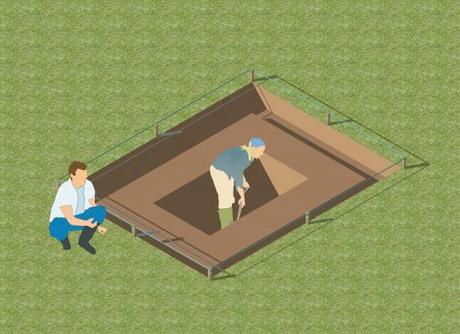 Step 5: Digging Deep

-Start digging from the center of your pond outwards. Remember to dig a few inches deeper than your intended depth – this space will be used to a add sand or gravel layer to prevent any rips or tears from the bare ground.
-The ‘deep zone’ in the center of your pond should be around 3 feet deep if you plan on keeping fish. This will ensure it won’t freeze, and give the fish a winter time habitat.
-Don’t place your pump or fountain in this zone.
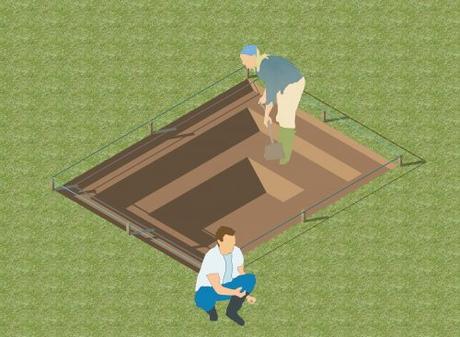 Step 6: Creating an area for plants

– You should build a shelf outside the center of your pond, around 8 – 12 inches deep, this will provide a place for your shallower plants to take root.
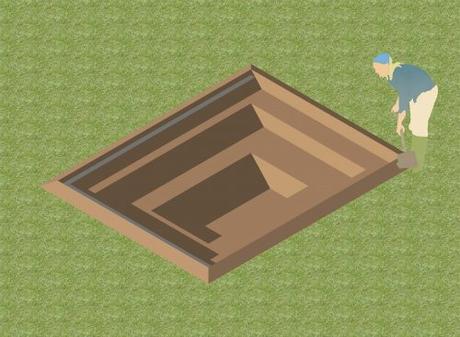 Step 7: Preventing water run-off and leveling

-By this point you can remove the sticks and string you’re using as guides.
-Use a Bubble Level to ensure your pond is level. If not your pond liner may show.
-Back-fill a trench around your pond, around 5 inches, and grade it downwards – to prevent water from your garden running into your pond.
(place the Level diagonally across, using an accurately cut length of timber to increase its span)
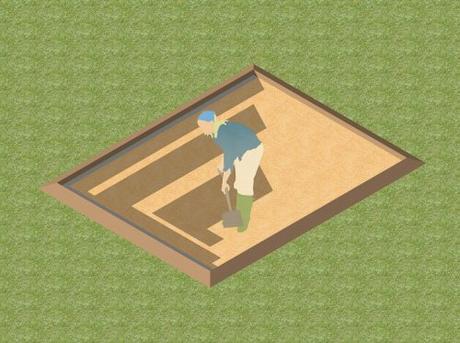 Step 8: Clean out your pond site!

-Sharp sticks and stones can puncture your liner, so removing all these offending objects is essential. Fill any holes left by large objects with soil.
-Next choose a material to line your pond site with. Sand is normally used, but materials such as fiberglass insulation and even newspaper are fine. Some Pond Liner suppliers even offer their own material.
-Lay around 2-3 inches of Sand in your pond site. This will provide a soft cushion for your Pond Liner to sit on and help prevent potential rips or tears.
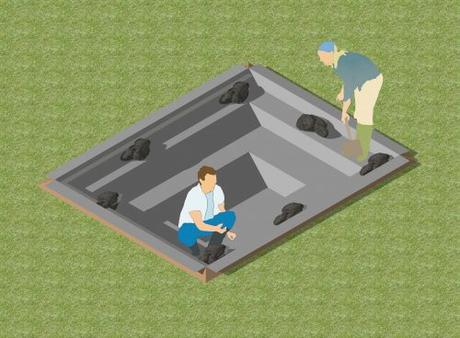 Step 9: Placing your Pond Liner

-A helper is very useful for this step. To avoid damaging your liner, don’t drag it along the floor. But rather hold and drape it over your pond site. Place it down with an even overlap on all sides of the hole. (But don’t cut anything yet)
-Place some large but smooth flat stones around the edge of the liner to hold it in place.
-Begin adding water, adjusting the liner to remove creases as it fills. Ease off the stones as the liner begins to stretch.
-Once full use a utility knife or some sharp scissors to trim the liner. Leave enough room around the pond for edging stones to sit on and hold your liner in-place.
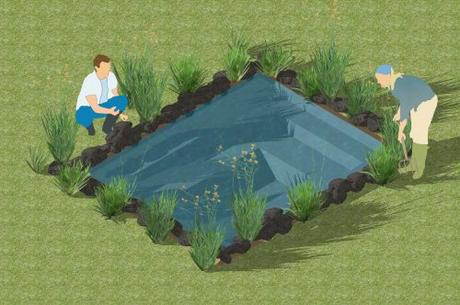 Step 10: Finishing Touches

-When placing Edging Stones onto your Pond Liner, it is advisable to use landscaping pins or 20d nails every foot or so around the edge to hold the Pond Liner in place whilst you arrange your stones.
-Natural Stones can be used to great effect, as can flag stones and paving slabs. Ensure the stones can’t topple into the pond. They can be arranged so that this won’t happen or if not pre-mixed concrete, (often referred to as ready or post mix) can be used to weld the stones in place.
Now you have a complete pond, read further below for advice on waterfall installation, choosing pumps and filters, and other great ways to make your Perfect Pond.
Installing a Preformed Pond (Shell Liner)
Step 1: Safety first!
-You don’t want any unwanted surprises when you break ground, so check your house plans for underground cables and pipes, and call your local utility company to make sure that the ground is clear. Shovels and electricity don’t mix.
-If there are any wires, pipes or hazards near your pond site, mark them out very clearly.
-Also ask your friends and family for your help, especially if you’re embarking on a large project, pond construction is far more enjoyable with company – not to mention a lot quicker!
Step 2: Marking out
-This can be done simply by turning you Preformed Pond on it’s head and marking around the edge.
-Mark out the site by staking sticks in the ground and connecting with string.
Step 3: Breaking ground
-Dig the pond site for the Preformed Pond with the same dimensions. Then give the hole another 2 inches of space on each side to give you a space to place a sand layer.
Step 4: Cleaning the site!
-Sharp sticks and stones can puncture your liner, so removing all these offending objects is essential. Fill any holes left by large objects with soil.
-Next choose a material to line your pond site with. Sand is normally used, but materials such as fiberglass insulation and even newspaper are fine. Some Pond Liner suppliers even offer their own material.
-Lay around 2-3 inches of Sand in your pond site. This will provide a soft cushion for your Pond Liner to sit on and help prevent potential rips or tears.
Step 5: Placing the Preformed Pond
-It’s best to get help with this part in particular!
-Place the Preformed Pond into the hole. The top of the Preformed Pond should be about 1-2 inches proud from the top of the hole to prevent water running into the pond from the rest of your garden.
-Place a Bubble Level across the top of your Preformed Pond, then add or remove soil from around the base until the pond is level. (place the Level diagonally across, using an accurately cut length of timber to increase its span)
Step 6: Filling the Pond
-Ensure your pond is perfectly level. Then start adding water (keeping your Bubble Level in place)
-As the water rises, back-fill clean soil or wet sand around the Preformed Pond, ensuring that the Preformed Pond remains level.
-Run the water at a rate at which the clean soil and damp sand you are back-filling, exceeds the speed at which the water is rising. This will stop the Preformed Pond bulging.
-Try to back-fill equally around all sides of the Preformed Pond.
Step 7: Finishing Touches!
-Once the Pond is filled you can conceal the edge of the Preformed Pond with Edging Stones or Paving Slabs. Ensure that these overhang the pond by a few inches and cannot tumble into the pond itself! They can be arranged so that this won’t happen, or if not – pre-mixed concrete, (often referred to as ready or post mix) can be used to weld the stones in place.
-The full weight of the Edging Stones or Paving Slabs shouldn’t be placed on the rim, as it may break. So therefore they must be partially supported by the surrounding ground to prevent this.
Now you have a complete pond, read further below for advice on waterfall installation, choosing pumps and filters, and other great ways to make your Perfect Pond.
Choosing the correct and best quality Pond Liners and Preformed Ponds is essential to the success of the build and an enduring pond.
Installing a Pond Waterfall
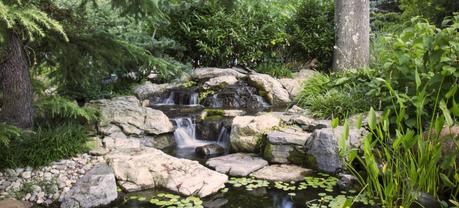
Adding a Waterfall to your pond adds an element of drama your Pond. Not only this, but it also gives your garden a soothing soundtrack of running water, and perhaps most importantly it helps draw oxygen into your Pond, which is very beneficial for plant and pond Life.
Whether you have installed a Liner Pond or a Preformed Pond, the steps for creating a waterfall are similar.
-
Step 1: Creating a Sloped, Solid and Stable Base
-A Pond Waterfall is essentially a slide, which you pump water from your pond to the top of, for it to run down and then up again, and so on.
-So the first thing to do is build up an area of higher ground using soil and stones, to create a sloped, solid and stable base.
-
Step 2: Placing the Stones
-On top of this base, place Stones down the sloped base, ensure the Stones are graded at enough of an angle to keep the water flowing and reduce the amount of stagnant areas.
-The Waterfall should overhang the pond by a few inches.
-
Step 3: Installing your Water Pump
-Place your Water Pump in your pond. Preferably on a shelf, which is not too deep.
-Run the hose to the top of the Waterfall, and test the Waterfall for leaks. Plug any gaps or holes with soil or damp sand. Also, check for stagnant areas and adjust the Stones accordingly.
-
Step 4: Concealment!
-Use Stone, Soil and Plants to conceal the hose and to surround the waterfall itself.
-Not only will this hide the plastic parts, but it will also give your waterfall more of a grounding in its surroundings, making it look more at home in your Garden.
Now you have a complete Waterfall! It might look a little out of place at first, but once the rocks start to weather and the plants start to grow – it will look right at home.
Using local plants and natural materials will speed up this process a great deal.
Choosing an effective Pump for your Pond Waterfall is important.
Here is a selection of Pond Pumps we recommend.
Choosing a Pond Water Pump
Adding a simple Water Pump to a Pond can make the difference between a stagnant and lifeless pond, and an invigorated and lively one!
In Fact it is essential in keeping water quality clean and clear, providing a great habitat for plants and pond life alike.
Before choosing a Pond Water Pump you must work out how much work you want it to do. This will be dependent on your Pond’s Size, Waterfall, Water Features and Filters.
Simply put, the more work – the more powerful the pump required.
For a healthy pond, water should be circulated once every two hours.
For example. A 100 Gallon Pond would require a 50 Gallon Per Hour Pump. (Minimum)
It’s always a good idea to choose a pump that exceeds the minimum amount of circulation required. As this will ensure it doesn’t always run at it’s capacity – and gives the potential to expand or add more features in the future.
The more features your pond has and the higher the waterfall, the more powerful a pump you will need.
Formula for working out the size of your pond in gallons:
If you have a square or rectangular pond:
Length x Width x Average Depth x 7.5 = Total US Gallons (x1000 for Litres)
If you have a round pond:
0.785 x Top Diameter x Bottom Diameter x Depth) x 7.5 = Total US Gallons
Radius x Radius x 3.142 x Depth x 1000 = Total Litres
Choosing an effective Pump for your Pond is very important.
Here is a selection of Pond Pumps we recommend.
