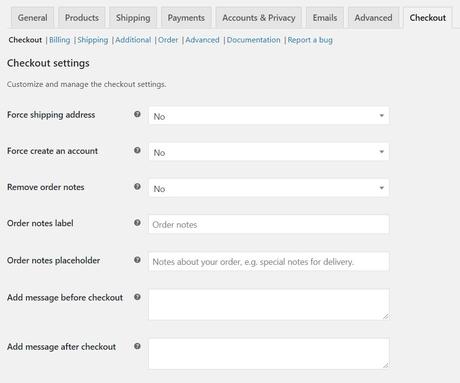
If you are running a WooCommerce store, you may want to customize your checkout page to collect more information from your customers or to enhance their user experience. For example, you may want to add a field for VAT number, delivery date, gift message, or any other data that is relevant to your business.
However, WooCommerce does not provide an easy way to add or edit fields on the checkout page from the settings. You need to use some additional tools or methods to achieve this. In this blog post, we will show you how to add extra fields in WooCommerce checkout form using different ways, such as:
- Using a WooCommerce extension
- Using custom code
Using a WooCommerce Extension
The first way to add extra fields in WooCommerce checkout form is to use a WooCommerce extension that provides this functionality. WooCommerce extensions are official plugins that are developed by WooCommerce or third-party developers. They usually offer more features and support than free plugins.
One of the easiest ways to add extra fields in WooCommerce checkout form is to use a plugin that allows you to do so. There are many plugins available that can help you with this task, but we will use WooCommerce Checkout Manager as an example. This plugin is free and easy to use, and it lets you add, edit, and remove fields from the checkout page with a few clicks.
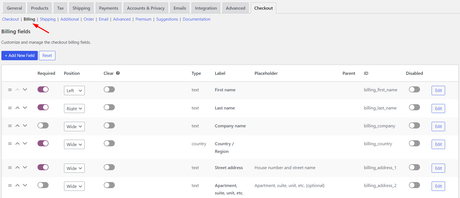
To use this plugin, you need to install and activate it on your WordPress site. Then, go to Admin Panel →WooCheckout . You will see a list of all the fields from the billing, shipping, and additional sections. You can edit or delete any of these fields as you wish.

To add a new field, switch to billing, shipping, and additional fileld on the page and find the "Add New Field Section". Here, you can choose the type of field you want to add, such as text, textarea, checkbox, radio button, select, date picker, etc. You can also enter the name, label, placeholder, required option, and other details for the field.

For example, if you want to add a field for delivery date, you can select the date picker type and enter the name as "delivery_date". You can also set the label as "Delivery Date", the placeholder as "Select Date", and the required option as "Yes". Then, click on the "Save Changes" button at the top right corner.
Now, if you go to your checkout page, you will see the new field added.
You can repeat this process for any other fields you want to add. You can also reorder the fields by dragging and dropping them on the list.
Using Custom Code
The second way to add extra fields in WooCommerce checkout form is to use custom code. This method is for advanced users who know how to code or have access to a developer. This method gives you more control and flexibility over how you want to add and display the fields on the checkout page.
To use this method, you need to add some code snippets to your functions.php file or a custom plugin. The code snippets will use some WooCommerce hooks and filters to add the fields to the checkout page, process the field values, and display them on the order page.
For example, if you want to add a field for customer feedback, you can use the following code:
add_action( 'woocommerce_after_order_notes', 'my_custom_checkout_field' ); { echo '<div id="my_custom_checkout_field"><h2>' . __( 'Customer Feedback' ) . '</h2>'; woocommerce_form_field( 'customer_feedback', array( 'type' => 'text', 'class' => array('my-field-class form-row-wide'), 'label' => __( 'How did you hear about us?' ), 'placeholder' => __( 'Enter your answer here' ), ), $checkout->get_value( 'customer_feedback' )); echo '</div>'; } add_action( 'woocommerce_checkout_process', 'my_custom_checkout_field_process' ); function my_custom_checkout_field_process() { if ( ! $_POST['customer_feedback'] ) wc_add_notice( __( 'Please enter your feedback.' ), 'error' ); } add_action( 'woocommerce_checkout_update_order_meta', 'my_custom_checkout_field_update_order_meta' ); function my_custom_checkout_field_update_order_meta() { if ( ! empty( $_POST['customer_feedback'] ) ) { update_post_meta( $order_id, 'Customer Feedback', sanitize_text_field( $_POST['customer_feedback'] ) ); } } add_action( 'woocommerce_admin_order_data_after_billing_address', 'my_custom_checkout_field_display_admin_order_meta', 10, 1 ); function my_custom_checkout_field_display_admin_order_meta(){ echo '<p><strong>'.__('Customer Feedback').':</strong> ' . get_post_meta( $order->get_id(), 'Customer Feedback', true ) . '</p>'; }
Now, if you go to your checkout page, you will see the new field added.
You can repeat this process for any other fields you want to add. You can also customize the code according to your needs.
Conclusion
In this blog post, we have shown you how to add extra fields in WooCommerce checkout form using different ways, such as using a plugin, a WooCommerce extension, or custom code. You can choose the method that suits your skill level and requirements.
Adding extra fields in WooCommerce checkout form can help you collect more information from your customers or improve their user experience. However, you should also be careful not to add too many fields or unnecessary fields that may confuse or annoy your customers. You should only add the fields that are relevant and useful for your business.
We hope this blog post has helped you with your project. If you have any questions or feedback, feel free to leave a comment below.👇
Interesting Reads: How to Add Shipping Charges in WooCommerce How to Sell Your Art on Fiverr BuddyBoss Platform Review: All You Need to Know