Do you run a Non-Profit Organization? or Do you want a donation for your project? If yes, then this article will be of great help for you. Using the methods described here, you will be able to add a donate button PayPal to your website.
Additionally, if you want to add a PayPal buy now button to your website then you can also do the same by following the method.
So, without wasting any time further, let’s get started with the article on “How to add a PayPal donate button to your website?”
How to add a PayPal donate button to your website?
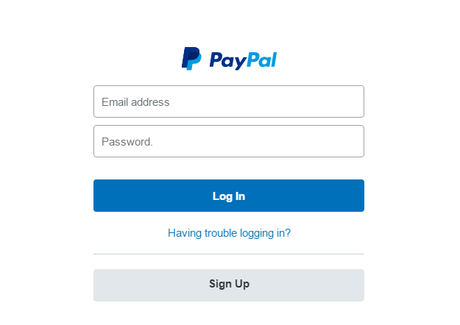
Step #1: As the first step, you need to visit www.paypal.com and log on to your PayPal account using the corresponding credentials. Just in case, if you do not have a PayPal account as without having one, you won’t be able to add a PayPal button to your website. So, make sure to be equipped with one before proceeding further.

Just for the sake of information, if you want to create a PayPal account then you need to click on join button. After this, you will have to follow the onscreen instructions. In a new PayPal account, you may need to know how to add money to PayPal.
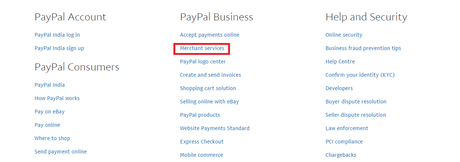
Step #2: So, by now we assume that you are equipped with a PayPal account and have logged onto it. From the PayPal dashboard, you now need to navigate to the “Merchant Services” tab. Once you have found the same, then you now need to click on it.

Since it seems like PayPal has changed its interface, you may have a hard time finding “merchant services” option. So, you can directly follow the following link which can be found through the sitemap.
Always remember that for this, you are required to have a business PayPal account.
From the following window, you are required to scroll down a bit for “PayPal Website Payments Standard.” Once you have found the same then, you need to click on it.
Step #3: The recent activity of yours will land you to a plethora of options. If you are looking to add “Buy Now” sort of buttons to your website, then you can click on the corresponding option. After this, you can follow the onscreen instructions to complete the process.
However, if you are looking to add a donation button, then you should consider looking for the “Donations” link. You need to click on it in order to start the process of integrating it into the website. Also, rest of the steps will tell you about the processes required for adding a donate now button on your site.
Step #4: To directly jump to this step, you can click on this link.
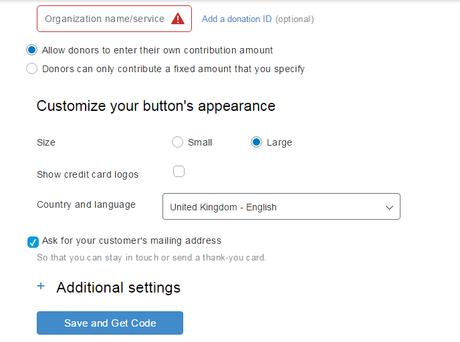
In this step, you will be prompted to enter the details relating to your organization. You will first have to choose the button type which will be by default “Donations”. After this, you will have to provide your organization name or the service name. If you are equipped with the Donation ID, then you can enter the same in the subsequent field. However, this is optional.

On the same page, you will see an option as “Customize text or appearance.” As the name suggests, you can click on it in order to customize the appearance of your buttons. Like, if you want to display the credit card buttons along with your Donate now button then you can mark the check box next to which “Display Credit Card Logos” is written. Also, you can select the country and language for the button.
Apart from this, you will have to choose the currency by clicking on the button just below the “Currency” text.
However, all the options to customize the buttons are optional, and you can also add your custom made button. For this, you just have to enter the URL of the image of the button and your work will be done.
After, doing all the mentioned, you will have to choose the “Contribution Amount.” For this, you will be provided with two options. The first one being that you can set a particular amount, and this means that the donor cannot send a large or a small amount other than the fixed price.
On the other hand, the other option includes that the donor can enter their contribution. Go for the one whichever suits your need and proceed forward.
Step #5: After doing all the needful as mentioned in step #4, you now have to scroll down a bit for further options. Now, you have to choose the Merchant Account ID. Yet again, you are provided with two options. You can go for either one of them whichever you found yourself comfortable with.

Now, if you want to save the button and its preferences for future use, then you can consider moving onto step 2 on the window. However, if you are not up with it, then you can certainly jump on to step 3.
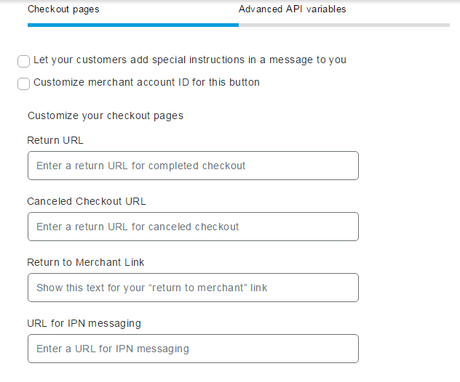
If you have to customize advanced features then also, you will have to look onto step 3. Using this step, you can customize your page for the exception when a user cancels the donation, or you want your button to be on a specific page.
Step #6: After successfully completing the previous steps, all that you require doing is to click on the “Create Button.” This will direct you to a page where you will be provided with two kinds of codes. One is for using it on your websites, and the other one is for using it on your email.

To use website code, you will have to copy the code and place it into the code of your website. For this, you can ask your designer, or you can simply do it yourself. All that you require doing is to paste the code where you want it to be displayed. That’s it; you now have a donation button on your website. Kudos.
So, this was all about adding a PayPal donate button to your website. We hope that by making use of the methods specified here in this article, you will be able to know “How to add a PayPal payment button to your website?”
PayPal is the easiest and the convenient way to send and receive offshore as well as local money from different merchants. If you are really new to the PayPal, you should see how to use PayPal for sending and receiving money.
If you found this article helpful then do let us know by leaving a comment below. Moreover, do not forget to share this article because sharing is caring.
Thank you for passing by and giving it a wonderful read.
Stay tuned for more and keep visiting.
Quick Links
- How to Setup a PayPal Account?
- Melio Payments Review
- How to Receive Money through PayPal?

