PhotoWorks is an easy to use intelligent photo editing tool from AMS Software. In this article, we will review the performance of this software for adding a background to a picture.
This post-processing software is for Windows operating system. Mac users can also use this by using any Windows emulator software. So, let us see how to add a background to a picture using PhotoWorks.
Add a Background to a Picture using PhotoWorks
1. Install & Open

Install PhotoWorks on your computer. Open the application after installation. It didn’t take much time for me to open the software.
2. Image Selection
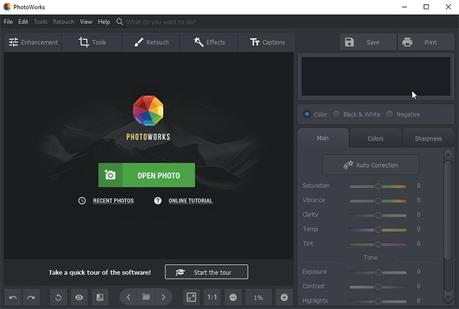
Now, click the “Open Photo” button to browse and select the photo for background change from your hard drive. I will use one of my images of Malabar Trogon, which I have photographed from Thattekkad in Kerala, India.
3. Background Change Panel Introduction
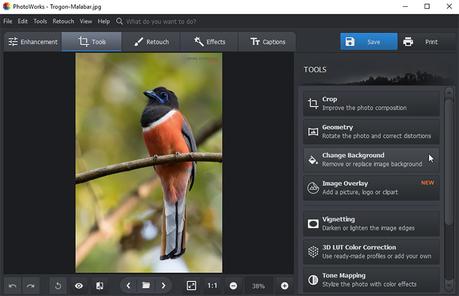
You can see four tabs on top of the photo. Select the “Tools” tab from this group, next to the “Enhancement” tab. You can see the “Change Background” option on the right-side panel. Select this option.
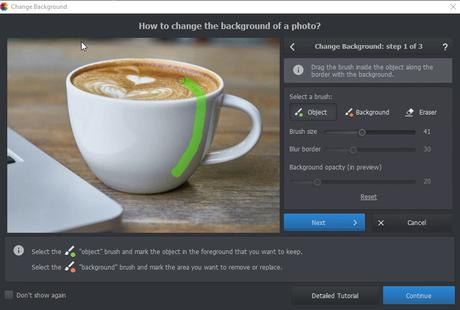
Now, you can see a popup window that shows you how to change the background in an animated fashion. I really liked this quick reference guide kind of feature. So, you don’t have to look into any external tutorials to use this feature.
4. Change Background- Step 1
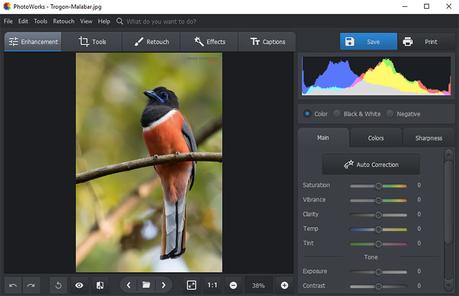
Now, close the quick reference tutorial window.
So, let us start using the background changing feature to see how to add a background to a photo.
PhotoWorks has divided the whole procedure into three steps. So, let us start with Step 1. You can see three brush options here – Object, Background, and Eraser.
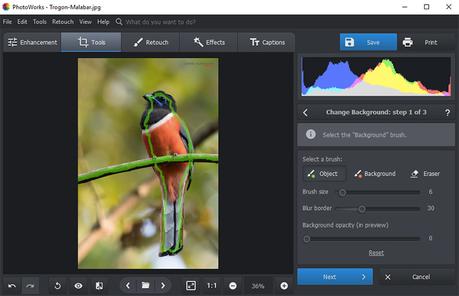
You can use the Green color Object brush to make a rough marking inside the subject. I will use it to mark the inside of the bird and the branch.
You can vary the brush size slider to paint the small areas of the subject also.
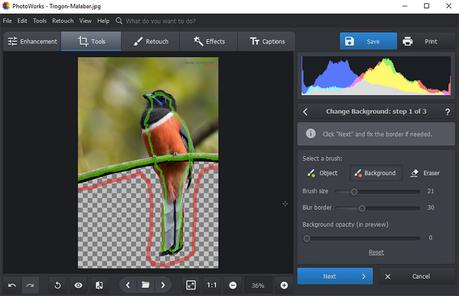
Once the subject selection is completed, we need to make the background selection. You can use the Red background brush to select the background. You just have to draw lines outside the subject, as I have done in this picture. Once you complete the drawing, then you can see the background area getting transparent.
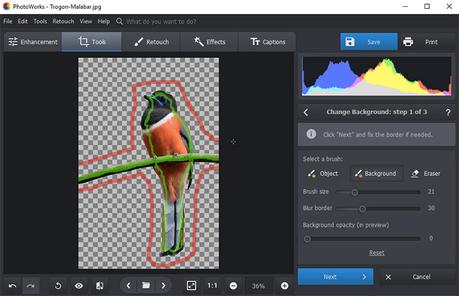
I have two background sections for this picture. So, I will do the same for the top part also. Now, we can see that the background has gone transparent.
You can use the Eraser brush to remove some unwanted strokes if any. So, the process is straightforward, anyone can easily do it.
PhotoWorks has provided a background opacity slider for preview. I found this slider very useful. If you pull this slider all the way down to zero, then you can remove the background entirely in the preview. It is beneficial to visualize whether the selection is good or not. If not, you need to make some more adjustments.
5. Change Background – Step 2
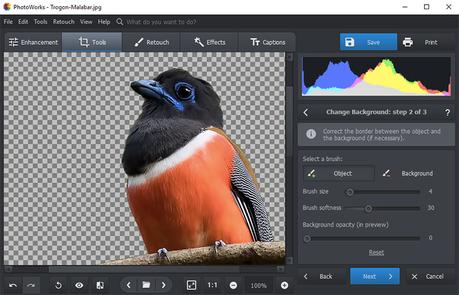
Now, click on the “Next button” to move to Step 2 of the process.
Now, I will enlarge the image to 100 percent by clicking the1:2 button.
Here, you can fine-tune the border between the subject and the background. It comes with the same “Object” and “Background” brushes for this fine adjustment. But, here it is manual brushing. There is no auto-detection feature in Step 2.
Step 1 did an excellent job for my bird image. So, I don’t need to use Step 2.
6. Change Background – Step 3

Click Next to move to the final step. Here, you can see the picture loaded with an image resizer around it.
Here, you will have the three basic background options- white, gray, and black. You can see the color picker option after this.
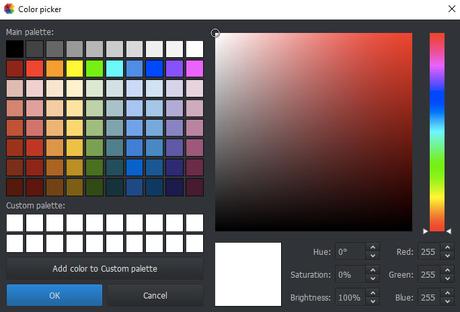
I really loved this color picker option. It allows you to add custom colors. It will be handy if you are creating some posters or banners.
They have also given the option to add color to the custom palette.
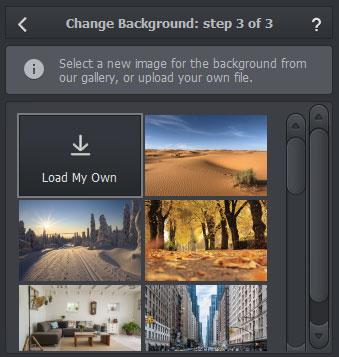
You can use the “Select Background Image” button to add a custom background image. They have provided some photos here. You can either add these images or use the “Load My Own” option to add your picture to the background.
I will add a colored background to this picture of Malabar trogon. You can also add a different background to a photo, based on your requirement. For example, if the subject in person, then you can use scenery like a forest, beachside, or any other beautiful picture as the background.
There are three sliders in this step.
Blur Edge and Extend Edge sliders are useful to make a more accurate selection of the subject. You need to play with these sliders.
You can easily blend the background color with the subject tone using the “Adapting colors to the background” slider. They have made life so easy with these options.
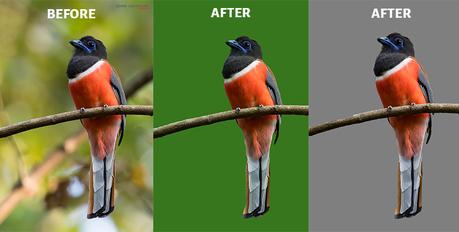
You can also save the image with a transparent background in the PNG format. Click the “Apply” button after doing all the edits. Click on “Save” button on top to save final image.
All these three steps have a “Reset” button to undo all the changes.
Conclusion
So, now you know how to add a background to a photo using PhotoWorks software. It also comes with many other easy to use edits, which require only a few clicks to get the result.
I liked the processing speed of this software. There is no lag or delay while doing the edits.
PhotWorks comes with two modes of operation- GPU and CPU mode. So, you can efficiently run this tool even in your low-end computer without any dedicated GPU.
You can download the free trial version and give it a try to see the other features. The full version comes in three variants – Standard, Deluxe, and Pro. The price starts at $27.50.
So, when you compare the costing with other high-end photo editing software like Lightroom, Photoshop, and Capture One, it doesn’t cost much.
If you are looking for an easy-to-use tool for adding a background to a picture, then PhotoWorks is a good option.

