Adding a Flodesk form to a WordPress blog is a breeze, even for beginners. We’re big fans of the Flodesk email marketing platform! However, we understand that beginners may find it challenging to add their forms to their websites due to the complexity of the process. Luckily, we specialize in this area and are here to help. Today, we’ll provide you with a tutorial on how to seamlessly integrate Flodesk into your WordPress website. In this example, we’ll demonstrate how to embed an inline form from Flodesk into your WordPress site.

Add a Flodesk Form To a WordPress blog
Step 1: Create a Form on Flodesk
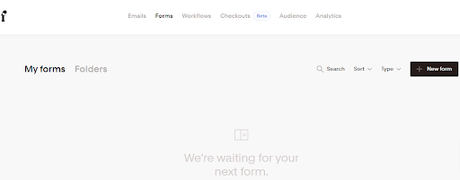
To begin creating a form in Flodesk, start by accessing your dashboard and clicking on the “FORMS” option located at the top of the screen. This will initiate the process of setting up your desired form.
Step 2: Choose Your Layout Style
We recommend selecting the inline form style for your creation. This choice will provide you with a highly branded appearance that is both basic and straightforward, yet complements any design seamlessly.
Step 3: Click Customize on the Form of Your Choice
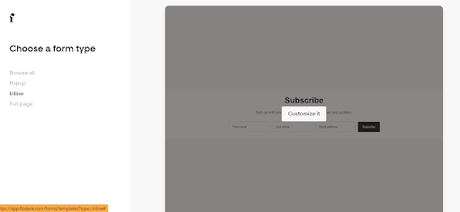
After selecting the inline form style, click on the “customize” option. A prompt will appear asking you to enter a new segment before proceeding. Typically, this segment represents new subscribers, but you can also tag them based on other criteria such as “my awesome freebie
subscribers.” This segmentation step is crucial as it allows you to target your marketing efforts toward their specific interests. For instance, if someone signed up for your DIY course, they may not want to receive emails about your done-for-you services.
Step 4 – Design/Customize the Form
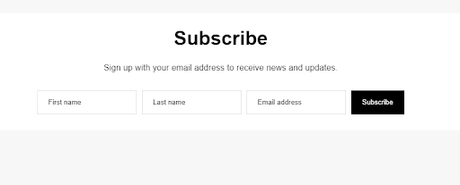
Customizing the Inline form is a straightforward process. You have the ability to modify the button color, style, and wording effortlessly by clicking on the respective elements on the page and making changes as desired.
Furthermore, you can also personalize the fonts used and adjust their size by accessing the right panel.
Step 5 – Choose Double Opt-In or Not
After designing your form, it’s time to determine the final steps for sign-up. Consider whether you want to implement a confirmation process for a subscription. This measure serves to safeguard against spam bots and ensures that genuine individuals who genuinely desire your emails sign up. Opting for double opt-in means subscribers will receive a confirmation email, requiring them to click before being subscribed and receiving their first welcome email (if you have set up a series). Alternatively, without double opt-in, subscribers are immediately added to your list upon signing up.
Step 6 – Do You Want Notifications?
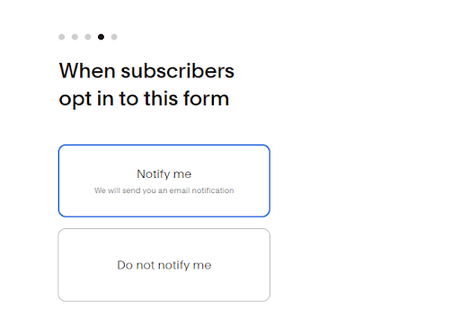
Consider whether you would like to receive notifications whenever a new subscriber signs up. Initially, when your business is small, each new subscriber can bring a sense of excitement, prompting a happy dance. However, as your business grows, these notifications may become overwhelming and unnecessary. It is advisable to disable them from the beginning and instead rely on your email marketing software to keep track of new subscribers. Make sure you are regularly utilizing your email marketing tools to stay informed about any new sign-ups.
Also Read: Top 5 Modern and Effective Editing Tips for Diligent Bloggers
Step 7 – Choose What Happens Next- Add a Flodesk Form To a WordPress Blog
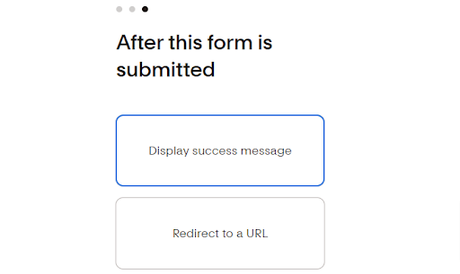
After a user has subscribed, you need to decide on the next step. Would you like to provide them with a thank-you message or direct them to another URL/page?
One advantage of redirecting them to another URL is the ability to offer customized thank-you pages that include downloads or videos for immediate gratification. This approach proves especially beneficial if you have enticed them to sign up by offering a freebie, as you can promptly reward them with valuable content.
So, consider whether you prefer a thank-you message or redirecting them to a designated URL that delivers a personalized and rewarding experience.
Step 8 – Get Your Embed Code- Add a Flodesk Form To a WordPress Blog
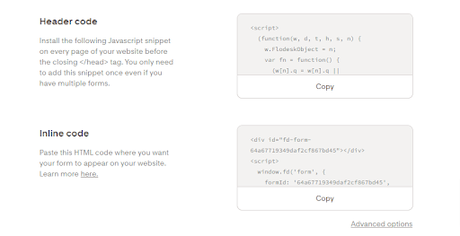 Get Your Embed Code
The next three steps are crucial yet challenging, often causing confusion for many individuals. After obtaining the embed code from Flodesk, it is important to keep the current window open while opening a separate browser window to access your website’s login page.
Proceed to sign in to your website using the new browser window and navigate to the specific page where you intend to embed the form. Open the page for editing purposes.
Also Read: WordPress Plugins That Help In Doubling Your Website Traffic
Step 9 – Add Header Code to Your Website
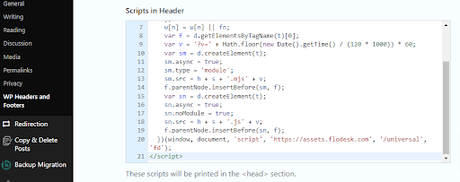
Completing the next step is crucial for your form to be displayed. The step that often hinders people from successfully adding their Flodesk forms is using a plugin to add header content, eliminating the need to modify complex code on your template. We suggest using the trusted “Insert Headers and Footers” plugin by WPBeginner, ensuring regular updates. Simply install and activate the plugin, access its settings page from your dashboard’s Settings menu, add the header code to the designated area, and save your changes.
Also Read: 7 WordPress Plugins That Will Help For More Traffic
Step 10 – Embed the Inline Form on Your Page
When embedding any element on a website, you need to work within the text or code editor rather than using the visual builder, especially when using Gutenberg.
The process is easiest with the classic editor, as it allows for easy modification of code, although it can also be achieved in Gutenberg with some familiarity.
In this example, we’ll demonstrate how to do it using the classic editor or WPBakery’s text block editor.
- Copy the code for the “Inline Code” provided by Flodesk.
- Locate the appropriate spot on your website where you want the form to be displayed.
- Paste the embed code into the designated area.
- Save, publish, or update your page to apply the changes.
- Preview the page to ensure that your form is appearing correctly on the front end of your website.

Conclusion on Add a Flodesk Form To a WordPress Blog
Converting a Figma design to a WordPress website involves a systematic approach and technical skills. By following the steps outlined in this guide, you can successfully bring your Figma design to life in the form of a functional and interactive WordPress site. Remember, if you’re not comfortable with coding or WordPress development, it’s advisable to seek assistance from a professional web developer who can help you achieve your design goals effectively and efficiently. With dedication and attention to detail, you can transform your Figma design into a remarkable WordPress website that engages and delights your audience.
Interesting Reads:
How To Optimize the Checkout Page Of an E-commerce Store
Websites to Sell Online Courses
How to Sell Marketing Services Online With Woo Sell Services?
