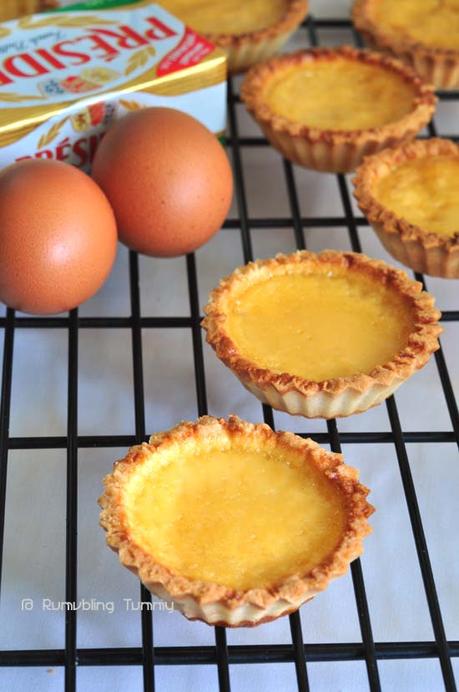
Though I rather like the other recipe filling but I was keen to explore another crust recipe. So today, I shall attempt another recipe on this HongKong Egg Tart.

Findings: The crust is nice and buttery. It is easy to handle as well.
I actually managed to yield 20 pcs from one recipe with a nett weight of 28g.
I have done two batches. The first based I actually browned it too much on the crust so I will reduce this 1st bake at 7 mins instead of 10 mins.
Also I have tested out on air fryer for the final bake and it should be at 165 for 13 mins.
I have brought a batch to a party and the feedback was rather good as well.
So this recipe is a keeper.
Source
Makes about 10-12 egg tarts (3”)
What you need:Crust
200g plain flour25g cake flour125g butter, softened55g icing sugar1 egg, whiskeda dash of vanilla extract
Egg Custard:
2 eggs70g caster sugar150g hot water75g evaporated milk½ tsp vanilla extract
Method (crust):
Cream butter and sugar with mixer over medium speed until the mixture is light and fluffy.
Beat in egg, one at a time.
Add vanilla extract, mix well.
Sift in flour in two batches, and mix until all combined. Knead into dough briefly.
Roll out the dough to a ½ cm thick.
Cut dough with a cookie cutter that is just a bit smaller than your tart tin in size and line dough in the tart tins. Lightly press to let dough cover the entire mould
Method (custard):
Add sugar into hot water, mix until completely dissolved.
Whisk egg with evaporated milk.
Pour in sugar water. Mix well.Strain egg mixture into a sprouted cup. Carefully pour egg mixture into each tart shell.
Preheat oven to 200°C. Set baking tray to the lower third of the oven. Bake tarts for 7 mins until the edges are lightly brown. (this temp is based on my oven)
Lower the heat to 180°C. Keep an eye on them. Once you see the custard being puffed up a bit, pull the oven door open about 2 to 3 inches.
Bake for another 10 to 15 minutes until the custard is cooked through. (do the toothpick stand test to confirm doneness)
Enjoy!
 If you have enjoyed this post by Rumbling Tummy, be sure to follow her on Facebook, Instagram, Pinterest, Twitter and Google+
.